
TL;DR

Get business pricing on tools and workshop supplies
- Business-only prices and quantity discounts
- Tax-exempt purchasing
- Multiple users, one account, clear invoices
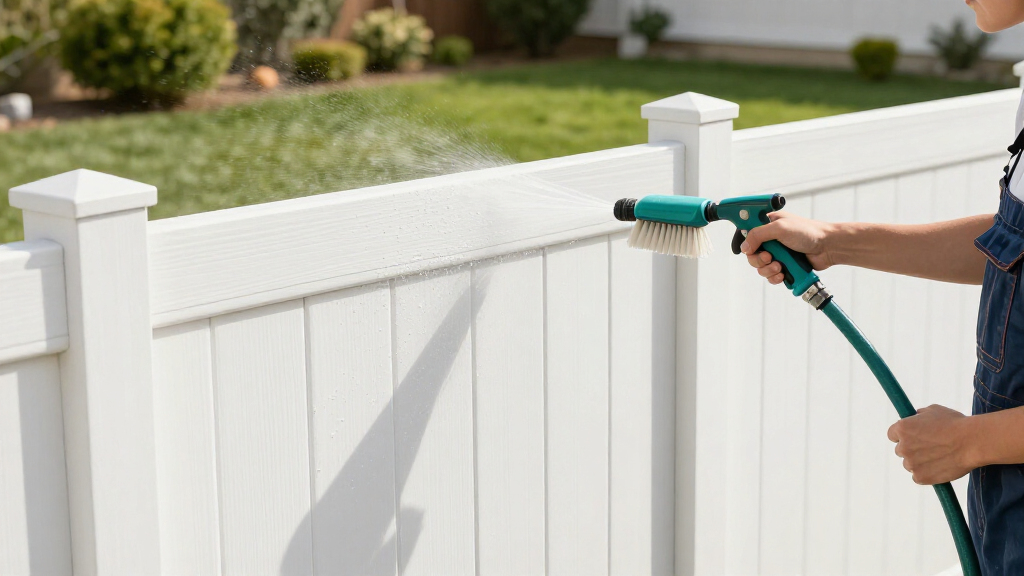
Vinyl fence washing without streaks, lance marks or blown caps works best when you apply a compatible cleaner evenly, keep it wet for the label-specified dwell time, and rinse complete panels with low pressure. Inspect caps and oxidation first, work in shade, use a wide fan, and treat stubborn stains with the right cleaner instead of moving the nozzle closer.
A pressure washer can turn a dull green fence bright white in an afternoon, but one careless pass can leave zebra-like stripes, a patchy sheen, or a post cap sailing across the lawn with a sharp pop. The surprise is that more pressure rarely produces a better result on vinyl. It usually makes your margin for error smaller.
You will get a cleaner, more even finish by treating dirt as something to loosen before you rinse it away. That means using a vinyl-compatible cleaner, allowing controlled dwell time, brushing stubborn areas, and rinsing with a wide, gentle spray. According to Outdoor Pro Masters, chemical-assisted low-pressure cleaning offers a safer approach than making water pressure do all the work [1].
This guide shows you where streaks come from, why lance marks appear, and how water can force its way into hollow posts. You will also learn how to handle algae, rust, hard-water spots, and oxidation without reaching automatically for stronger bleach. The goal is simple: clean whole panels evenly, protect the finish, and finish the job with every post cap still attached.
Apply a compatible cleaner evenly and use water mainly for a low-pressure, top-to-bottom rinse.
Work in 20- to 25-foot sections so the cleaner stays wet and dirty runoff does not dry into stripes.
Check every post cap by hand, remove loose caps, and never direct spray beneath caps or into seams.
Treat whole panels with broad overlapping passes; tracing individual stains creates visible lance marks.
Test for oxidation with a dark cloth before washing because uneven pressure can strip chalking into permanent-looking bands.
Vinyl Fence Washing Without Streaks, Lance Marks or Blown Caps
Loosen grime first, then rinse it away. The safest route to bright, even vinyl is a compatible cleaner, controlled dwell time and a broad low-pressure rinse across complete panels.
Cleaner breaks the bond; water carries the residue away.
Small enough to preserve dwell time and a wet edge.
Never trace individual spots or pause on the surface.
Broad overlapping passes prevent zebra-like lines.
Never let detergent dry into pale tracks.
Test from several feet away before moving closer.
Remove loose caps and avoid upward spray.
Three ways a clean fence goes wrong
The visible damage rarely comes from one pressure rating alone. Heat, surface condition, nozzle geometry, distance, flow and dwell time combine to determine the result.
Streaks
Detergent dries, dirty runoff crosses partly cleaned vinyl, or chemical coverage varies from one pass to the next.
Lance marks
A narrow pattern, short working distance or inconsistent overlap cuts visible lines—and may permanently alter surface sheen.
Blown caps
Upward spray catches friction-fit caps and drives water into hollow posts, joints and openings.
Technique matters more than the machine’s headline PSI
Published pressure tells only part of the story. Risk rises when distance shrinks, the fan narrows, the surface is oxidized or the operator stops moving.
The even-finish chain
Each link reduces the need for force. Break the chain by skipping dwell time or targeting isolated stains, and the chance of stripes rises sharply.
Identify the soil
Separate dirt, organic growth, minerals and oxidation.
Match the cleaner
Use compatible chemistry at the label-specified dilution.
Hold a wet dwell
Give the product time to loosen the contamination.
Rinse complete panels
Move top to bottom with a broad, gentle fan.
The eight-step wash sequence
Follow the same order on every section. Consistency removes the stop-start decisions that create patchy coverage, dried detergent and nozzle marks.
Find loose caps, cracks, open seams, oxidation, chalking and electrical hazards.
Move objects and people away. Pre-wet plants and shield sensitive surfaces.
Clean a hidden patch, let it dry fully, then check color and sheen.
Coat evenly at low pressure, generally bottom upward when the label permits.
Set a timer, follow the label and keep the cleaner damp without flooding.
Use soft bristles on grooves, rail edges and stubborn shaded growth.
Work top to bottom with a wide fan, constant motion and steady distance.
Inspect after drying. Repeat gentle treatment instead of drilling missed spots.
Match the cleaner before touching the trigger
Wrong chemistry wastes time and invites excessive pressure. Always confirm vinyl compatibility, test specialty finishes and follow the product label.
| What you see | Likely cause | Better first choice | Avoid |
|---|---|---|---|
| Gray film or fingerprints | Ordinary dirt or traffic residue | ✓Mild exterior-vinyl detergent and soft brush | ✗Abrasive powder or narrow jet |
| Green or black patches | Algae, mildew or organic growth | ✓Properly diluted, label-approved exterior cleaner | ✗Unverified stronger mixtures |
| Orange sprinkler drips | Rust or irrigation minerals | ✓Tested vinyl-compatible mineral or rust remover | ✗Expecting bleach to remove iron |
| White powder on dark cloth | Oxidation or chalking | ✓Method approved for oxidized vinyl | ✗Uneven high-pressure passes |
Start here: compatible chemistry, wide fan, long distance and soft agitation.
Avoid this end: narrow jet, turbo nozzle, close range and repeated spot tracing.
Control the direction of every rinse pass
Many decorative caps rely on friction, clips or a small amount of adhesive. A sharp upward pass can lift one instantly and force water into the hollow post below.
Hands-on inspection
Touch each cap rather than relying on a visual check. Secure sound caps and temporarily remove loose ones.
Top-down, never underneath
Keep the spray face-on where practical and let runoff travel downward across already loosened grime.
Treat stubborn stains with the right cleaner or a soft brush—not by moving the nozzle closer. Clean complete panels, preserve the wet edge and inspect again only after the vinyl has dried.
Why Lower Pressure Gives You a Cleaner, More Even Fence
Vinyl fence washing without streaks, lance marks or blown caps depends on letting cleaner loosen the grime before water carries it away. Use pressure as a rinsing tool, not a cutting tool. A wide fan, steady distance, and complete-panel passes produce a more even finish than a narrow jet aimed at individual stains.
Think of high pressure as a chisel and detergent as a key. The chisel can scrape away a dark algae spot, but it may also change the surface sheen around it. The key breaks the grime’s grip, allowing a low-pressure rinse to slide the mess down the panel in gray-green sheets.
Suppose you have 200 linear feet of white privacy fence bordering a shaded half-acre lot. Attacking every green dot with the wand turns the job into hours of stop-start tracing, and each pause creates another possible mark. Dividing that run into 20- to 25-foot sections gives you better chemical coverage, manageable dwell time, and a wet edge.
A gas pressure washer gives you long runtime and useful water flow on acreage, but its available pressure can punish sloppy technique. A battery sprayer offers quiet, consistent chemical application without exhaust, though tank size and rated runtime may slow a long fence line. In either setup, flow and even coverage matter more than chasing the highest PSI number.
Pressure ratings can mislead you. Impact changes with nozzle angle, flow rate, distance, and the condition of the vinyl, so begin with the lowest effective setting and test from several feet away [1].
As an affiliate, we earn on qualifying purchases.
Match the Cleaner to the Stain Before You Touch the Trigger
Vinyl fence washing without streaks, lance marks or blown caps starts by identifying what you are actually cleaning. Mild detergent handles road film, a label-approved bleach cleaner handles organic growth, and a compatible specialty remover handles many mineral stains. Using the wrong chemistry wastes time and often tempts you to apply too much pressure.
| What you see | Likely problem | Better first choice | What to avoid |
|---|---|---|---|
| Gray film and fingerprints | Ordinary dirt or traffic residue | Mild exterior-vinyl detergent and a soft brush | Abrasive powder or a narrow jet |
| Green or black patches | Algae, mildew, or other organic growth | Properly diluted, label-approved sodium hypochlorite cleaner | Stronger mixtures without checking final concentration |
| Orange drips near sprinklers | Rust or irrigation minerals | Tested vinyl-compatible mineral or rust remover | Expecting bleach to remove inorganic stains |
| White powder on a dark cloth | Oxidation or chalking | Method approved for oxidized vinyl | Uneven high-pressure passes |
For example, an orange fan below a sprinkler head will often remain after a bleach wash because bleach targets organic matter, not iron deposits. Repeated blasting may leave a pale halo without moving the stain. A tested vinyl-safe rust treatment gives you a better shot with less surface wear.
Oxidation needs extra care. Rub a hidden area with a dark microfiber cloth; if white chalk transfers, pressure can strip that weathered layer unevenly and create permanent-looking bands. Manufacturer compatibility guidance favors testing specialty colors, textured panels, printed finishes, and warranty-covered fencing before broad treatment [2].
low pressure power washer for vinyl fencing
As an affiliate, we earn on qualifying purchases.
As an affiliate, we earn on qualifying purchases.
Use This Eight-Step Wash Sequence for an Even Finish
Vinyl fence washing without streaks, lance marks or blown caps follows a repeatable sequence: inspect, protect, test, apply, dwell, brush, rinse, and recheck. Each step removes one common failure point. On a warm day, working one manageable section at a time also keeps your cleaner from drying into pale tracks.
- Inspect every panel and cap. Look for cracks, open seams, oxidation, loose rails, and electrical fixtures.
- Prepare the work zone. Move furniture, toys, pets, and vehicles away; pre-wet nearby plants.
- Test a hidden patch. Let it dry fully so you can check color and sheen.
- Apply cleaner evenly. Work from the bottom upward when the product permits, which limits concentrated run marks.
- Use the label dwell time. Set a timer and keep the surface damp without flooding it.
- Brush stubborn grime. Use soft bristles on grooves, rail edges, and shaded algae patches.
- Rinse from top to bottom. Keep a wide fan moving at one steady distance.
- Inspect after drying. Reclean missed panels gently instead of drilling individual spots with pressure.
On a six-foot privacy fence, you might wash three or four panels before moving forward. If the first panel starts losing its wet shine while you spray the fourth, your work area is too large. Mist it lightly or rinse the group before the detergent dries.
Nearby electrical equipment changes the plan. Shut off power to exposed or questionable outdoor fixtures, keep spray away from outlets and wiring, and use eye protection, chemical-resistant gloves, closed footwear, and label-specified clothing. If a fixture, cable, or connection appears damaged, stop and call a licensed electrician; water and improvised electrical repairs make a bad pair.
As an affiliate, we earn on qualifying purchases.
Keep Detergent Wet and Those White Stripes Never Get a Foothold
You prevent streaks by applying cleaner uniformly, maintaining a wet edge, and rinsing before any section dries. Start on cool vinyl, work in shade when possible, and clean complete panels rather than scattered spots. Finish with a top-to-bottom rinse that clears joints, rails, and low points where dirty solution collects.
Imagine washing the sunny side of a white fence at noon. The upper half feels hot under your glove, the detergent flashes dull within minutes, and brownish trails harden below every spray overlap. Those are not mysterious defects; they are dried cleaner and uneven runoff recording your work pattern like wet paint.
Applying solution from the bottom upward can reduce dark, concentrated drips on vertical surfaces when the cleaner label allows that method. Rinse in the opposite direction, from the top downward, so clean water pushes residue toward the ground. Keep the fan passes overlapping and your walking pace steady: swish, swish, swish, not spray-pause-sprint.
Hard water adds another problem. Mineral-rich droplets can dry as cloudy freckles even after the dirt is gone, especially on dark or colored vinyl. Work in shade, rinse thoroughly, and use a softened or deionized final rinse where spotting is severe; this small change can turn a blotchy afternoon result into a clean, uniform finish.
- Pre-wet the surface when the cleaner instructions recommend it.
- Divide long runs into 20- to 25-foot zones.
- Re-rinse rail bottoms, panel joints, and decorative grooves.
- Stop if wind carries mist away or sunlight dries the cleaner too quickly.
As an affiliate, we earn on qualifying purchases.
Erase Wand Lines Without Cutting New Ones Into the Sheen
Lance marks come from uneven distance, narrow spray patterns, poor overlap, or partial oxidation removal. Correct dirt-related lines by recleaning the entire panel at low pressure, not by tracing each stripe. If the vinyl’s texture or sheen has changed, stop spraying because more pressure can make the mark permanent and wider.
A typical mistake happens when you spot a dark vertical line beside a rail and move the nozzle closer. The water note rises from a soft hiss to a sharp tsssk, the grime disappears, and a lighter stripe appears after drying. You cleaned that narrow track more aggressively than the surrounding panel.
Hold the nozzle square to the face when practical and use broad, overlapping passes at a consistent speed. Start several feet back, then move closer only after testing a hidden area. A wide fan nozzle offers more forgiveness than a zero-degree jet, while turbo and rotary nozzles concentrate moving impact that vinyl fencing does not need.
Wet panels can lie to you. Water darkens residue, fills tiny surface variations, and temporarily hides patchy oxidation, so a fence may look flawless until the sun dries it. Wait for a full dry check before making corrections, then use a gentle whole-panel treatment if you see incomplete cleaning.
Can every lance mark be removed? No. Lines caused by leftover dirt often respond to uniform recleaning, but lines caused by altered texture, stripped oxidation, or damaged gloss may need professional restoration or panel replacement. Outdoor Pro Masters recommends gentle repeat treatment over concentrated pressure on individual spots [1].
Keep Every Post Cap Seated and Water Out of the Posts
Vinyl fence washing without streaks, lance marks or blown caps requires checking each cap by hand and keeping spray away from its underside. Remove loose caps before washing, label their locations, and reinstall them after the fence dries. Direct water across or downward, never upward into caps, seams, or hollow posts.
A cap can feel tight when you press down yet lift instantly when water catches its lower lip. Then—pop, whoosh, clatter—it lands behind a shrub or cracks against a patio stone. Many caps rely on friction, clips, or a small bead of adhesive rather than a mechanical fastener.
Walk the fence line before you connect the hose. Wiggle each cap gently, inspect decorative finials, and place removable pieces in a marked box. On a run with 30 posts, masking-tape numbers let you return weathered or custom-fitted caps to the exact posts where they sat.
Do not glue every loose cap automatically. Some fence systems use removable caps for access, service, or drainage, and the wrong adhesive can stain vinyl or make later repair messy. Check the fence maker’s instructions and use only a manufacturer-approved adhesive when permanent attachment suits the design [2].
Water forced into posts may carry detergent, soil, and rust-colored residue into areas that drain slowly. In cold climates, trapped water can also add freeze-related trouble. Reduce pressure around post tops, rail sockets, and open joints; a few careful seconds here can prevent hidden water intrusion that outlasts the wash.
Protect Your Lungs, Landscaping, and Drainage While You Clean
Safe vinyl washing means controlling chemical strength, spray drift, runoff, and access to the work zone. Follow the product label, wear suitable PPE, pre-wet nearby plants, and keep children and animals away. Never mix bleach with ammonia, acids, vinegar, or unrelated cleaners, because the reaction can release dangerous gases.
Suppose your fence runs beside roses, black metal hardware, and a storm drain. Pre-wet the leaves and soil, apply only enough solution to keep the vinyl damp, and rinse plants again when you finish. Keep chemical runoff out of the drain and follow local wastewater rules; plant-safer or biodegradable wording does not make careless discharge harmless.
Wind deserves the same respect as pressure. A light breeze can turn a controlled stream into a cool mist that lands on your face, clothing, cars, or neighboring windows. Work upwind when possible, avoid atomizing strong solution, and wear splash-rated eye protection, gloves, closed footwear, and clothing listed on the cleaner label.
Covering a sensitive shrub may help during brief application, but plastic left in direct sun can trap heat like a small greenhouse. Remove coverings promptly, rinse foliage, and watch where runoff pools. A low-volume battery sprayer can give you steadier application near delicate beds, while a gas machine’s higher flow can rinse long rural fence runs faster.
More chemical strength is not better by default. Use the label-approved dilution, test a hidden area, and stop if you see discoloration, chalking, metal reaction, or finish changes.
Judge the Result Only After the Fence Dries
A dry inspection reveals missed algae, detergent residue, hard-water spots, oxidation, and lance marks that wet vinyl can hide. Let the cleaned section dry fully, then view it from several angles in even light. Correct remaining dirt with another gentle whole-panel treatment instead of aiming pressure at isolated pale or dark lines.
For example, a freshly rinsed fence may gleam like white glass at 3 p.m., yet show faint vertical bands by dinner. Those bands often follow changes in wand distance or dried runoff. Mark affected panels with painter’s tape on the post, then return during cooler conditions and reclean them uniformly.
If a dry microfiber cloth picks up white powder, you are dealing with chalking rather than ordinary soil. Continued high-pressure washing can remove that oxidized layer in uneven tracks. Pause the job and consult the fence manufacturer or a property-care professional who handles oxidized vinyl restoration, especially on colored, textured, or warranty-covered panels.
A professional also makes sense when the fence is tall, unstable, heavily stained, surrounded by delicate landscaping, or close to questionable electrical equipment. Telescoping soft brushes can reduce ladder use, but they do not repair loose posts or unsafe access. Keep your feet on stable ground and leave structural repairs and damaged electrical work to properly licensed professionals.
Light periodic washing makes future work easier. A quick low-pressure clean before algae builds a thick green skin uses less chemical, less brushing, and less water than a rescue job every few years. Your fence stays cleaner because you treat maintenance as a regular rinse, not a pressure-washing contest.
Frequently Asked Questions
Can you safely pressure wash a vinyl fence?
Yes, you can pressure wash vinyl when you use a wide fan, low pressure, steady movement, and a safe working distance. Let a compatible cleaner handle most of the soil, and avoid zero-degree, narrow, turbo, or rotary nozzles. Test a hidden area before cleaning the full fence.
Why did pressure washing leave lines on my vinyl fence?
Lines usually come from changing the nozzle distance, missing overlaps, cleaning narrow tracks, or removing oxidation unevenly. If dirt remains, reclean the entire panel gently. If the texture or gloss changed, stop because the mark may reflect surface damage rather than leftover grime.
Should you apply fence cleaner from the bottom or the top?
Apply cleaner from the bottom upward when the product instructions permit, which reduces concentrated run trails on vertical vinyl. Rinse from the top downward so clean water carries detergent and dirt toward the ground. Keep every section wet until you rinse it.
Is bleach safe for vinyl fencing and nearby plants?
A properly diluted, label-approved bleach cleaner can remove algae and mildew from compatible vinyl. Pre-wet plants, limit overspray, rinse foliage afterward, and manage runoff. Never mix bleach with acids, ammonia, vinegar, or other cleaners, and wear the PPE named on the label.
Will bleach remove rust and sprinkler stains?
No. Bleach works mainly on organic growth, while orange rust and many sprinkler marks come from iron or other minerals. Test a vinyl-compatible specialty remover in a hidden spot, and avoid strong acids unless the fence manufacturer permits them.
Should you glue vinyl fence post caps before washing?
Only glue caps when the fence design and manufacturer instructions support permanent attachment. Some caps need to remain removable for access or drainage. For a washing job, you can remove loose caps, label them, let the posts dry, and reinstall each one in its original location.
How often should you wash a vinyl fence?
Wash frequency depends on shade, rainfall, irrigation, vegetation, road film, and coastal exposure. Inspect the fence each season and clean when a light film appears; gentle periodic washing takes less chemical and pressure than waiting for thick algae. A shaded fence near sprinklers may need attention more often than one in an open, dry yard.
Conclusion
Your best safeguard is simple: let chemistry, dwell time, and a soft brush loosen the mess, then rinse with the lowest effective pressure. Check caps before you start, keep detergent wet, clean complete panels, and wait for the vinyl to dry before judging the result. If oxidation, damaged wiring, unstable fencing, or a changed surface sheen appears, stop and bring in the right licensed professional.
A good wash should end quietly—no flying caps, no etched stripes, no bleach smell hanging over scorched shrubs. Just a clean fence, an even satin sheen, and water slipping harmlessly into the grass as you coil the hose.
Halloween Picks
halloween
As an affiliate, we earn on qualifying purchases.