TL;DR

Get business pricing on tools and workshop supplies
- Business-only prices and quantity discounts
- Tax-exempt purchasing
- Multiple users, one account, clear invoices
Pressure washing can lift loose, weathered paint from sturdy exterior wood, but it can also gouge boards, raise grain, and drive water behind siding. Start with the lowest effective pressure, a wide spray, and a small test area; use scraping or sanding for delicate, soft, historic, or potentially lead-painted wood.
A pressure washer can peel a fence clean in minutes—or leave the boards striped, furry, and full of grooves. The difference often comes down to what the paint is attached to: loose flakes on sound wood can lift readily, while soft fibers and tight joints can take the spray’s full force.
This guide helps you decide when pressure washing can assist with paint removal, where it can wreck wood, and how to test a surface before committing to a whole wall or deck. You’ll also learn when scraping, sanding, or a chemical remover gives you better control, and why old paint calls for extra care.
Use a pressure washer to assist with loose paint on sturdy exterior wood, not to strip every coating by force.
Start with a small test, a wide spray, generous distance, and the lowest effective pressure; keep the nozzle moving.
Avoid washing soft, damaged, historic, or intricately detailed wood, and don’t aim upward into siding laps or directly at seams.
Contain paint chips and runoff; treat potentially lead-painted surfaces as a lead-safe project and check local requirements.
Let wood dry fully and meet the paint maker’s moisture requirements before repainting.
Exterior wood · paint preparation guide
Stripping Paint With Pressure: Where It Works and Where It Wrecks Wood
A pressure washer can lift loose, weathered paint from sturdy exterior wood—but it can also gouge boards, raise grain, and drive water behind siding. Treat it as a cautious aid, test first, and switch to hand methods when the wood or coating needs more control.
01 / Match the surface
Where washing can help—and where it can harm
Results vary with wood species, age, grain, paint adhesion, nozzle, distance, and technique. A setting tolerated by dense boards may tear into soft, weathered lumber.
Better candidate
Broad, sturdy exterior wood
Sound decks, fences, and some siding with paint already curling at the edges. Washing can clear grime and help release loose flakes after scraping.
Higher risk
Soft, thin, or weathered boards
A close pass can cut grooves, raise fuzzy grain, splinter edges, and leave striped patches. Stop if the surface starts to look rough or furred.
Keep water out
Seams, end grain, and details
Aim away from siding laps and joints. Water driven behind boards can soak sheathing, insulation, or framing; delicate trim and historic profiles can lose detail.
Stop signal: fuzzy fibers, splintering, grooves, water behind siding, or firmly bonded paint that needs a more forceful jet.
Change methods02 / Choose the tool
Pressure washing versus controlled removal
Many exterior jobs combine methods: scrape peeling edges, wash dirt and remaining loose flakes only if the wood is sound, then let it dry before finishing preparation.
| Method | Where it helps | Main tradeoff |
|---|---|---|
| Pressure washing | Large, sturdy exterior surfaces with loose paint and dirt | Fast coverage; can gouge wood or drive water into joints |
| Hand scraping | Peeling edges, trim, and spots needing precision | Slower across a large wall, but easy to control |
| Sanding | Feathering edges and smoothing small rough areas | Can create hazardous dust; use lead-safe precautions when needed |
| Chemical remover | Some coatings and detailed surfaces suited to the product | Follow label directions and manage cleanup around nearby materials |
For a peeling porch railing, a washer may suit broad faces while a scraper or suitable remover protects narrow profiles and joints.
Control matters03 / Test before scaling up
Five checks before you wash a whole wall
A hidden test patch shows how that wood and coating respond. It cannot guarantee every board, but it can reveal obvious damage before you commit to a deck or elevation.
- 1InspectLook for rot, deep cracks, open joints, damaged end grain, and brittle trim.
- 2ProtectCover openings, shield landscaping, and collect paint chips and runoff.
- 3Start wideUse a broad fan, generous distance, and the lowest effective pressure.
- 4Keep movingDo not hold the jet in one place or aim upward into siding laps.
- 5Dry and inspectCheck again when dry; repaint only when within the paint maker’s moisture requirements.
The test patch stays smooth, with no visible damage or water forced into seams.
Grooves, splinters, stripes, or rough fibers mean the wood needs a gentler method.
Scrape stubborn edges with more precision instead of chasing them with a stronger jet.
04 / Extra care
Old paint changes the cleanup plan
Older coatings may contain lead. Disturbing them can spread contaminated chips and water, while sanding can put hazardous dust into the air.
Before disturbing old paint: assess the coating, contain debris and runoff, follow applicable local lead-safe guidance, and get qualified help when the coating or scope calls for it. Requirements vary by location.
Lead-safe careWhen a Pressure Washer Can Lift Paint Without Chewing Up the Wood
Pressure washing can remove loose, weathered paint from sturdy exterior wood when you use a wide spray, keep the nozzle moving, and give the surface room between the jet and the board. It works best as a preparation aid on sound decks, fences, and some siding where paint already curls at the edges. It is much less dependable against firmly bonded paint.
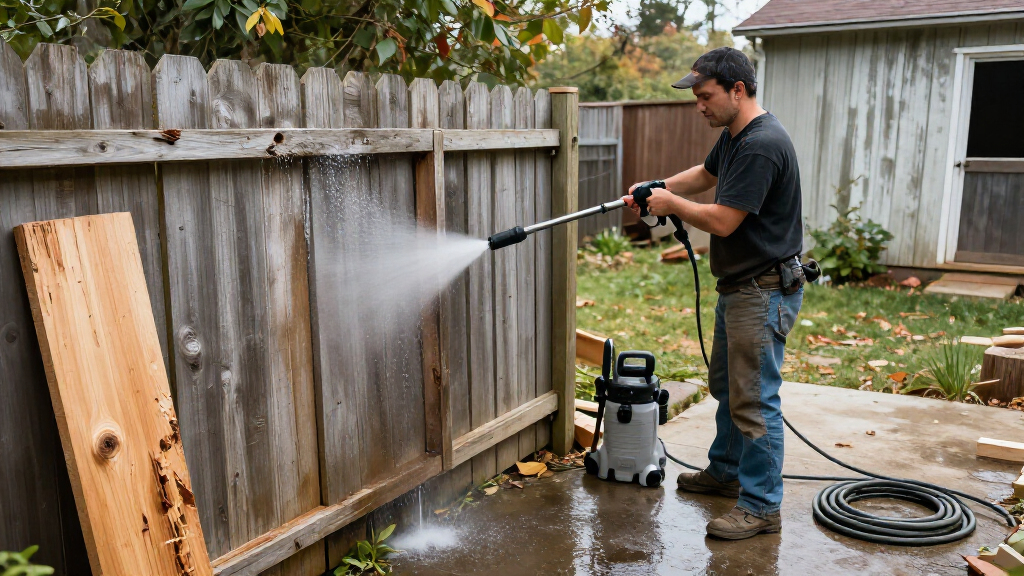
Think of the spray like a stiff brush with a fire hose behind it: it reaches across broad areas quickly, but it has no way to tell a paint flake from a wood fiber. On a fence with sun-baked paint lifting in thin curls, a careful pass may clear grime and release flakes after hand scraping. On a dense, intact coating, you may get stripes where the spray passes and stubborn islands where it doesn’t.
Results depend on the wood species, age, grain, paint adhesion, nozzle, distance, and operator. A setting that seems gentle on sound, dense boards can tear into soft, weathered lumber. One number on the dial cannot promise safety across every acre of fence or every foot of siding.
Use the washer where the wood is accessible, sturdy, and already losing paint. If you find that you need a narrow, close, aggressive jet to make progress, the washer is telling you the job needs a different method. Scraping can remove stubborn edges with more precision, leaving the wood fibers intact for the next preparation step.
Popular right now

Philips 3300 Series Fully Automatic Espresso Machine with LatteGo Milk System

Shark Navigator Lift-Away Upright Vacuum (NV360)

De'Longhi Rivelia Automatic Espresso Machine with Milk Frother – White
As an affiliate, we earn on qualifying purchases.
Which Wood Surfaces Are Most Likely to Get Gouged or Soaked
Pressure washing is most likely to wreck wood when boards are soft, aged, cracked, rotten, or thin, or when water can enter siding laps and joints. A surface can look sturdy from the yard and still have loose edges or deteriorated fibers that the spray tears apart. Trim, end grain, and decorative details need particular care.
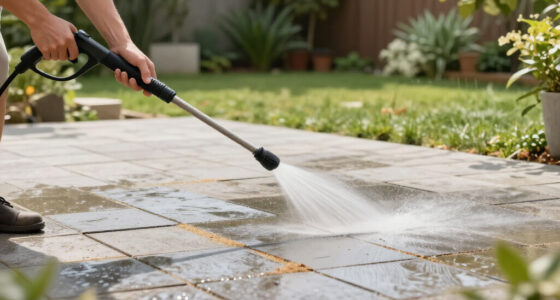
On a weathered deck, a close pass can carve pale tracks through gray boards and leave raised grain that catches a bare hand. On lap siding, pointing the spray upward can send water behind the boards toward sheathing, insulation, or framing. That hidden moisture can take longer to dry than the exposed face, and damp building materials can invite mold or decay.
Historic millwork is another poor candidate. A forceful wash may soften crisp profiles and erase marks left by older tools; it can strip sound paint alongside the peeling layer. Painted wood furniture and interior trim are generally poor targets, too: water can swell joints, damage nearby interior materials, and leave a finish blotchy instead of clean.
Stop if a small test leaves fuzzy fibers, splintered edges, grooves, or water forced into seams. For example, a ranch owner who sees a few fuzzy patches on a test section of cedar siding should switch to hand scraping instead of washing the full elevation. Surface damage spreads fast when each pass has to work harder than the last.
Pressure Washing Versus Scraping and Sanding: Pick the Right Tool
Pressure washing suits broad surfaces with loose paint, while scraping and sanding offer more control over individual edges, fibers, and delicate profiles. Many exterior paint jobs combine methods: scrape peeling areas first, wash away dirt and remaining loose flakes if the wood is sound, then let it dry before finishing the preparation.
| Method | Where it helps | Main tradeoff |
|---|---|---|
| Pressure washing | Large, sturdy exterior surfaces with loose paint and dirt | Fast coverage, but can gouge wood or drive water into joints |
| Hand scraping | Peeling edges, trim, and spots that need precision | Slower over a large wall, but easy to control |
| Sanding | Feathering edges and smoothing small rough areas | Can create hazardous dust; use suitable protection and lead-safe methods when old paint may contain lead |
| Chemical remover | Some coatings and detailed surfaces suited to the product | Requires label directions, cleanup, and care around nearby materials |
Consider a peeling porch railing beside intact painted balusters. A washer might save time on the railing’s broad faces, but a scraper or suitable remover can protect the narrow profiles and joints. If the boards are already rough or damaged, a controlled hand method avoids using water force to solve a problem the surface cannot tolerate.
Sand only after you’ve checked the coating and chosen suitable precautions. Old paint can contain lead, and sanding can put hazardous dust into the air. Don’t treat a potentially lead-painted deck or siding project like routine cleanup; follow local lead-safe guidance and get qualified help when the coating or work scope calls for it.
How to Test a Small Area Before You Wash a Whole Wall
Test a hidden patch first, then use the lowest effective pressure, a wide spray pattern, and generous distance while keeping the nozzle moving. A small test shows how that particular wood and coating respond; it cannot certify every board, but it can reveal obvious risks before you commit to a deck or wall.
- Inspect the boards. Look for rot, deep cracks, open joints, damaged end grain, and loose or brittle trim. Choose hand methods if the wood is soft, valuable, or intricate.
- Protect the area. Cover nearby openings, keep water away from seams, and shield landscaping. Collect paint chips and runoff instead of letting debris wash across soil or into drains.
- Start wide and distant. Use a broad fan and begin with the lowest setting that produces a result. Keep your hand and nozzle in motion; don’t hold the jet on a single spot to chase stubborn paint.
- Check the test patch. Look for grooves, lifted grain, splinters, water behind siding, or paint that remains firmly bonded. Stop if the wood starts to look fuzzy or striped.
- Let it dry and inspect again. Freshly wet wood can hide roughness and moisture in joints. Revisit the area after drying before deciding whether it is ready for more preparation.
For example, test the back side of a fence panel rather than starting in the center of a visible gate. If the test lifts only loose flakes and leaves the grain smooth, you have evidence to proceed cautiously. If it raises fuzz or exposes fibers, put the washer away and scrape those boards instead.
Why Paint Chips, Runoff, and Drying Time Matter
Pressure washing spreads paint chips and dirty water, so containment matters as much as the spray itself. Before you begin, protect doors, windows, nearby plants, and surfaces that should stay dry. Set up a practical way to catch or collect loose paint instead of sending flakes across the yard or into storm drains.
Older coatings need a special pause. If paint may contain lead, disturbing it can spread contaminated chips, dust, and wastewater. Don’t pressure wash it as ordinary paint removal; check local lead-safe requirements and seek qualified guidance before disturbing the coating. Rules vary by location, so avoid assuming that a familiar cleanup routine meets local requirements.
Drying is the next part of the job, not a box to tick after the surface looks clean. Water can sit in joints, behind board edges, or within thick lumber after the outer face starts to look dry. A shaded deck after a wet wash may need longer than a sunny fence in a breezy spot. Wait until the wood is fully dry and meets the paint manufacturer’s moisture requirements before coating it.
That matters because new paint over damp wood can adhere poorly or fail early. A homeowner who washes a porch on Saturday and paints Sunday morning may find the railing looks dry while the shaded posts are still damp at their bases. Check the whole surface and follow the coating label; appearance alone doesn’t prove the wood is ready.
What to Do When the Test Patch Turns Fuzzy or Gouged
If a test patch turns fuzzy, grooved, or splintered, stop washing and let the wood dry before deciding what repair it needs. Raised fibers may need careful sanding after drying; deep gouges, softened spots, and rotten boards may need repair or replacement. Don’t cover damaged wood with paint and hope the roughness disappears.
Imagine a cedar fence that looks clean from across the yard but feels like a cat’s tongue when you run a gloved hand over it. That rough texture is a sign the spray lifted fibers, not just paint. Once dry, you can assess whether light sanding will smooth the surface or whether the board has lost too much material to hold a good finish.
If you find a deep groove or a soft area that yields under gentle pressure, put repair ahead of repainting. Check nearby boards, fasteners, and joints for the same trouble. For a larger area of rot, or damage near structural connections, get an appropriate qualified professional to assess it rather than treating a pressure washer as a repair tool.
For a manageable patch of raised grain, use careful hand sanding and appropriate dust protection after confirming the coating is safe to disturb. A pressure washer can speed up broad cleaning, but once it has cut the wood, more washing only makes the surface harder to restore. The clean stopping point is the moment the wood tells you the method is too aggressive.
Frequently Asked Questions
Can you pressure wash paint off wood?
Sometimes. A washer can lift loose paint from sturdy exterior wood, especially after scraping, but it may leave firmly bonded paint behind or damage the wood if you push harder.
Test a hidden area first and stop if the grain gets fuzzy or gouged.
What pressure should I use on painted wood?
There is no universally safe pressure for every species, age, and condition of wood. Start with the lowest effective setting, a wide fan, and generous distance, then judge the results on a small patch.
Soft or aged boards need extra caution and may be better handled by scraping.
Will pressure washing damage a deck or siding?
It can gouge boards, raise grain, splinter edges, and force water behind siding. A close pass on a soft deck board may leave pale tracks, while spraying upward into siding laps can wet materials behind the boards.
Keep the nozzle moving and avoid joints, seams, and end grain.
Is pressure washing better than scraping or sanding?
A washer can cover large areas faster when the paint is already loose and the wood is sturdy. Scraping and sanding give you more control on stubborn edges, trim, and fragile or rough surfaces.
For many jobs, hand-scrape the peeling areas and use washing only as a cautious cleaning step.
How long should wood dry before painting?
Drying time depends on sun, shade, weather, board thickness, and how much water entered joints. Wait until the wood is fully dry and within the paint manufacturer’s moisture requirements.
A surface that looks dry in the sun can still hold moisture at shaded posts or board seams.
Can I pressure wash wood painted with lead paint?
Don’t treat potentially lead-painted wood as an ordinary washing job. Disturbing the coating can spread contaminated chips and wastewater.
Check local lead-safe requirements and get qualified guidance before disturbing older coatings.
Conclusion
Use pressure washing as a careful helper when loose paint and dirt cover sound, accessible exterior wood. Start small, keep water out of joints, and stop when the grain turns fuzzy or the jet starts cutting grooves; scraping and sanding give you more control on delicate or weathered boards.
Let the wood dry fully before paint goes on. A clean board is a good start; a smooth, sound, dry board is what gives the next finish a fighting chance.