
TL;DR

Get business pricing on tools and workshop supplies
- Business-only prices and quantity discounts
- Tax-exempt purchasing
- Multiple users, one account, clear invoices
Start cleaning paver patios at the lowest effective pressure, commonly within 1,000–2,000 PSI for sound concrete pavers, using a 25° or 40° fan nozzle and a test patch. Expect some loose joint sand to wash away, but refill hollow joints only after the paving dries, and repair rocking pavers, failed edges, or drainage problems before resanding.
A pressure washer can turn a gray, algae-slick patio bright again in an afternoon—or carve pale stripes into it in less than a minute. The difference rarely comes down to one magic PSI number. It comes down to pressure, nozzle angle, distance, and movement, plus knowing when a stain needs chemistry instead of more force.
You also need to watch what happens between the pavers. A satisfying ribbon of dirty water can carry away joint sand that supports the paving, leaving dark, hollow slots where firm joints used to sit. Some loss is normal, but widespread erosion can let units shift, collect seeds, and invite ants into the open spaces.
This guide shows you how to identify the surface, select a sensible starting pressure, clean without blasting directly into the joints, and decide whether you need a light sand top-up or a full refill. You will also see where regular joint sand, polymeric sand, permeable aggregate, and sealer fit—and where they do not. The goal is simple: a patio that looks evenly clean, feels solid under your shoes, and stays serviceable after the hoses are rolled away.
Start with a 25° or 40° fan nozzle , low pressure, and a hidden test patch; sound concrete pavers often clean around 1,000–2,000 PSI , but material condition c…
Keep the nozzle moving about 12–18 inches from the surface at first, and wash across joints at a shallow angle instead of aiming directly into them.
Resand when joints are visibly hollow or units begin moving, but repair drainage, base, bedding, and edge-restraint failures before treating new sand as the fi…
Use regular jointing sand for easier maintenance or polymeric sand for better erosion resistance, knowing that dry preparation, exact watering, and cure time c…
Do not fill permeable-paver joints with conventional sand, and keep sediment, chemicals, and dirty wash water out of storm drains.
Cleaning Paver Patios Without Washing Away the Joints
Start with the lowest effective pressure, a broad fan nozzle and a hidden test patch. The goal is an evenly clean surface—not pale wand marks, excavated joints or a patio that feels less stable after the hoses are rolled away.
Match the treatment to the surface and the stain
Concrete, clay brick, natural stone, sealed paving and permeable systems react differently. More pressure is not the answer when the mark needs chemistry—or when the apparent “dirt” is actually a failing coating.
Green or black film
Use a surface-compatible algae or organic-growth cleaner and observe the specified dwell time.
Dark oil spot
Choose an oil-specific degreaser or masonry poultice instead of grinding at the mark with a narrow jet.
Orange rust mark
Test a masonry-safe rust remover on a hidden edge before treating the visible area.
White crystalline bloom
Confirm efflorescence. Pressure alone may clean around the deposit while leaving the chalky patch intact.
Cloudy or peeling finish
Investigate the existing sealer before washing; patchy coating removal can spread rapidly.
Soft stone or old brick
Use substantially less force. A setting suitable for concrete may erode limestone or damage fragile clay faces.
PSI is only one part of the equation
The machine’s maximum rating is not the force automatically reaching the paving. Nozzle size, spray angle, flow rate, working distance, dwell time and operator movement all change the result.
A safer setup versus a damaging one
Test in a hidden corner with a 40° nozzle around 18 inches from the surface. If dirt remains, allow compatible chemistry to work or move slightly closer before increasing pressure.
| Control | Safer starting choice | Damage-risk choice | Watch for |
|---|---|---|---|
| Pressure | ✓ Lowest effective setting | ✗ Maximum by default | Pale lines or exposed aggregate |
| Nozzle | ✓ 25° or 40° fan | ✗ Zero-degree or tight turbo | Cutting, chipped edges, coating loss |
| Distance | ✓ Start 12–18 inches away | ✗ Move close to chase stains | Rapid surface etching |
| Movement | ✓ Straight overlapping passes | ✗ Pausing or drawing arcs | Light-and-dark wand marks |
| Joint direction | ✓ Shallow angle across joints | ✗ Aim directly downward | Hollow slots and sand ribbons |
| Surface cleaner | ~ Matched size and steady pace | ✗ Undersized or uneven speed | Striping and joint erosion |
Follow a controlled lane from inspection to final rinse
Think of the patio as a set of straight, overlapping lanes. Keep your working distance consistent and let water lift softened dirt from the faces instead of trenching the joints.
Clear & inspect
Mark rocking units, cracks, low spots and failed edges.
Protect
Shield plants, metals, outlets and storm drains.
Treat
Apply the correct cleaner and observe its dwell time.
Test
Begin hidden, low and wide at roughly 18 inches.
Wash lanes
Move steadily with overlap and a shallow joint angle.
Rinse & inspect
Lower pressure, check color, joints, edges and runoff.
Resand only after the paving is clean, repaired and dry
Some loose joint-sand loss is normal. Refill when joints are visibly hollow, sand sits substantially below the chamfers or units begin to move. Minor surface loss may need only a top-up.
Regular joint sand
- Lower cost and simple to replenish
- Easier to remove during future repairs
- More vulnerable to washing, rain and insects
- Use properly graded jointing or kiln-dried sand
Polymeric sand
- Better resistance to joint erosion
- Requires thoroughly dry paving and joints
- Needs exact sweeping, watering and cure time
- Excess left on faces can create haze
Permeable aggregate
- Use the aggregate specified for the system
- Conventional sand can block intended infiltration
- Remove sediment without contaminating joints
- Protect drains and receiving water from runoff
Never mix cleaning chemicals—especially bleach with acids or ammonia. Wear eye protection, gloves, long trousers and closed footwear; follow product labels and contain dirty wash water.
The serviceable-patio chain
Identify the Surface and Stain Before You Pull the Trigger
Cleaning Paver Patios starts with identifying both the paving material and the mark you want to remove. Concrete, clay brick, natural stone, sealed paving, and permeable systems react differently to water and chemicals, while algae, oil, rust, efflorescence, and failed sealer each need a different treatment.
That identification is one of the most important aspects of the job because cleaning methods differ. For concrete pavers, a broad fan and moderate pressure may work well, while soft limestone can lose its smooth cream-colored face under the same spray. Before washing, determine whether the discoloration is ordinary dirt, algae, rust, efflorescence, or sealer failure.
Here is a common driveway-side example. A white, dusty bloom across red-brown pavers may look like dried detergent, but it can be efflorescence, which is salt carried to the surface by moisture. More pressure may brighten the surrounding paver without removing the deposit, leaving a clean halo around the same chalky patch.
- Green or black film: Use a surface-compatible algae or organic-growth cleaner with the label’s dwell time.
- Dark oil spot: Use an oil-specific degreaser or masonry poultice instead of grinding at it with a narrow jet.
- Orange rust mark: Choose a masonry-safe rust remover and test it on a hidden edge.
- White crystalline deposit: Confirm efflorescence and use a compatible cleaner rather than treating it as loose soil.
- Cloudy or peeling finish: Investigate the existing coating before washing because patchy sealer removal can spread quickly.
Never mix cleaning chemicals, especially bleach with acids or ammonia. Wear eye protection, gloves, long trousers, and closed footwear; protect plants and metals; and follow the product label. If runoff could reach a pond, street drain, or neighboring lot, set up containment before you begin.
As an affiliate, we earn on qualifying purchases.
Use These Pressure and Nozzle Choices to Avoid Permanent Scars
Cleaning Paver Patios safely means starting with the lowest pressure that removes the loosened dirt, not the highest rating on the machine. Sound concrete pavers often clean within roughly 1,000–2,000 PSI, but older units, sealed surfaces, clay brick, and natural stone may need far less.
| Control | Safer starting choice | What raises the damage risk |
|---|---|---|
| Pressure | Lowest effective setting after a test patch | Running at maximum pressure by default |
| Nozzle | 25° or 40° fan nozzle | Zero-degree jet or concentrated turbo nozzle |
| Distance | Start about 12–18 inches away | Moving the tip close to chase one dark mark |
| Movement | Steady, overlapping passes | Pausing or drawing arcs with the wand |
| Spray direction | Shallow angle across the joints | Aiming straight down into the joints |
| Tool | Matched surface cleaner for broad areas | Undersized cleaner or uneven walking speed |
No universal PSI is safe because flow rate and nozzle size change cleaning force. A 4-GPM gas machine with a tight nozzle can hit far harder than a small battery unit showing a similar pressure figure. Maximum machine pressure also does not equal the pressure arriving at the paving after the spray spreads through the air.
Suppose you have a 400-square-foot concrete patio behind the house. Start on a hidden corner, hold a 40° nozzle about 18 inches above the surface, and make one smooth pass. If the gray film remains, let a compatible cleaner dwell or move slightly closer before increasing pressure.
Stop immediately if you see pale lines, exposed stone grains, chipped edges, peeling coating, or water driving beneath loose units. Those marks mean the process is cutting the surface rather than cleaning it.
A surface cleaner usually gives a more even result because its spinning bar holds the nozzles at a set height. You hear a steady, low mechanical hum instead of the sharp hiss of a wand tracing stripes. It can still remove joint material, though, so even coverage does not mean zero risk.
As an affiliate, we earn on qualifying purchases.
Follow This Wash Pattern to Keep Sand in the Joints
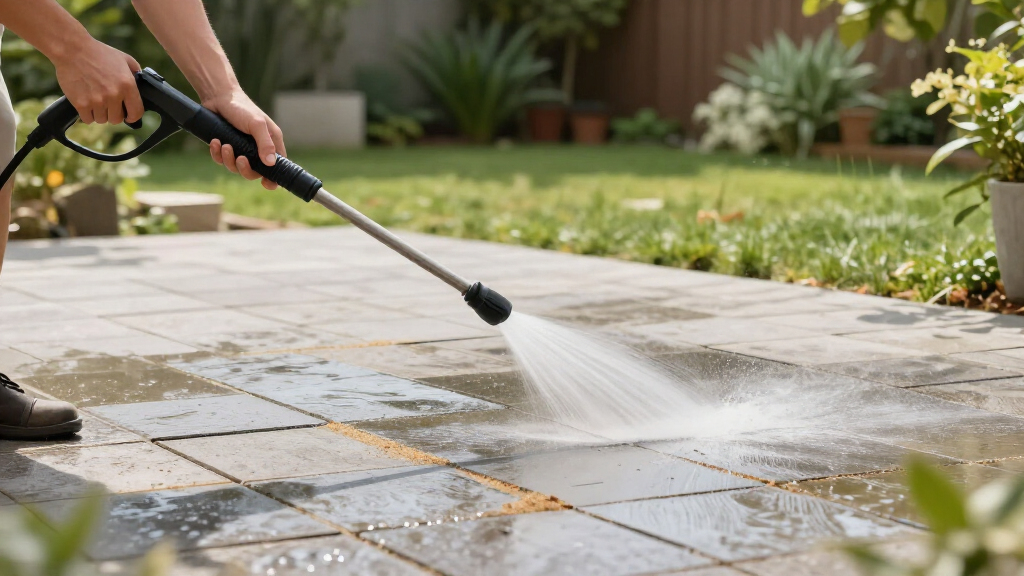
The safest wash pattern uses overlapping passes, a steady working distance, and a shallow spray angle across the joints. You want water to lift softened dirt from the paver faces while avoiding the dark channels between them, where a close nozzle can excavate sand like a miniature trenching tool.
- Clear and inspect the patio. Move furniture and pots, sweep away grit, and mark rocking pavers, open edges, cracked units, and low spots before they disappear under dirty water.
- Protect the surroundings. Cover or wet sensitive plants, close doors and windows, shield outlets, and route runoff away from storm drains. Keep the pressure washer’s power connection dry and use a GFCI-protected outlet for electric equipment.
- Apply the correct cleaner. Follow the label’s dilution and dwell time, keeping the surface from drying into patchy residue.
- Test a hidden area. Begin with a 40° fan, low pressure, and roughly 18 inches of distance. Increase cleaning force in small steps.
- Wash in straight, overlapping lanes. Keep the nozzle moving, cross joints at a shallow angle, and overlap each pass enough to prevent light-and-dark stripes.
- Rinse and inspect. Use lower pressure for the final rinse, then check edges, joints, and surface color before cleaning another section.
On a patio with six-inch concrete pavers, a practical lane is about two feet wide. Walk slowly from the house toward the drainage point, keeping your shoulders square and your pace even. If you swing the wand from your wrist, the nozzle moves close at the center and far away at the edges, producing bright crescent-shaped marks.
Do not use a narrow jet to blast every moss thread or weed root from a joint. Treat the growth, remove the loosened material gently, and accept that stubborn roots may need a hand tool. A few extra minutes with a scraper cost far less than replacing several bags of lost sand or resetting loose paving.
Pressure washing normally does not make a sound patio sink by itself. The warning sign is a patio that already has rocking units, loose edge restraints, deep erosion, or pooled water. Strong runoff and joint loss can expose those defects and speed up movement, so repair the installation before aggressive washing.
As an affiliate, we earn on qualifying purchases.
Know When Sand Loss Needs a Top-Up or a Full Refill
Cleaning Paver Patios commonly removes some ordinary joint sand because loose sand has no binder holding it in place. Resanding becomes necessary when joints look hollow, sand sits well below the chamfers, or pavers begin to move; a thin loss at the surface usually needs only a light top-up.
The chamfer is the small beveled edge around the top of many pavers. In practical terms, it gives you a visible fill reference: joint material commonly finishes near the bottom of that bevel, not smeared across the face. The exact level comes from the paver or sand manufacturer’s instructions.
Run a simple check after the patio dries. Look across the surface in low afternoon light, when empty joints appear as sharp black lines, then press several pavers near corners and traffic paths with your shoe. If the units stay firm and most joints remain filled near the chamfer, a light refill may be enough.
- Minor loss: The surface layer is thin, but joints remain substantially filled and pavers do not move.
- Moderate loss: Several joints are visibly hollow or more than roughly half an inch low, especially near downspouts and patio edges.
- Heavy loss: Joints are empty through much of their depth, edges have opened, or units click and rock underfoot.
- Structural warning: Repeated settlement, wide gaps, spreading edges, or standing water points to base, bedding, drainage, or restraint trouble.
For example, a 20-by-20-foot patio may lose only a dusting of sand across the middle yet show bare joints beside an uncapped downspout. Refill alone will not solve that pattern. Extend or redirect the downspout first, then replace the missing joint material after the area is stable and dry.
Resanding supports interlock; it does not repair a failed foundation. If pavers rock, settle again after leveling, spread at the perimeter, or hold puddles for days, have a qualified hardscape contractor inspect the base, bedding, drainage, and edge restraints.
As an affiliate, we earn on qualifying purchases.
Choose Regular or Polymeric Sand Without Buying the Wrong Fix
Regular joint sand is the simpler, lower-cost choice for many traditional patios, while polymeric sand adds binders that harden after controlled watering. Polymeric material resists erosion, insects, and seed lodging better, but preparation and watering errors can leave soft joints, washouts, stains, or a stubborn surface haze.
| Feature | Regular joint sand | Polymeric sand |
|---|---|---|
| Upfront cost | Lower | Higher |
| Installation | Forgiving and easy to replenish | Dry surface, compaction, exact watering, and curing required |
| Erosion resistance | Lower | Higher after a sound cure |
| Future repairs | Easy to remove | More work to remove from joints |
| Weed control | Limited | Better, but not weed-proof |
| Common failure | Frequent washout | Soft joints, binder washout, or polymer haze |
Use properly graded jointing sand or kiln-dried sand for a loose-sand installation. Play sand often contains rounded or poorly graded grains that do not interlock well. Masonry products also vary, so a bag being labeled “sand” does not make it suitable for paver joints.
Polymeric sand is much less forgiving. The old material and debris must be removed to the product’s required depth, the joints and paver faces must be dry, and the new sand must be compacted and topped up. Before watering, sweep and blow away every pale grain of dust because residue can cure into a chalky film.
Imagine activating polymeric sand on a humid evening with rain due in two hours. The first watering leaves powder buried near the bottom, while the storm sends binder-rich foam over the charcoal pavers. By morning, the joints feel like damp brown sugar and the faces carry a gray-white haze—an expensive result caused by timing rather than bad material.
Product directions control the required depth, temperature range, water volume, and cure time. Polymeric sand also cannot promise a weed-free surface; seeds often sprout in leaves, dust, and soil collecting above the hardened joint. Regular sweeping removes that seedbed before green shoots take hold.
Resand in the Right Order for Full, Even Joints
A reliable resanding job starts with a clean, completely dry patio, followed by diagonal sweeping, compaction where the system permits it, and a final top-up. The goal is to fill the joint through its usable depth while leaving the paver faces clean and the finished sand level at the manufacturer’s specified height.
- Wait for dry conditions. Damp joints grab sand near the top and hide empty space below. Give washed paving enough drying time for the climate, shade, and product.
- Pour manageable piles. Spread small amounts instead of dumping a whole bag in one spot, where fine dust can cake on textured pavers.
- Sweep diagonally. Cross the joint lines from several directions so sand drops into the gaps rather than riding along them.
- Compact when specified. Use the paver and jointing-product instructions; protect the surface with the correct plate-compactor mat when mechanical compaction is permitted.
- Top up the joints. Add material after compaction until the settled level reaches the stated position, commonly near the bottom of the chamfer.
- Clean every paver face. Remove excess loose sand or polymer dust before activation, sealing, or reopening the area.
- Activate polymeric sand exactly as directed. Apply even water in the stated amount, avoid flooding, and protect the patio from rain and traffic through the required cure window.
On a 300-square-foot patio with textured pavers, sweeping from only north to south can bridge narrow joints and leave air pockets. Turn ninety degrees, then sweep diagonally from both corners. You will often see the sand level drop another quarter inch as the grains settle into spaces that looked full moments earlier.
Too little activation water leaves dusty, weak polymeric sand below the surface. Too much water can carry the binder away, stain low areas, and leave joints that crumble beneath a fingertip. Measure the work by the bag instructions, not by how wet the patio looks from ten feet away.
Keep regular joint sand dry long enough to settle before heavy cleaning or a forecast downpour. With polymeric sand, obey the stated rain and foot-traffic window even if the top skin feels firm. A hard crust can hide uncured material underneath, much like bread that browned before the center finished baking.
Handle Sealer, Permeable Pavers, and Runoff Without Costly Mistakes
Sealer is optional after cleaning and resanding, while permeable paving and wash-water disposal require their own methods. Seal only dry, compatible paving after joint material has cured, and never replace a permeable system’s specified open-joint aggregate with ordinary or polymeric sand unless its manufacturer expressly allows it.
A compatible sealer can reduce staining, stabilize some loose joint material, deepen color, or add sheen. It cannot correct poor drainage, a weak base, loose pavers, or failed edge restraints. Film-forming products can also make wet paving slick, so test the appearance and grip on a hidden section before coating the whole patio.
Moisture trapped beneath sealer can create milky white clouds, bubbles, or weak adhesion. For example, shaded joints beside a north-facing wall may remain damp long after sunlit pavers feel warm and dry. Check several locations and allow a longer drying window rather than trusting the driest corner.
Permeable pavers use open joints filled with specified clean, angular aggregate so rain can pass into the stone layers below. Ordinary sand or polymeric sand can clog that path. Maintenance may call for vacuum sweeping or specialized sediment removal, particularly where tan silt has formed a tight crust over the joints.
According to the U.S. Environmental Protection Agency, stormwater can carry pollutants through drainage systems to local waters without sewage-style treatment [1]. Capture dirty wash water where local rules require it, keep chemicals and sediment out of storm drains, and check municipal discharge requirements before washing a large area. The Concrete Masonry & Hardscapes Association also treats jointing material and installation details as system-specific parts of interlocking and permeable pavement performance [2].
If you discover electrical outlets, lighting circuits, gas lines, major settlement, or retaining structures in the work area, stop and bring in the right licensed professional. Switch affected power off at the breaker when electrical equipment may get wet, verify the circuit is dead, and wear appropriate PPE. Local code, permit, manufacturer, and wastewater rules take priority over general cleaning advice.
Frequently Asked Questions
What PSI should I use to clean concrete pavers?
Many sound concrete-paver patios clean effectively within roughly 1,000–2,000 PSI, but that range is only a starting reference. Begin lower with a 25° or 40° nozzle, test a hidden area, and adjust distance, cleaner dwell time, and movement before raising pressure.
Is it normal for pressure washing to remove joint sand?
Yes. Some loss of loose joint sand is normal because it has no binder, especially in shallow, weathered, or weed-filled joints. Loss becomes a problem when joints turn visibly hollow, sand drops well below the chamfers, or pavers click and shift underfoot.
How far should I hold the pressure-washer nozzle from pavers?
Start about 12–18 inches away with a broad fan nozzle and move closer only after checking the test patch. Keep a steady distance and never hover over one mark; that sharp, stationary spray can carve a pale line before the stain disappears.
Can I install polymeric sand over existing joint sand?
Only when the polymeric-sand manufacturer permits it and the remaining joint depth meets its instructions. In many cases, you must remove old sand and debris deeply enough to create a sound new joint; a thin polymer cap over loose, dirty material can crack or wash out.
How long should pavers dry before resanding or sealing?
The pavers and joints must be fully dry before sweeping polymeric sand, and sealing requires dry paving plus cured joint material. Weather, shade, joint depth, humidity, and product directions control the wait, so a cool shaded edge may need much longer than the sunlit center.
Will polymeric sand stop weeds permanently?
No. Polymeric sand reduces seed lodging and erosion, but windblown soil and leaf fragments can collect above the joint and support new weeds. Sweep the patio regularly and remove small shoots early rather than attacking hardened joints with a narrow pressure-washer jet.
Conclusion
Your best pressure setting is not the biggest number printed on the washer. It is the lowest setting that cleans your test patch evenly while leaving the paver face, coating, edges, and joints intact. Pair that restraint with the right cleaner, a broad fan, smooth passes, and a deliberate plan for replacing lost joint material.
Before you start, kneel down and study one paver and one joint in good light. Identify the material, mark the existing defects, and decide where the runoff will go. When the final rinse clears, you want to see even color, firm joints, and clean water moving toward a controlled outlet—not pale wand marks and a trail of sand disappearing down the street.
Fall Picks
fall essentials
As an affiliate, we earn on qualifying purchases.