TL;DR

Get business pricing on tools and workshop supplies
- Business-only prices and quantity discounts
- Tax-exempt purchasing
- Multiple users, one account, clear invoices
ANSI/ISEA 107 classifies high-visibility clothing into three levels, matching safety needs with work environments. Choosing the right class boosts safety, compliance, and comfort in property work scenarios.
Imagine working on a busy street, the roar of passing cars echoing in your ears. Without the right hi-vis gear, you blend into the background, invisible to drivers. That’s a risk you can’t afford.
Getting the right ANSI-rated high-visibility clothing isn’t just about following rules — it’s about staying alive and keeping your crew safe. This guide breaks down what each class means, how to pick the right gear, and what recent innovations can keep you safer and more comfortable on the job.
Choose the right ANSI class based on your work environment’s risk level — underestimate at your peril.
Modern hi-vis gear combines durability, comfort, and high visibility through innovative fabrics and reflective materials.
Always verify that your gear meets ANSI/ISEA 107 standards for safety and legal compliance.
Proper maintenance extends the life and effectiveness of hi-vis clothing, saving money and ensuring safety.
Knowing the specifics about colors and patterns can make a real difference in visibility, especially in cluttered or low-light settings.
Hi-Vis Clothing Classes: When Property Work Calls for ANSI Ratings
TL;DR: ANSI/ISEA 107 organizes high-visibility apparel into three performance classes matched to different hazard levels. The right class helps crews remain detectable around traffic, machinery, pedestrians, and visually complex work areas—without adding unnecessary bulk.
A three-level safety ladder
Higher classes provide more conspicuous material and body coverage. That added visibility matters as vehicle speed, machinery movement, low light, and background complexity increase.
Class 1
Lowest visibilityBasic fluorescent background and the least conspicuous material of the three classes. Its lighter profile supports mobility but leaves less margin when conditions change.
Best fit
Separated work areas, minimal vehicle or equipment interaction, and genuinely low-risk environments.
Class 2
Moderate visibilityMore high-visibility background and reflective material improves detection where moving vehicles, machinery, pedestrians, or visual clutter create moderate exposure.
Best fit
Parking lots, municipal tasks, landscaping crews, delivery areas, and property work near moderate traffic.
Class 3
Highest visibilityThe greatest visibility and body coverage support recognition from multiple angles in high-risk, fast-moving, low-light, or visually complex environments.
Best fit
High-speed roads, active construction, dense equipment zones, emergency conditions, and complex backgrounds.
Choose by exposure—not convenience
A lower class can create false confidence in a busy setting. A needlessly high class may add heat, weight, and cost. Reassess whenever the site or task changes.
| Performance class | Visibility profile | Property-work examples | Key limitation | Decision signal |
|---|---|---|---|---|
| Class 1 | Basic Minimal conspicuous material |
Controlled grounds, isolated maintenance, low-equipment areas | Limited protection when traffic, clutter, or speed increases | ✓ Minimal exposure only |
| Class 2 | Balanced More background and reflective material |
Parking operations, landscaping, municipal and roadside-adjacent tasks | May be insufficient for high-speed or highly complex sites | ✓ Moderate moving hazards |
| Class 3 | Maximum Highest visibility and coverage |
Roadway work, active construction, night operations, heavy equipment zones | More material can increase warmth, bulk, and cost | ✓ High or unpredictable exposure |
Five checks before the shift
Treat classification as a short risk assessment. Consider normal operations, foreseeable changes, and the worst conditions likely to occur during the task.
Scan the environment
Note vehicle speed, machinery, lighting, weather, blind corners, and background clutter.
Map exposure
Ask how close workers will be to moving traffic, equipment, visitors, and delivery routes.
Match the class
Use Class 1 for minimal, Class 2 for moderate, and Class 3 for high-risk exposure.
Read the label
Confirm the ANSI/ISEA 107 marking, performance class, size, and care information.
Check condition
Replace garments with faded backgrounds, damaged tape, poor fit, or obscured surfaces.
Conditions can upgrade the risk.
Reassess immediately when work moves closer to traffic, equipment begins operating, daylight fades, weather reduces visibility, or the visual background becomes crowded. The class selected at the start of a project may not remain suitable all day.
Safer gear workers will actually wear
Modern apparel combines compliant visibility with greater durability and comfort. These indicators show the relative design emphasis of key innovations—not laboratory performance scores.
Durable reflective materials
Visibility focusImproved tapes are engineered to preserve retroreflective performance through wear and repeated cleaning.
Breathable, moisture-wicking fabrics
Comfort focusLightweight fabric systems help reduce heat burden and encourage consistent use during long shifts.
Contrast and pattern design
Recognition focusStrategic color blocking can help the worker stand apart from cluttered equipment and landscaping backgrounds.
LED and RFID integration
Emerging techSupplemental lighting and identification technologies may add detection or tracking—but do not replace required compliant materials.
Compliance continues after purchase
The correct class only works when the garment fits, remains visible, and is worn as intended. Care practices protect both performance and replacement budgets.
Before wearing
- Confirm the marking: Check the label for the relevant ANSI/ISEA 107 designation and class.
- Check the fit: The garment should support movement without leaving conspicuous areas folded or hidden.
- Inspect every surface: Look for fading, tears, contamination, peeling tape, or blocked reflective material.
- Review the site: Make sure today’s exposure still matches the selected class.
After the shift
- Follow the care label: Wash and dry only according to the manufacturer’s instructions.
- Avoid improvised repairs: Noncompliant tape or patches can interfere with intended performance.
- Store it clean and dry: Keep garments away from chemicals, sunlight, crushing, and sharp equipment.
- Retire degraded gear: Replace apparel when visibility or garment integrity is no longer dependable.
What are ANSI hi-vis clothing classes, and why do they matter?
ANSI/ISEA 107 classifies hi-vis clothing into three levels, each engineered for different risk environments. Think of it like a safety ladder: Class 1 is the most basic, suitable for minimal traffic, while Class 3 offers maximum visibility for high-speed or complex sites.
Understanding why this classification matters is crucial: it directly impacts your safety. Wearing a lower class than your environment demands creates a false sense of security, increasing the risk of accidents due to poor visibility. Conversely, choosing a higher class than necessary can lead to unnecessary expenses and discomfort, as the gear may be bulkier, more reflective, and less breathable. Striking the right balance means considering the specific hazards, background environment, and work conditions—each factor influences which class provides optimal protection without overburdening you. This understanding ensures compliance and enhances safety, reducing the likelihood of accidents or injuries caused by being unseen or overly encumbered.
As an affiliate, we earn on qualifying purchases.
Break down each ANSI class — what you need to know
Here’s a detailed look at each class, emphasizing why understanding their features and typical applications can make a real difference in safety and efficiency:
| Class | Visibility Level | Best For | |
|---|---|---|---|
| Class 1 | Lowest — minimal reflective tape, basic fluorescent background | Low-traffic areas, minimal machinery | While Class 1 gear may seem sufficient in low-risk environments, it’s important to recognize its limitations. Its minimal reflective features and simpler fluorescent background are designed for environments where vehicles and machinery are stationary or moving very slowly. Using this class in busier settings—like active construction zones or roads with moving traffic—can be dangerous because it may not provide enough visibility. This underlines the importance of matching gear to the actual risk level; overestimating safety can lead to accidents, while underestimating can be equally hazardous. The tradeoff is that lower-class gear is lighter and more comfortable, but only suitable when the environment genuinely warrants it. Misjudging the environment can have serious safety implications, so understanding these nuances is vital. |
| Class 2 | Moderate — more reflective tape, brighter background | Moderate traffic zones, parking lots, municipal work | Class 2 provides a balanced approach: it offers increased visibility that can significantly reduce accident risks compared to Class 1. Its design recognizes the need for better detection in environments where vehicles are moving at moderate speeds, and background clutter is present. Choosing this class means acknowledging moderate hazards while also considering comfort and practicality. It’s a compromise that enhances safety without the bulk or weight of higher classes, making it suitable for a wide range of everyday work scenarios. However, workers must still remain vigilant, as this gear isn’t foolproof in high-speed or highly complex environments. The key is understanding where your work fits within the risk spectrum and selecting gear that offers sufficient visibility without unnecessary bulk. |
| Class 3 | Highest — extensive reflective tape, high-visibility colors | High-speed roads, construction, complex backgrounds | Class 3 gear is designed for the most demanding environments, where failure to be seen can have severe consequences. The extensive reflective tape and vibrant colors maximize visibility from all angles, which is critical in high-risk situations like highway work or dense construction sites. Yet, this increased safety often comes with tradeoffs: the gear can be heavier, less breathable, and potentially more uncomfortable during long shifts. Recognizing these tradeoffs is essential—safety must be balanced with comfort to ensure workers remain alert and effective. Choosing the right class involves understanding the environment’s risks and selecting gear that provides maximum visibility without overly compromising mobility or comfort. This decision can be life-saving in critical scenarios. |
In essence, each class is a carefully designed tool tailored for specific risk levels. Selecting the right one is more than just a regulatory requirement—it’s a strategic choice that directly impacts your safety and operational efficiency. Proper understanding of these differences allows you to make informed decisions, ensuring your gear provides adequate protection without unnecessary burdens.
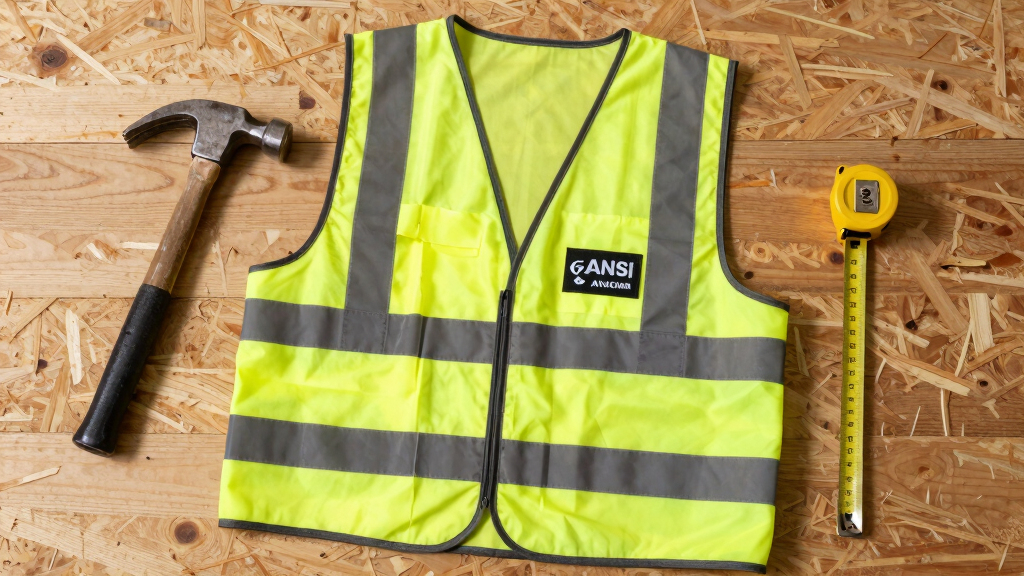
high visibility work clothing ANSI 107
As an affiliate, we earn on qualifying purchases.
As an affiliate, we earn on qualifying purchases.
How to choose the right hi-vis class for your property work
- Assess your environment: Are vehicles moving fast? Is background cluttered or open?
- Identify safety risks: Is there heavy machinery nearby? Are workers close to traffic?
- Select the appropriate class: Use Class 1 for minimal risks, Class 2 for moderate, and Class 3 for high-risk zones. Consider the specific hazards—if you’re working near high-speed traffic or heavy machinery, opting for a higher class can be the difference between safety and disaster.
- Check compliance: Make sure your gear meets ANSI/ISEA 107 standards for your chosen class. Non-compliant gear may not only be unsafe but also legally questionable, especially in regulated environments.
- Prioritize comfort and durability: Look for breathable fabrics and reinforced reflective strips that withstand washing. Remember, gear that’s uncomfortable or quickly wears out can lead to non-compliance or reduced safety over time.
Matching your gear to your environment isn’t just about ticking boxes; it’s about making a conscious choice that impacts your safety and productivity. For instance, in high-traffic or high-risk zones, investing in Class 3 gear might seem costly upfront, but the safety benefits far outweigh the expense. Conversely, in low-risk situations, over-vesting can cause discomfort and reduce compliance if workers find the gear burdensome. The key is to evaluate your specific hazards and environment to select the most appropriate class that maximizes safety while maintaining comfort and practicality.
reflective safety apparel for property maintenance
As an affiliate, we earn on qualifying purchases.
As an affiliate, we earn on qualifying purchases.
Latest innovations making hi-vis clothing safer and more comfortable
Recent tech advances are transforming hi-vis gear. Reflective tapes now last longer and stay bright after countless washes, reducing the need for frequent replacement and ensuring consistent visibility. Fabrics are lighter, more breathable, and moisture-wicking, which not only improves comfort but also helps maintain alertness during long shifts. These materials prevent overheating and fatigue, which are common issues with bulkier gear.
Some brands are pushing the envelope further by integrating LED lights or RFID tags into garments. LED-embedded vests can flash or pulse, drawing attention even in low-light or foggy conditions, significantly increasing safety margins. RFID tags enable tracking of gear usage and maintenance, ensuring compliance and timely replacement. These innovations are not just about convenience—they can be lifesaving by enhancing visibility and communication in complex work environments. Recognizing these developments helps workers and managers make smarter choices, investing in gear that offers better safety, durability, and comfort.
high visibility work jacket ANSI rated
As an affiliate, we earn on qualifying purchases.
As an affiliate, we earn on qualifying purchases.
Common questions about ANSI hi-vis clothing — answered
Q: Do I have to wear ANSI-rated hi-vis gear for property work?
Yes. OSHA references ANSI/ISEA 107 standards for high-vis apparel, especially when working near traffic or machinery. Compliance isn’t just a legal issue — it’s about your safety.
Q: Can I wear non-ANSI hi-vis clothing?
You can, but it won’t guarantee the same safety level or regulatory compliance. When in doubt, choose gear with ANSI ratings.
Q: How do I maintain my hi-vis gear?
Follow manufacturer instructions: wash in cold, hang dry, and avoid fabric softeners. Proper care keeps reflective strips bright and fabrics durable.
Q: Are certain colors better for specific environments?
Fluorescent yellow-green works well in daylight, while orange is more visible at dawn or dusk. Match your gear to your work setting for maximum safety.
Q: What’s the cost difference between classes?
Generally, Class 3 gear is more expensive — but it’s a small price for safety in high-risk zones.
Understanding these nuances helps you make smarter choices, ensuring you’re not only compliant but also optimally protected in your specific work setting.
Conclusion
In property work, visibility isn’t just a safety checkbox — it’s your lifeline. Wearing the right ANSI-rated hi-vis gear can mean the difference between being seen or unseen in a busy, potentially dangerous environment.
Invest in quality, stay informed about the latest innovations, and always match your gear to the risk. Because when it comes to safety on the job, being visible isn’t optional — it’s essential.
Halloween Picks
halloween
As an affiliate, we earn on qualifying purchases.