
TL;DR

Get business pricing on tools and workshop supplies
- Business-only prices and quantity discounts
- Tax-exempt purchasing
- Multiple users, one account, clear invoices
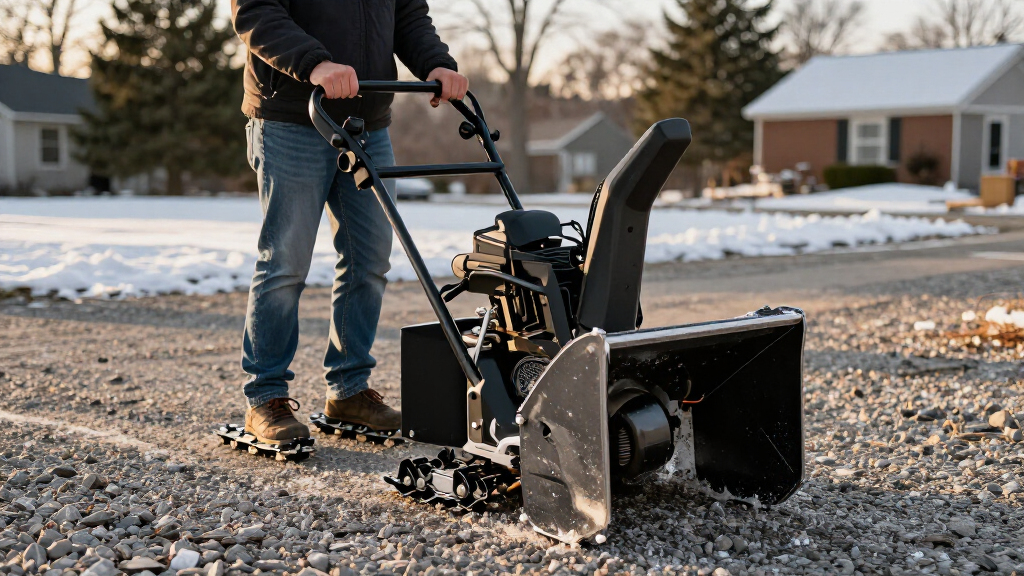
For snow blowing a gravel driveway, use a two-stage or three-stage machine and set its skid shoes so the scraper bar sits about 13–25 mm (½–1 inch) above loose stone. Leave a thin layer of snow, raise the housing during thaws, and stop immediately if you hear grinding, feel vibration, or start throwing gravel.
A snowblower can launch a stone farther than it throws snow, which turns one low skid shoe into a threat to windows, vehicles, pets, and anyone near the discharge path. You may hear the warning before you see it: clack-clack-bang, followed by gravel rattling through the chute. That sound means the machine is set too low, moving too fast, or crossing ground that has softened beneath the snow.
The goal on a gravel driveway is controlled clearance, not a spotless black ribbon like you would leave on asphalt. The housing should ride slightly above the stones, supported by evenly adjusted skid shoes, while the scraper leaves a thin layer of packed snow behind. You will learn how to choose the right machine, set a useful 13–25 mm clearance, react to changing ground, and protect the auger system when hidden rocks fight back.
You will also see why bare gravel is the wrong finish, even if the leftover white film offends your tidy side. Imagine a 60-metre rural drive after an early December storm: the snow looks deep enough, but the unfrozen stones beneath it still roll under your boots. Set the housing high, move slowly, and that first pass builds a firm base instead of spraying gray rock across the lawn.
Start with 13–25 mm (½–1 inch) of scraper clearance on loose gravel, using more height on soft, coarse, or uneven sections.
Lower both skid shoes evenly to raise the housing, and check matching tire pressure before diagnosing a sideways pull.
Leave a thin packed-snow base instead of scraping down to bare stone; raise the housing again whenever a thaw softens the drive.
Use only the exact manufacturer-specified shear pins, and stop immediately after a bang, grinding noise, unusual vibration, or repeated pin failure.
Aim the chute away from people, pets, vehicles, windows, roads, and nearby property because stones can travel beyond the visible snow plume.
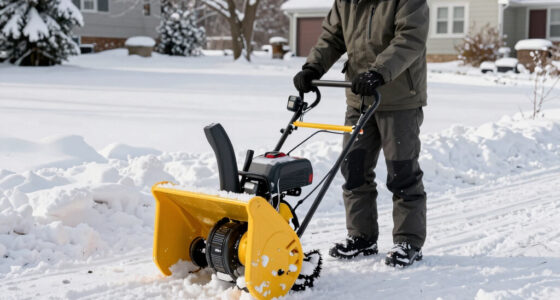
Snow Blowing a Gravel Driveway
Skid shoes, scraper height and auger care: ride above the stones, leave a thin snow base and treat every clack, bang or vibration as a stop signal—not background noise.
½–1 inch between the scraper and loose or unfrozen gravel.
Adjustable skid shoes let the auger housing float above stone.
A thin packed-snow layer is the safer finish.
Use a machine that can float
The machine’s ground-contact design matters more than its marketing label. Adjustable skid shoes support the housing above loose aggregate while a separate impeller moves the snow.
Single-stage
Rubber paddles often sweep the surface directly. Usually best on pavement and liable to collect loose stones unless the manufacturer expressly approves gravel.
✗ Usually avoidTwo-stage
A slow auger gathers snow while a faster impeller discharges it. Skid shoes provide the clearance needed for most gravel drives.
✓ Best all-round fitThree-stage
Useful for long lanes, dense storms and plow banks. It offers adjustable clearance but adds weight, cost and moving hardware.
✓ Heavy-duty fit| Machine type | Gravel handling | Best fit | Primary limitation | Status |
|---|---|---|---|---|
| Single-stage | Paddles may contact ground | Small paved areas | Can pick up and throw stones | ✗ Caution |
| Two-stage | Skid shoes raise housing | Most gravel driveways | Needs careful adjustment | ✓ Preferred |
| Three-stage | Adjustable housing | Long lanes and dense snow | Weight, cost and complexity | ✓ Capable |
| Battery two-stage | Good when shoes are adjustable | Moderate runs with charged packs | Cold and wet snow reduce runtime | ~ Verify capacity |
Lower the shoes to raise the mouth
The skid shoes act like boot soles. Lowering both shoes relative to the housing holds the scraper bar and auger farther above the driveway.
Use the upper end for fresh fill, ruts, large aggregate or unfrozen soil. Move toward the lower end only on a firm, stable base.
Adjustment works opposite to what many owners expect.
Set both shoes evenly and confirm matching tire pressure. A difference of only a few millimetres can tilt the housing, shave a crown and leave an uneven snow strip.
Power off
Remove key, isolate spark plug or battery and wait for all motion to stop.
Find level ground
Use a flat garage floor so unequal settings remain visible.
Loosen shoes
Support the housing securely before touching the hardware.
Add equal blocks
Place matching 13 or 25 mm spacers beneath the scraper.
Drop both shoes
Seat them firmly on the floor and tighten evenly.
Test and inspect
Roll a short pass. Stop and add height if stones begin clicking.
Winter changes the setting
Clearance is not a one-time adjustment. Gravel firms during freezes, loosens during thaws and changes abruptly at crowns, ruts, drainage dips and transitions.
Build the base
Use maximum practical clearance and leave an even white layer.
Test underfoot
Lower slightly only when stones no longer shift beneath a boot.
Refine the pass
A smaller gap can improve cleanup while still clearing high spots.
Reset higher
Softened aggregate can roll, rut and enter the housing again.
Slow and lift
Ease forward and lift at the handles before the scraper noses down.
A stone can outrun the snow plume
Aim the chute away from people, pets, vehicles, windows, roads and neighboring property. Moderate speed reduces the chance that the housing dives into irregular ground.
Clack. Bang. Grind. Vibrate.
Do not continue in the hope that the surface will improve. Shut down, isolate the power source and inspect only after all moving parts stop.
Auger-care checklist
- Inspect before each run. Remove branches, wire, toys and loose objects from the route.
- Check the scraper. It should be straight, secure and evenly worn—not used as a substitute for proper shoe height.
- Inspect skid-shoe wear. Recheck clearance as shoes wear or conditions change.
- Mark hidden hazards. Stake driveway edges, drainage structures, rocks and transitions before snow accumulates.
- Keep hands out. Use the approved clean-out tool after full shutdown and isolation.
From correct setup to a safer finish
The right result is not a spotless black ribbon. It is an even, controlled pass that leaves the gravel in the driveway, the snow in the discharge zone and the machine ready for the next storm.
Choose a Machine That Can Float Above the Stones
Snow blowing a gravel driveway works best with a two-stage or three-stage snowblower whose adjustable skid shoes hold the auger housing above loose stone. Most ground-contact single-stage machines suit pavement because their rubber paddles sweep the surface directly, making them more likely to collect gravel unless the maker approves that use.
| Machine type | How it handles gravel | Best fit | Main limitation |
|---|---|---|---|
| Single-stage | Paddles often touch the ground | Small paved walks and smooth drives | May pick up and throw loose stones |
| Two-stage | Skid shoes raise the auger housing | Most gravel drives and moderate snow | Needs careful shoe adjustment |
| Three-stage | Adjustable housing handles dense snow quickly | Long drives and heavy plow banks | More weight, cost, and moving hardware |
A typical two-stage machine uses a slow-turning auger to gather snow and a faster impeller to send it through the chute. That separation lets the housing ride above the drive while the machine still moves snow. On a 0.4-hectare property with a 90-metre lane, this design gives you enough control to clear the center crown without grinding into every loose ridge.
What about a battery snowblower? A cordless two-stage model can work well on gravel when it has adjustable shoes, enough battery capacity, and a drive system that maintains a steady pace. Cold batteries lose usable output, and wet snow consumes power quickly, so a long drive may need a second charged battery while a gas machine only needs a fuel refill.
Your operator’s manual sets the final rule because adjustment points, approved surfaces, shear hardware, and maintenance intervals vary by model [2]. If the manual limits the machine to paved surfaces, skid-shoe improvisation does not rewrite that restriction. For example, adding homemade blocks to a pavement-only single-stage machine can upset paddle clearance and guarding without making the machine safe for stone.
snow blower skid shoes for gravel driveway
As an affiliate, we earn on qualifying purchases.
As an affiliate, we earn on qualifying purchases.
Set Both Skid Shoes for a Clean, Stone-Free Pass
Snow blowing a gravel driveway starts with both skid shoes set evenly so the scraper clears loose stone by about 13–25 mm (½–1 inch). According to Outdoor Pro Masters, that range is a practical starting point for unfrozen gravel, with more clearance needed for coarse aggregate, ruts, and soft early-season ground [1].
- Shut the machine down. Remove the key, disconnect the spark-plug lead or battery as the manual directs, and wait until every moving part stops.
- Move it onto a flat surface. A smooth garage floor makes uneven settings easy to spot.
- Loosen both skid shoes. Support the housing securely and never work beneath unsupported equipment.
- Place matching wooden spacers under the scraper bar or housing. Use 13 mm blocks for a firm surface or 25 mm blocks for loose, uneven gravel.
- Lower both shoes firmly against the floor, then tighten the hardware evenly.
- Check the scraper from end to end. It should sit level, with no corner hanging closer to the floor.
The direction confuses plenty of owners. Lowering the skid shoes relative to the housing raises the scraper and auger farther from the drive; raising the shoes lets the housing sit closer. Plain version: the shoes act like boot soles, and thicker soles hold the machine’s mouth higher.
Suppose the left shoe sits 6 mm lower than the right. The machine may tug toward one edge, shave the driveway crown, and leave a thicker white strip on the other side. Unequal tire pressure can create the same tilted stance, so match the tire pressure to the manufacturer’s specification before blaming the shoes.
Power off before adjustment: remove the key, isolate the spark plug or battery, wear sturdy gloves and eye protection, and keep your body out from beneath an unsupported housing.
After tightening, roll the machine a few metres and inspect the first pass. If you hear stones clicking through the housing, stop and add clearance rather than hoping the surface improves. This simple shoe adjustment prevents the scraper and side plates from digging into loose aggregate.
two-stage snow blower with adjustable scraper height
As an affiliate, we earn on qualifying purchases.
As an affiliate, we earn on qualifying purchases.
Leave the Right Snow Layer as the Drive Freezes and Thaws
Snow blowing a gravel driveway should leave a thin, even snow layer instead of exposing every stone. The scraper bar removes snow below the auger, but on gravel it should ride above loose aggregate; the driveway is not scraped clean until a hard, stable base can safely support a slightly lower setting.
During the first storms, use the highest practical clearance and a moderate walking pace. Fresh gravel can behave like marbles under a rug, especially when the soil below remains damp. On an October snowfall over a newly graded lane, a 25 mm gap may leave more white behind, but it also keeps fist-sized aggregate out of the impeller.
- Loose or unfrozen gravel: Start near 25 mm and slow down over crowns or fresh fill.
- Packed snow base: Lower the housing in small steps only when stones no longer shift under a boot.
- Frozen, stable ground: A setting closer to 13 mm can improve cleanup while still clearing high spots.
- Rain or midwinter thaw: Raise the housing because softened gravel can roll and rut again.
- Potholes and drainage dips: Ease forward and lift slightly at the handles before the scraper noses down.
Should you lower the machine after three hard freezes? Yes, if the base feels locked together and a test pass sends only snow through the chute. Make one small change, clear 5–10 metres, and inspect the discharge; a sudden peppering sound says you went too low.
A straight, firmly mounted scraper bar matters just as much as the shoes. A bent corner can catch a ridge even when both shoes measure correctly, while a deeply worn center changes the effective clearance. Flip a reversible bar only when the manual permits it, and replace a damaged bar instead of using its wear as a makeshift height adjustment.
Leaving snow can create slick spots after a sunny afternoon and cold night. Spread sand or gravel-safe grit where people walk or vehicles brake, and keep drainage channels open. You are trading a manageable traction issue for a much less manageable shower of stones, torn turf, and auger damage.
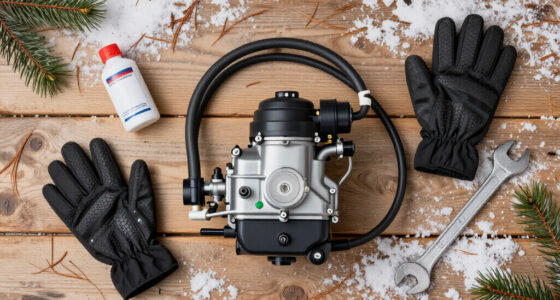
snow blower shear pins replacement kit
As an affiliate, we earn on qualifying purchases.
As an affiliate, we earn on qualifying purchases.
Clear Deep Snow Without Firing Gravel at Windows
Snow blowing a gravel driveway safely means keeping the chute away from people, pets, vehicles, glass, roads, and neighboring land while you use a steady pace. Stones can travel farther than the snow plume, so treat the entire discharge direction as a projectile zone even when the machine sounds smooth.
Before the first storm, mark driveway edges, culvert ends, retaining timbers, drainage grates, and decorative rocks with tall reflective stakes. A 75 cm marker may disappear inside a plow bank by February, so use stakes tall enough to remain visible. Walking the route before snowfall also gives you a chance to remove branches, wire, toys, and fist-sized rocks.
In 20 cm of light snow, a full-width pass may work cleanly. In 30 cm of wet, heavy snow, take half-width bites so the auger and impeller keep their speed. The engine or motor should sound loaded but steady, not bog down with a long whummm while the tires claw at the base.
Approach a packed roadside plow bank at low speed. Let the auger shave off narrow sections rather than ramming the housing into a frozen wall, because hidden stones and ice chunks can snap a shear pin in an instant. If the handles kick, the wheels spin, or gravel starts rattling, release the auger control and reassess your height.
- Blow along the driveway when possible, directing discharge toward an open lawn rather than a building.
- Avoid thin or bare patches, where the auger has little snow separating it from stone.
- Slow before surface changes, especially where gravel meets a paved apron or garage slab.
- Use partial passes through dense snow instead of forcing the machine at maximum ground speed.
Consider a curved farm lane with a workshop on one side and parked vehicles on the other. Start near the building and aim discharge toward open acreage, then work outward in controlled strips. That route keeps each later pass clear and prevents a small gray rock from becoming an expensive star-shaped crack in a truck window.
As an affiliate, we earn on qualifying purchases.
Protect the Auger Before a Small Rock Becomes a Big Repair
Auger care starts with correct shear pins, routine inspection, and an immediate shutdown after any hard impact. Shear hardware is designed to break before the rock transfers damaging force into the auger shaft, gearbox, chain, or drive system, so an ordinary hardened bolt is never a safe substitute.
You will often feel a strike before you diagnose it: a sharp bang, sudden handle vibration, or one auger section that stops turning. Release the auger control, stop the engine or motor, remove the key, and disconnect the spark-plug lead or battery as directed. Wait for all movement to stop before you inspect the housing from a safe position.
Never reach into the chute, impeller, or auger housing, even when the engine is off. A jammed part or loaded belt can move without warning; use the supplied cleanout tool while wearing gloves and eye protection.
Keep the manufacturer-specified shear pins and their retaining clips in a dry parts box. The exact diameter, groove, and metal strength matter. When a standard bolt replaces a sacrificial pin, the next rock may leave the cheap bolt intact while cracking a costly gearbox housing.
After a strike, look for a lodged stone, bent auger flight, damaged scraper, cracked weld, loose bearing, gearbox leakage, or fresh metal scraping inside the housing. Rotate parts only by the safe method given in the manual. Persistent vibration, grinding, or repeated pin failures calls for professional service before the next pass.
Grease the auger shaft only at the points and intervals the manufacturer lists. Some designs require you to remove shear pins periodically, lubricate the shaft, and confirm that each auger section moves freely; other gearcases use sealed parts and different procedures. More grease is not automatically better, since excess lubricant can attract abrasive grit or reach areas where it does not belong.
For example, a small stone wedged between the flighting and housing may chip paint without bending metal. Clean and dry the area, inspect it under bright light, and touch up bare steel with an approved coating. That five-minute job blocks the orange bloom of corrosion that otherwise spreads under wet winter slush.
Use a Five-Minute Check to Prevent Mid-Storm Breakdowns
A five-minute inspection before each use catches low skid shoes, uneven tires, missing shear pins, and loose hardware before they ruin a pass. Follow it with drying and a quick post-run check, since gravel abrasion, meltwater, and packed snow can hide damage that becomes obvious only after the machine stops.
Before starting, check that both shoes sit evenly and still provide your chosen clearance. Inspect the scraper and housing for bent edges, confirm the cleanout tool and guards are fitted, and look at each shear pin. Match tire pressure as listed in the manual because one soft tire can tilt the housing enough to scoop stone from a crowned lane.
- Before every run: Check shoe height, scraper condition, tire pressure, shear pins, guards, controls, and the route ahead.
- After every run: Remove packed snow safely, inspect for trapped gravel, let the housing dry, and look for leaks or chipped paint.
- During seasonal service: Inspect belts, cables, bearings, bushings, skid-shoe wear, gearbox lubricant, and specified grease points.
- Before storage: Follow the maker’s fuel or battery procedure and park where meltwater cannot freeze around the auger or controls.
Skid-shoe material changes the feel but not the need for proper setup. Polymer shoes resist rust and glide smoothly over paved sections, while steel shoes are simple, durable, and often inexpensive. Oversized shoes spread the machine’s weight across soft gravel, though bolt spacing and housing clearance must match your exact model.
Roller-style shoes can move easily on a firm drive, but small wheels may drop into coarse stone or deep ruts. On a long lane with 38 mm aggregate, broad flat shoes usually float better than narrow wheels. Tool-free adjusters also help when a sunny thaw softens the drive at noon and an overnight freeze firms it again.
Runtime deserves the same practical thinking. A battery unit may clear a short 20-metre drive quietly with no fuel smell, while a 150-metre lane in dense, wet snow can drain packs quickly. Gas offers fast refueling and long sessions; battery power offers low routine maintenance, easy starting, and fewer fumes, but cold-weather capacity and charging time remain real limits.
Once a month during active use, set the machine on a flat floor and repeat the spacer check. Abrasive gravel can wear one shoe faster where the driveway crown leans. Catching a 3–6 mm mismatch early costs a few minutes and saves you from a crooked scraper, wandering machine, and gray spray across the snowbank.
Frequently Asked Questions
How high should a snowblower be set above gravel?
Start with about 13–25 mm (½–1 inch) between the scraper area and loose gravel. Use the larger gap on unfrozen, rutted, or coarse stone, then make small reductions only after a firm packed base forms. If stones enter the housing, stop and raise it.
Should the scraper bar touch a gravel driveway?
No, the scraper should normally remain above loose gravel. Direct contact can scoop stones, wear the bar, and push the housing into high spots. A cautious lower setting may work after the drive freezes solid, but the scraper still needs clearance over crowns and ridges.
Why does my snowblower keep picking up rocks?
The common causes are insufficient housing clearance, worn or mismatched skid shoes, a bent scraper, unequal tire pressure, excess speed, or soft ground. Stop the machine and inspect those items on a flat surface. If the problem began during a thaw, raise both shoes and leave a thicker snow layer.
Can I replace a broken shear pin with an ordinary bolt?
No—use the exact shear hardware specified for your model. A normal or stronger bolt may survive an impact and pass the force into the gearbox, shaft, chain, or auger. Keep the right spare pins and clips with the machine so a storm does not tempt you into an expensive shortcut.
Are plastic skid shoes better than steel shoes?
Polymer shoes resist rust and often slide smoothly across paved aprons, while steel shoes can be durable, affordable, and easy to find. Wear life depends on gravel sharpness, machine weight, and mileage. Check model compatibility, bolt spacing, and the shoe’s wear limit before changing materials.
Is a battery snowblower suitable for a long gravel driveway?
A two-stage battery snowblower with adjustable skid shoes can handle gravel, but driveway length, snow density, temperature, and battery capacity decide whether it finishes the job. Wet snow and hard cold reduce practical runtime. For a 150-metre lane, plan around extra charged packs or choose gas when rapid refueling and long continuous operation matter more.
What should I do when the auger hits a rock?
Release the auger control and shut the machine down immediately. Remove the key, isolate the spark plug or battery, wait for all parts to stop, and use the cleanout tool rather than your hands. Check the shear pins, flighting, housing, scraper, bearings, and gearbox area; continued vibration or grinding needs professional service.
Conclusion
Your best finish is a thin white layer with every stone still on the driveway. Set the housing high during early storms, lower it only after the base freezes firm, and raise it again when rain or sun softens the gravel. That small habit protects the scraper, auger, gearbox, windows, and everyone near the discharge path.
Before the next storm, spend five minutes with two matching wooden spacers, a tire gauge, and the correct wrench. Then walk the route, plant tall markers, and choose a safe chute direction. When the auger settles into a steady hum and the snow rolls into an open field—without that ugly clack of stone on steel—you will know the setup is right.
Halloween Picks
halloween
As an affiliate, we earn on qualifying purchases.