TL;DR
Open a free Amazon Business account
Business pricing, bulk buying and tax-exempt orders.
Create a free accountAs an affiliate, we earn on qualifying purchases.
A heavy end-of-driveway berm is best managed by clearing a 10–20-foot relief pocket on the side the road plow approaches first, then removing the remaining ridge before it freezes. Cut the windrow into narrow sections, take partial-width snowblower bites or small shovel loads, and store the snow on your property without blocking traffic sightlines, drains, sidewalks, or utilities.
The snow at the end of your driveway may look like an ordinary white ridge, but your shovel knows better. A road plow packs wet snow, salt, ice chunks, and roadside grit into a dense roll that can harden like pale concrete. Leave it overnight, and a manageable cleanup can become a frozen barricade by breakfast.
You can make that ridge smaller before the truck arrives and remove what remains without beating up your back or machine. The key is to identify the plow’s approach direction, create an upstream relief pocket, and attack the deposited snow in narrow, shallow passes. Those details matter more than raw horsepower or the width stamped on a snowblower housing.
This guide shows you where to put the pocket, when to start clearing, and how to choose between a shovel, scraper, snowblower, tractor, or plow-equipped vehicle. You will also learn where the snow can safely go, why roadside debris changes the job, and when local rules or an accessibility problem call for help from your road authority. The goal is simple: keep your driveway usable without creating a new hazard for somebody else.
Identify the plow’s actual travel direction and clear a 10–20-foot relief pocket on the side it approaches first.
Remove a fresh windrow before a temperature drop turns salty slush and ice chunks into a solid roadside block.
Feed a snowblower partial-width bites at low speed; steady processing is safer than forcing the full intake into dense material.
Store snow downstream on your property where meltwater will not cross the driveway, block sightlines, or cover drains and utilities.
Never enter active traffic, clear a chute by hand, or push snow back into the traveled roadway.
The End-of-Driveway Berm
Technique for heavy plow windrows: build an upstream relief pocket, remove the remaining ridge while it is fresh, and process dense snow in narrow, shallow bites.
Make room for the rolling load
“Upstream” is not automatically left or right. It is the side the road plow approaches first on your side of the street. Observe a normal pass from safely inside your property.
Identify direction
Watch where the truck comes from. Its blade carries a rolling mixture of packed snow, slush, salt, grit, and ice.
Cut the relief pocket
Clear 10–20 feet along the roadside and several feet back from the road edge. The empty area catches part of the load before it reaches the driveway.
Smaller berm
The pocket reduces depth and weight. It may not eliminate the ridge, but it makes the remaining cleanup more manageable.
Placement check: Keep the pocket on your property and clear of traffic lanes, drainage channels, sidewalks, hydrants, mailboxes, utility boxes, culverts, buried markers, and neighboring land.
Six controlled moves beat brute force
Work from the driveway toward an approved storage area. Narrow sections and shallow cuts reduce lifting strain, machine overload, clogging, belt wear, and loss of control.
Survey
Find rocks, branches, trash, gravel, curbs, mailbox pieces, and fist-sized ice before a tool finds them.
Open
Cut one shovel width or roughly half a snowblower intake to establish a working lane.
Crack
Use a scraper or ice chopper with controlled, low strokes. Avoid feet, asphalt scars, and chipped pavers.
Process
Push loose snow and lift only small compact loads. Treat saturated snow like wet mortar.
Store
Move snow downstream on your property without blocking sightlines, drainage, sidewalks, or utilities.
Reset
Restore the upstream relief pocket before the next plow pass can stack a new layer onto the first.
Feed only 12 inches
Advance slowly and let the auger clear. Repeated engine lugging, belt smell, wheelspin, or snow dribbling from the chute signals that the bite is too large or the pace is too fast.
A small ridge can outweigh a large snowbank
Plow snow is mechanically compressed. Traffic kneads it, salt creates saturated slush, and the blade folds in ice, sand, gravel, and litter. A windrow deposited above freezing can drain and slump, then lock together after dark.
Qualitative resistance scale • temperature swings, repeated plow passes, and frozen runoff increase difficulty
| Tool | Dense windrow | Best use | Main limitation |
|---|---|---|---|
| Ergonomic shovel | ~ Moderate | Small ridges and detailed cleanup | Heavy lifting if loads are too large |
| Snow pusher | ✗ Limited | Loose, movable surface snow | Poor at lifting compacted material |
| Two-stage blower | ✓ Strong | Deep compacted snow in partial-width bites | Debris, clogging, shear pins, and traction |
| Ice chopper / scraper | ✓ Strong | Cracking frozen layers before removal | Can damage pavement if swung aggressively |
| Tractor / vehicle plow | ✓ Strong | Large sites with ample stacking space | Can compact snow further or block sightlines |
Open the driveway without creating another hazard
Heavy windrow removal combines slippery footing, concealed debris, exertion, machinery, and traffic exposure. Wear visible clothing, keep children and pets away from the road edge, and take breaks during strenuous work—especially when cardiovascular risk is a concern.
Why a Small Plow Ridge Can Feel Heavier Than a Snowbank
The End-of-Driveway Berm is a mechanically compressed ridge deposited when a road-plow blade carries snow past an opening and part of that rolling load spills across the entrance. It is commonly called a plow windrow, snow berm, or plow row, and it is often far denser than untouched yard snow.
Why does a knee-high ridge stop a machine that handled 10 inches of fresh snow? The answer is water and compression. Traffic kneads the road snow, salt turns part of it into heavy slush, and the blade folds everything together with ice, sand, gravel, and litter. It behaves less like flour and more like cold bread dough packed with stones.
For instance, imagine 6 inches of fluffy overnight powder across a two-car driveway. Your blower may throw it in clean, sparkling arcs. Then the road plow is left across a 12-foot entrance with a ridge only 18 inches deep, yet the auger growls, the chute plugs, and the tires claw for grip because that smaller pile carries far more water by volume.
Temperature swings make the problem worse. A windrow deposited at 34°F can drain and slump during the afternoon, then lock together when the temperature falls to 24°F after dark. Multiple plow passes add layers, much like coats of paint, except each coat hides harder ice and more roadside debris beneath it.
According to Outdoor Pro Masters, windrow difficulty rises when traffic compresses snow, salt produces slush, runoff freezes at the road edge, or the ridge sits overnight [1]. That is why timing beats brute force: removing a fresh, wet berm takes work, but removing the same berm after a hard freeze can require chopping every few inches.
As an affiliate, we earn on qualifying purchases.
Cut a 10–20-Foot Pocket and Make the Next Berm Smaller
The End-of-Driveway Berm becomes smaller when you clear a relief pocket along the roadside on the side the plow reaches first. Make the opening about 10–20 feet long, several feet back from the road edge, and wide enough to catch part of the blade’s rolling load, where space and local rules allow.
Upstream does not automatically mean the left side of your driveway. It means the side the truck approaches first on your side of the street. Stand safely on your property and watch one normal plow pass; if the truck moves from your mailbox toward your driveway, the pocket belongs between those two points.
Think of the pocket as an empty bowl placed beneath a spilling pitcher. The plow still carries snow toward your entrance, but some of that load drops into the cleared space first. Outdoor Pro Masters recommends this approach because even a smaller pocket can help when a full 20-foot cut conflicts with a sidewalk, ditch, hydrant, utility box, or neighboring property [1].
For example, a rural owner with a 16-foot gravel entrance might clear a pocket 15 feet along the shoulder and 4 feet back from the pavement. When the road plow passes, the pocket fills first, leaving a waist-wide ridge at the driveway instead of a thick wall spanning the whole apron. The method reduces the cleanup; it does not promise a bare entrance.
Watch the plow’s direction before choosing a side. A beautiful pocket cut on the downstream side provides snow-storage room, but it does little to reduce the rolling load that reaches your driveway.
Keep the pocket off the traveled roadway and out of drainage channels unless your local road authority permits that placement [2]. Check for buried markers, culvert edges, mailboxes, and loose stone before running a blower there. A hidden rock thrown from the discharge chute can turn a smart preventive step into broken glass or an injury.
As an affiliate, we earn on qualifying purchases.
Use This 6-Step Method Before Wet Snow Freezes Solid
The End-of-Driveway Berm should be removed as soon as practical after a major plow pass and before wet material freezes into a solid ridge. Work from the driveway toward an approved storage area, divide the berm into narrow sections, and use shallow cuts instead of driving a shovel or snowblower through the full mass.
Survey the ridge before touching it. Look for fist-sized ice, branches, trash, gravel, mailbox pieces, and a buried curb. One dark chunk in gray slush may be harmless road snow; the next may be a stone capable of snapping a shear pin or leaving the chute at speed.
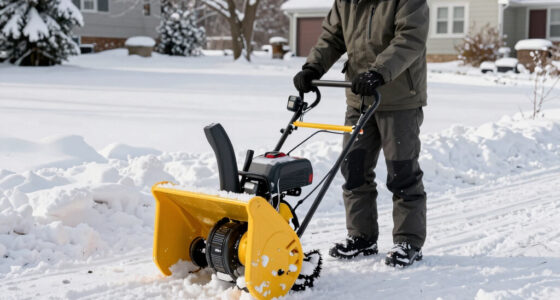
Open a narrow working lane. Cut a strip roughly one shovel width or half the snowblower intake width. For instance, feed only 12 inches of a 24-inch blower into dense snow, keep the unused half in open air, and let the auger clear before advancing again.
Break frozen layers carefully. Use an ice chopper or scraper with controlled strokes, keeping the edge low and away from your feet. You want cracks through the crust, not deep scars in asphalt or chipped corners on concrete pavers.
Move small loads toward storage. Push loose snow when possible and lift only compact shovel loads. A heaped shovel of saturated plow snow can feel like a bucket of wet mortar, so smaller bites protect your balance and reduce strain.
Finish the upstream pocket. Once the entrance is open, restore the 10–20-foot relief area before the next road-plow pass. This last step resets the trap and keeps the following windrow from stacking onto the first.
With a snowblower, lower your walking speed and listen to the engine or motor. A steady note means the machine is processing the load; repeated lugging, belt smell, wheelspin, or snow dribbling from the chute tells you to take a thinner bite. Forcing the intake raises the odds of clogging, shear-pin failure, belt wear, and a sideways lurch near traffic.
During a long 12-hour storm, you may need an interim cut. A homeowner who clears after the first plow pass might move two 8-inch layers instead of confronting one frozen 16-inch wall at dawn. That extra trip outside is inconvenient, but two controlled cleanups often beat one punishing fight.
As an affiliate, we earn on qualifying purchases.
Choose the Tool That Matches the Snow, Surface, and Distance
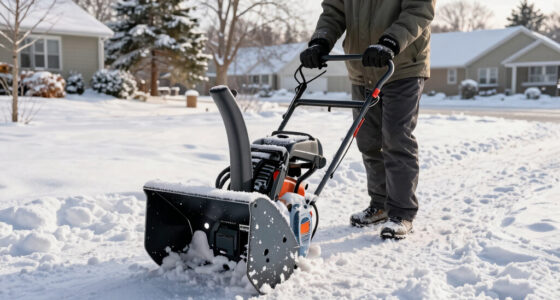
The End-of-Driveway Berm usually calls for a two-stage snowblower when the ridge is deep or compacted, while a sturdy ergonomic shovel and ice scraper handle smaller entrances and detail work. Match the tool to snow density, surface type, storage distance, and traction, not just the advertised clearing width.
| Tool | Where it works well | Main limitation |
|---|---|---|
| Ergonomic shovel | Small ridges, steps, tight corners, and final cleanup | Dense snow makes each lift heavy and tiring |
| Snow pusher | Loose snow on smooth, level pavement | Poor at lifting a packed windrow |
| Two-stage snowblower | Deep, mixed snow with enough room for discharge | Wet slush can clog; ice and stones can damage parts |
| Ice chopper or scraper | Breaking thin frozen layers before removal | Aggressive blows can harm pavement |
| Vehicle plow or tractor | Long drives with ample stacking space | Poor technique can compact the berm even harder |
A snow pusher looks appealing because its broad blade moves powder like a shop broom. Put it against salty, chestnut-colored roadside slush, though, and it stops dead. For a 10-foot paved entrance with a 12-inch ridge, you may get better control by cutting blocks with a shovel and feeding those blocks gradually into a 24- or 28-inch two-stage blower.
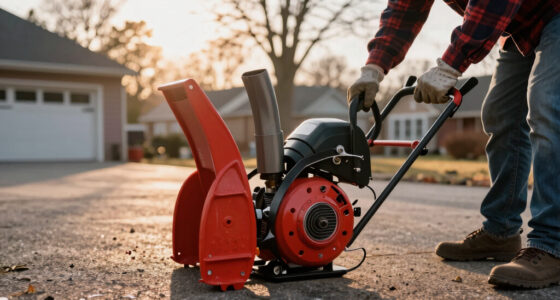
Battery versus gas? Modern battery two-stage machines offer quiet starts, no exhaust cloud, useful lighting, and good low-speed control. Gas machines still tend to suit long rural driveways, repeated municipal passes, and extended runtimes where swapping or warming battery packs becomes a burden. Intake height, usable torque, tire or track grip, chute control, and build quality tell you more than a flashy stage label.
Surface setup matters too. Raise adjustable skid shoes on gravel so the scraper bar does not scoop stones into the auger. On smooth pavement, a lower setting can collect more snow, but you still need clearance around raised joints and pavers. For instance, the same aggressive setting that leaves black asphalt clean can send driveway gravel rattling through the impeller like coins in a steel drum.
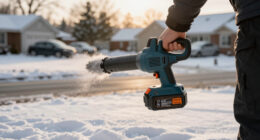
snow removal tool for end-of-driveway berm
As an affiliate, we earn on qualifying purchases.
As an affiliate, we earn on qualifying purchases.
Keep the Cleanup Out of Traffic and Away From Hidden Hazards
Safe windrow removal means staying out of the active road, wearing bright or reflective clothing, keeping children and pets away, and stopping powered equipment before clearing any blockage. Expect ice, rocks, trash, and sharp roadside debris inside the ridge, even when its surface looks smooth and clean.
The road edge is a noisy, slippery work zone. Snow muffles approaching tires, a hood narrows a side view, and blowing flakes erase the line between shoulder and travel lane. If you cannot work entirely from your property or a permitted shoulder area, stop and contact the responsible road authority rather than stepping into traffic.
Never put a hand into a snowblower chute, even after the engine goes quiet. Packed snow can hold the impeller under spring-like tension, and the blades may move when the blockage releases. Shut the machine down, remove the key or battery where the manufacturer directs, wait for moving parts to stop, and use the supplied cleanout tool.
Heavy shoveling also loads your heart and back while cold air tightens blood vessels. Push snow where you can, lift small amounts, keep your footing wide, and pause before you are gasping. If you have cardiovascular risk factors, limited mobility, chest discomfort, dizziness, or unusual shortness of breath, stop and arrange help; a driveway is not worth a medical emergency.
For instance, clearing at 5:30 a.m. in dark clothing near a bend gives drivers little time to react. A reflective vest, headlamp, slip-resistant boots, and work gloves make you visible and steady, while a second adult can watch traffic from a safe position. Keep snowbanks low enough that a driver backing out can see a cyclist, pedestrian, or school bus.
Do not build a rigid wall or ramp to redirect the municipal plow. A fixed roadside barrier can interfere with maintenance, damage equipment, violate right-of-way rules, or become a collision hazard [2].
Put Every Load Where It Will Not Cause Tomorrow’s Ice
Store plow snow on your property where local rules allow, preferably downstream from the driveway and away from intersections, sidewalks, drains, hydrants, utility equipment, and driver sightlines. Place it where meltwater can flow away from the entrance instead of crossing the pavement and freezing into a glassy sheet overnight.
Can you blow the ridge across the street and be done with it? Usually, no. Depositing snow in or across a public roadway is prohibited in many places because passing vehicles can strike the pile, spread it into bike lanes, or push it into another entrance. Local public-works rules govern the right-of-way, so check them before changing roadside drainage or storage patterns [2].
For instance, a tall pile placed uphill from a sloped driveway may look harmless at 20°F. Two sunny afternoons later, brown meltwater snakes across the apron, then freezes after sunset exactly where your tires turn. Moving that pile 15 feet downstream can keep runoff in the ditch and save you from chipping a wide ice ribbon each morning.
Keep storm drains open only in ways permitted by local guidance, and never bury hydrants, accessible routes, or utility cabinets. Roadside mailboxes need special care because thrown snow can strike with enough force to bend a post even when the blade never touches it. Mailbox height, setback, and breakaway construction must follow local requirements; an excessively rigid homemade guard may create a hazard.
Use deicer only after you have removed most of the snow mechanically. Salt cannot efficiently eat through a heavy berm, and large amounts can harm concrete, plants, vehicles, waterways, and pets’ paws. A light, labeled application on residual bonded ice makes more sense than pouring a whole bag onto 18 inches of compressed slush.
If persistent runoff keeps freezing at the road edge, treat it as a drainage problem during warmer weather. Grading, culvert, structural, or utility changes may fall under permits or right-of-way rules. Hire an appropriately licensed professional when the work affects structures, buried services, public drainage, or regulated roadside areas, and wear PPE while inspecting the site.
Frequently Asked Questions
Why does the road plow refill my driveway after I clear it?
The blade carries a rolling load of road snow that spills into openings as the truck passes. Operators generally cannot lift or redirect the blade at every driveway without slowing the route and leaving snow in the traffic lane. An upstream relief pocket gives part of that load another place to drop.
Which side of my driveway should I clear for the relief pocket?
Clear the side the plow reaches first on your side of the road. That may be your left or right, so watch a normal pass from a safe place on your property. The truck’s direction, not the driveway’s compass orientation, defines the upstream side.
Will a 10–20-foot pocket eliminate the berm completely?
No. A 10–20-foot pocket can reduce the amount of snow that spills across the entrance, but blade angle, truck speed, storm depth, and later passes still affect the result. Treat the pocket as load reduction, not a guarantee of bare pavement.
Why does my snowblower keep clogging in plow snow?
Wet, salty slush sticks to the housing and chute, while compacted blocks interrupt the feed. Slow down, take partial-width bites, and let the machine clear each load before moving forward. Shut it off before servicing a blockage and use the cleanout tool, never your hand.
Should I clear my driveway before or after the street plow arrives?
Clear early when accumulation is getting deep, but reserve time and energy for cleanup after a major road-plow pass. During a long storm, one interim clearing can prevent several layers from freezing together. The final pass is often the right time to restore your relief pocket.
Can I use salt to melt the entire end-of-driveway berm?
Salt is a poor substitute for mechanical removal of a thick windrow. Remove the bulk with a shovel or snowblower, then apply a limited amount of labeled deicer to thin residual ice. Heavy salt use can damage plants, concrete, vehicles, waterways, and pets’ paws.
What should I do if a windrow blocks an accessible entrance?
Contact your municipality or road authority about accessibility procedures, assistance programs, or complaint options. Arrange reliable help before forecast storms when the driveway is medically necessary or the property’s only safe entrance. Do not approach a moving plow or enter the roadway to flag down its operator.
Conclusion
Your best defense against a heavy plow windrow is not a bigger machine. It is an upstream relief pocket, an early start, and shallow controlled passes. Watch where the road plow comes from, give its rolling load 10–20 feet of empty space, then clear the remaining ridge while it is still wet enough to cut.
Set up the pocket before the next storm, mark hidden curbs and gravel edges, and choose a safe storage spot for runoff. When the amber plow lights glow through the falling snow, you will have given that gray, grinding wave somewhere to go besides straight across your driveway.
Summer Picks
summer essentials
As an affiliate, we earn on qualifying purchases.