
TL;DR

Get business pricing on tools and workshop supplies
- Business-only prices and quantity discounts
- Tax-exempt purchasing
- Multiple users, one account, clear invoices
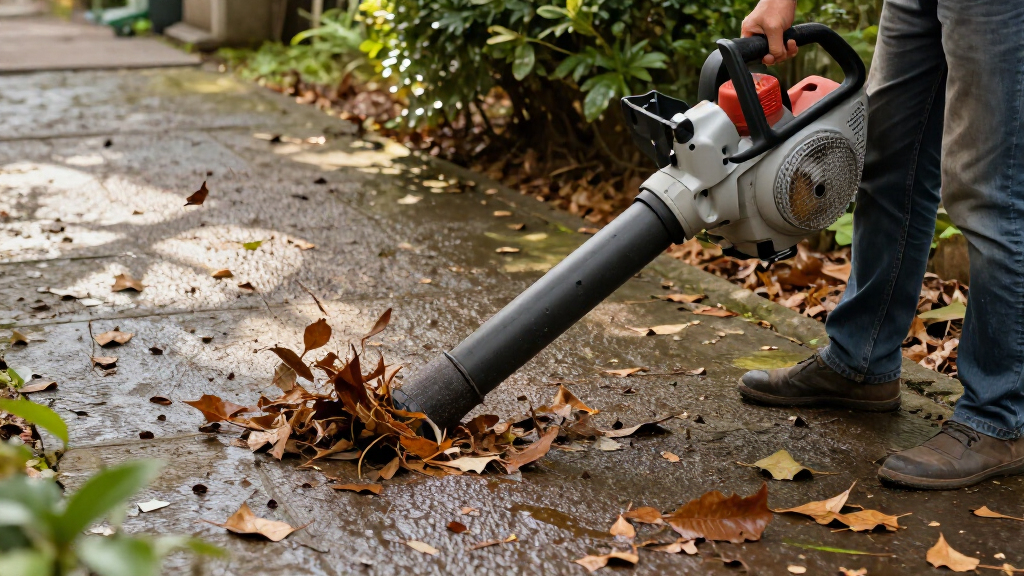
Wet leaves vs dry leaves call for different blower techniques: use broad, controlled airflow and lower throttle for dry material, then switch to a narrower nozzle, higher airspeed, and slower passes for wet mats. When leaves are soaked, waiting for a few drying hours or loosening them with a rake often saves more time and battery than holding the trigger at full power.
A thin layer of rain can turn an easy 20-minute leaf cleanup into an hour of wrestling with brown mats. Dry maple leaves skitter across pavement like paper scraps. Wet ones flatten against concrete, cling to grass, and shrug off a broad blast that would send dry leaves sailing across the yard.
The difference comes down to weight, surface adhesion, and airflow. Field guidance reports that wet leaves can weigh roughly two to three times more than dry leaves [1]. Water also helps leaves stick to one another and to the ground, so simply squeezing the trigger harder rarely fixes the whole problem.
You will learn how to match blower speed, nozzle shape, working angle, and walking pace to changing conditions through the season. You will also see when a battery blower makes sense, when gas power earns its keep, and when the smartest move is to wait for the sun. The goal is practical: fewer wasted passes, less strain on your equipment, and cleaner results without turning a slippery yard into a hazard.
Use broad airflow and low-to-medium power for dry leaves; reserve narrow nozzles and controlled high-speed bursts for damp or wet material.
Peel wet leaves in strips about 30 to 60 centimetres wide instead of trying to push one heavy mat.
Hold the nozzle roughly 5 to 10 centimetres above wet hard surfaces, then raise it and reduce power around gravel, mulch, and fragile turf.
Plan battery capacity around maximum-power wet work, since turbo use can cut runtime far below a low-speed rating.
Disconnect the power source before clearing debris, and treat wet leaves on steps, decks, and slopes as a serious slip hazard.
Wet Leaves vs Dry Leaves
Dry leaves ride broad airflow like paper sails. Wet leaves gain weight, cling together and seal against the ground. The efficient response is not endless full throttle—it is a narrower air stream, a lower working angle, slower passes and better timing.
Moisture changes the physics
A five-second boot test can save several laps. Scuff the edge: leaves that flutter need air volume; leaves that fold, smear or show shiny undersides need concentrated pressure. Standing water or exposed mud is a signal to wait.
Crisp & loose
Light leaves expose broad faces to moving air. Sweep quickly with a wide stream and use only brief power boosts.
Loose but heavy
Surface moisture adds mass without fully bonding the layer. Shorter passes aimed under the edge restore movement.
Matted & soaked
Water binds leaves to one another and the surface. Peel narrow strips, pulse the trigger and rake open stubborn mats.
Relative effort by condition
Illustrative workload indexOne blower, four conditions
Begin with the lowest setting that moves the material cleanly. Add airspeed only when the leaves resist, and reduce power immediately around gravel, mulch, fragile turf, windows and vehicles.
| Condition | Power setting | Nozzle | Working style | Best timing |
|---|---|---|---|---|
| ✓Dry & crisp | Low–medium; brief boosts | Wide or round | Long sweeping passes | After morning dew dries |
| ~Damp & loose | Medium–high | Round or moderately narrow | Short passes under the layer | After sun or breeze |
| ~Wet & matted | High, controlled bursts | Narrow high-speed | Peel 30–60 cm strips | Wait if drainage allows |
| ✗Frozen or slushy | Low test pass only | Standard nozzle | Stop if bonded to ground | After thaw and partial drying |
Settings are starting points. Follow the operator’s manual for approved nozzles, safe clearances, duty limits and wet-debris restrictions.
Five moves that clear wet leaves without endless full throttle
Create an edge, lift the bottom layer and keep each moving mass manageable.
Probe one square metre
Use a two-second burst. If the mat ripples but stays planted, rake it open or allow drying time.
Find the leading edge
Hold the outlet 5–10 cm above hard surfaces. Aim shallowly under the layer without scraping.
Work narrow strips
Move bands 30–60 cm wide. Each cleared strip exposes a fresh edge for the next pass.
Start, then back off
Use short high-power bursts to break adhesion. Reduce throttle once the leaves begin sliding.
Build small windrows
Form several loose rows, let water drain, then combine them instead of forcing one heavy mound.
Adjust before adding power
Smooth pavement releases a damp leaf once its seal breaks. Grass traps leaves between blades; gravel and mulch punish excess airspeed. The same leaf can move in one pass on a driveway and take three careful passes on turf.
Nozzle height by surface
Low angle · 5–10 cm · peel the seal
Raise slightly · avoid scalping soft ground
Higher outlet · lower throttle · shallow sweep
Highest caution · stop before stones launch
The efficient decision chain
A few drying hours may save more time, fuel and battery than fighting a soaked mat.
Ten firm pulls can open air gaps that eliminate repeated maximum-power passes.
Use concentrated bursts to begin movement, then reduce power and guide the windrow.
Wet work draws maximum power; advertised low-speed runtime may not reflect real cleanup time.
Why Moisture Changes the Job More Than Leaf Size
Wet leaves vs dry leaves differ mainly in weight and grip: dry leaves ride moving air, while wet leaves resist it and cling to the surface below. Moisture may make a pile two to three times heavier, while the thin film of water between leaves acts almost like glue [1].
Think of the blower stream as a river. A wide, gentle current carries dry oak leaves easily because their broad faces catch the air like little sails. After rain, those same leaves stack into a dark, leathery blanket, and the air rolls over the top unless you aim low enough to peel up the bottom edge.
Surface type changes the result too. On smooth asphalt, a damp leaf may slide once the nozzle breaks its seal. On thick fescue, water pulls the leaf down between grass blades, where even a strong blower has trouble reaching it. A leaf that moves with one pass on a driveway may need three careful passes on turf.
You can judge moisture with a quick boot test. Scuff the edge of the leaf layer: crisp leaves that flutter need volume, while leaves that fold, smear, or reveal shiny undersides need concentrated airspeed. If your boot exposes muddy soil or standing water, the ground may be too soft for aggressive cleanup without rutting the lawn.
Dry-leaf cleanup is an airflow problem. Wet-leaf cleanup is a pressure, adhesion, and timing problem.
This distinction saves fuel and battery charge. Running full throttle against every pile wastes energy, sprays grit, and can bury leaves deeper in shrubs. Read the material first, then set the machine. That five-second check often removes several unnecessary laps around the property.
electric leaf blower with adjustable nozzle
As an affiliate, we earn on qualifying purchases.
As an affiliate, we earn on qualifying purchases.
Use This Side-by-Side Setup for Dry, Damp, and Soaked Leaves
Wet leaves vs dry leaves need different combinations of air volume, airspeed, nozzle width, and pace. Use a broad stream and brisk movement for crisp leaves, then add pressure and slow down as moisture rises. For soaked mats, mechanical loosening or drying time often beats more throttle.
| Condition | Power setting | Nozzle choice | Working style | Best timing |
|---|---|---|---|---|
| Dry and crisp | Low to medium; brief boosts | Wide or round nozzle | Long sweeping passes | Calm morning after dew dries |
| Damp but loose | Medium to high | Round or moderately narrow nozzle | Short passes aimed under the layer | After sun or breeze lifts surface moisture |
| Wet and matted | High in controlled bursts | Narrow high-speed nozzle | Peel small strips; rake stubborn patches | Wait when drainage and schedule allow |
| Frozen or slushy | Low test pass only | Standard nozzle | Stop if material is bonded to the ground | After thaw and partial drying |
Here is a common October example. You start on a sunny driveway where curled birch leaves hop away at half trigger. Ten metres later, you reach the shaded north side of the garage, where yesterday’s rain still glistens. Keeping the same setting sends the top leaves forward but leaves a pasted layer behind.
That is your cue for adjusting blower technique, not merely adding power. Fit the narrow nozzle if your model offers one, lower the outlet to roughly 5 to 10 centimetres above the surface, and shorten each sweep. Work a strip about the width of your shoulders instead of attacking the whole bed.
The table is a starting point, not a substitute for your operator’s manual. Nozzle options, safe clearances, and duty limits vary by machine. A compact battery unit may handle wet leaves on a 500-square-metre suburban lot, while several wooded acres can demand spare battery packs, a backpack blower, or work split across multiple sessions.
gas-powered leaf blower for wet leaves
As an affiliate, we earn on qualifying purchases.
As an affiliate, we earn on qualifying purchases.
Five Moves That Clear Wet Leaves Without Endless Full Throttle
Wet leaves vs dry leaves reward a slower, more deliberate attack. You need to break the seal at the bottom of the layer, move a manageable strip, and give displaced water somewhere to drain. These five moves cut repeat passes and reduce the time your blower spends screaming at maximum output.
- Test one square metre first. Aim at the edge of the mat and use a two-second burst. If the leaves ripple but stay planted, loosen them with a rake or wait for partial drying.
- Lower the nozzle without scraping. Hold the outlet about 5 to 10 centimetres above hard surfaces and slightly higher over turf. Aim under the leading edge at a shallow angle.
- Peel narrow strips. Move a band 30 to 60 centimetres wide instead of pushing the full carpet. Each strip exposes an edge that the next blast can lift.
- Pulse the trigger. Use short high-power bursts to start movement, then back off once the leaves slide. Variable speed gives you control and preserves runtime.
- Build small windrows. Push leaves into several loose rows, let them drain, then combine them. One huge wet mound can stop both airflow and your patience.
Say a storm drops sycamore leaves across a 20-metre path. A head-on blast at full speed may carve a clean tunnel while throwing dirty water onto the siding. Working from one corner, however, lets you peel the layer sideways in strips and keeps the spray pointed toward the lawn.
Use a plastic rake when the bottom layer feels like damp cardboard. Ten firm pulls can open air gaps that save several minutes of blower work. On gravel, raise the nozzle and reduce power once the leaves start moving; a narrow blast can fire stones toward windows, cars, pets, or people.
Avoid forcing wet debris into vacuum or mulching modes unless the manufacturer specifically allows it. Wet leaf pulp can pack tubes, coat impellers, and block collection bags. Switch off the machine, remove the battery or disconnect the spark-plug lead as directed, and wait for moving parts to stop before clearing any blockage [2].
As an affiliate, we earn on qualifying purchases.
Make Dry-Leaf Days Faster Without Covering the Yard Twice
Dry leaves move fastest when you use broad airflow, moderate power, and a planned route. Start at buildings and fence lines, sweep with the wind, and gather leaves into small staging piles. Saving full power for corners gives you better control, longer runtime, and less dust.
Dry leaves feel easy, which is exactly why people create extra work. One careless full-throttle pass sends copper-colored leaves spinning over the cleaned lawn and into flower beds. Lower power keeps the layer rolling in front of you, like a low wave, instead of erupting into a dusty brown cloud.
On a quarter-acre lot, begin at the house and move toward your collection point. Clear steps, foundation beds, and fence pockets first. Then walk parallel lanes across the lawn, nudging each loose row into the next. This route prevents you from blowing the same leaf three times.
- Work with the breeze: even a light wind can carry airborne leaves beyond your target.
- Use a wide nozzle: broad airflow moves more light material per pass.
- Keep the outlet higher: roughly 15 to 30 centimetres often works on open turf without digging into mulch.
- Feather the trigger: lower speed near gravel, bark, doors, parked cars, and freshly seeded soil.
Dry conditions also bring dust, pollen, and grit. Wear eye protection, hearing protection, sturdy footwear, and a well-fitted dust mask or respirator when the ground is powdery. Keep bystanders and pets away from the discharge area, and never point the nozzle at a person—even a small pebble becomes a fast projectile.
Timing matters. Early morning may look calm, but dew can anchor leaves to the grass. Waiting until late morning often gives you the sweet spot: the leaves feel crisp, the wind remains manageable, and the sun has not yet baked the work area. On dry days, patience can save more charge than a larger battery.
battery leaf blower for heavy wet leaves
As an affiliate, we earn on qualifying purchases.
As an affiliate, we earn on qualifying purchases.
Choose Battery or Gas Power Based on the Worst Patch
Choose your blower around the heaviest recurring work, not the easiest dry afternoon. Battery blowers offer quiet starts, no exhaust, and precise variable speed; gas units usually provide longer sustained output for wet acreage, deep tree cover, and long sessions. Neither power source removes the need for sound technique.
Specifications can mislead when read alone. CFM, or cubic feet per minute, tells you how much air the machine moves. MPH describes airspeed. Broad dry piles respond well to higher volume, while stuck wet leaves often need concentrated speed from a narrow nozzle.
Imagine two properties. A suburban owner clears a 600-square-metre lot with one driveway and six mature trees. A modern battery blower with variable speed and a spare pack can handle the job cleanly. A rural owner clearing two wooded acres after three days of rain faces a different load; sustained gas power or a high-output backpack battery system may save several stops.
Battery runtime drops quickly at maximum output. A pack advertised for a long low-speed session can drain far sooner when you hold the turbo button against wet mats. Cold weather can also reduce useful battery performance, so keep packs at the temperature range listed by the manufacturer and never charge a wet or damaged pack.
Gas brings tradeoffs of its own: louder operation, hot surfaces, exhaust, fuel handling, and more maintenance. Refuel only after the engine cools, outdoors and away from flames. Check local noise, emissions, and operating-hour rules because some communities restrict gas blowers or seasonal use.
Buy for sustained work, but operate with restraint. High output is a reserve for wet patches, not the default setting for every leaf.
If your current machine moves dry leaves well but stalls against one soggy corner, try a narrower nozzle, a rake, and better timing before replacing it. Better technique costs nothing and often solves the actual problem.
Protect Your Blower and Your Footing After Rain
Safe wet-leaf cleanup starts with traction, electrical protection, and a clean air path. Wet leaves can hide slick paving, holes, sticks, and stones, while damp debris can block cooling vents and nozzles. Wear grippy boots and eye protection, inspect the route, and stop before clearing a clog.
A shaded deck offers a classic warning. The boards look merely dark, but a thin layer of crushed leaves can feel like soap under your heel. Test your footing before starting, keep both hands on the blower where the design calls for it, and work from stable ground rather than reaching across steps or slopes.
Battery blowers avoid fuel and extension cords, but they are not invitations to work in standing water or heavy rain. Follow the machine’s stated weather-resistance limits. If water reaches the battery compartment, controls, plug, or charger, stop using the equipment and let a qualified service provider inspect any suspected damage.
Corded blowers add trip and shock risks. Use only outdoor-rated cords, a ground-fault circuit interrupter where required, and connections designed to stay protected from moisture. If an outlet, cord, or breaker needs repair, switch off power at the breaker and hire a licensed electrician; electrical codes and permit rules apply, and wet-ground improvisation can turn deadly.
After the job, shut the blower down and isolate its power source according to the manual. Brush leaf paste from the nozzle, intake screen, cooling vents, and exterior with a nonmetal tool or soft brush. Never reach into an impeller area, and never defeat a guard to gain access.
One final pass through your work zone matters. Wet piles left on pavement can become a slip hazard, while leaves packed against a drain may cause ponding during the next shower. Move debris to an approved compost, collection, or municipal pickup area, and keep storm drains clear without blowing yard waste into the street.
Read the Season So You Work With Weather, Not Against It
Wet leaves vs dry leaves change through the season, sometimes within the same afternoon. Early fall often brings scattered, crisp material; stormy midseason weather creates heavy mats; late-season frost bonds leaves to the ground. Match your schedule to dew, rain, wind, temperature, and drainage.
In early fall, weekly light passes usually beat one giant cleanup. A thin layer stays airy and easy to steer, so you can clear a modest lawn at medium power before the leaves work down into the grass. Letting three weeks of leaves collect creates a dense pile that traps overnight moisture even on sunny days.
During peak drop, watch the forecast and divide the property into zones. Suppose rain is due Thursday night. Clear the driveway, steps, and drain grates Thursday afternoon, then leave low-risk lawn areas for the weekend. You remove the surfaces where slick leaves cause trouble without racing to polish every corner.
After rain, check sun exposure rather than assuming the whole property has the same condition. A south-facing lawn may dry by noon while the narrow strip behind a shed stays black and glossy all day. Handle the dry zone with broad passes, then change the nozzle and pace before entering the shade.
Late fall adds frost and cold batteries. Do not hammer frozen leaves with the nozzle or scrape them from delicate decking. Wait for thawing, loosen the edges gently, and stop if the ground begins smearing underfoot. Working saturated turf can compact soil and leave muddy tracks that outlast the leaves.
Your best seasonal habit is simple: clear high-risk hard surfaces first, work dry zones next, and save bonded mats for better conditions. This order protects footing, preserves runtime, and keeps a routine cleanup from turning into an equipment endurance test.
Frequently Asked Questions
Should I wait for wet leaves to dry before using a blower?
Wait when your schedule and drainage allow it. A few sunny or breezy hours can cut leaf weight, break surface adhesion, and save substantial battery or fuel. Clear slippery steps, paths, and drain grates promptly, but leave harmless soaked lawn areas until they become easier to move.
What blower setting works best for wet leaves?
Use medium-to-high power with a narrow nozzle, then apply full output in short bursts only where the layer sticks. Aim beneath the leading edge and work slowly across narrow strips. Holding maximum throttle continuously wastes runtime and can spray mud, gravel, or dirty water.
Is CFM or MPH more useful for moving wet leaves?
MPH and nozzle pressure matter more when leaves are stuck, while CFM helps carry a large volume of loose material. You still need both: concentrated speed breaks the wet layer free, and adequate air volume keeps it moving. Treat specifications as a pair rather than choosing a machine from one number.
Can a battery blower handle soaked leaves?
Yes, a high-output battery blower can move soaked leaves on many residential properties, especially with a narrow nozzle and variable speed. Expect shorter runtime at full output, and plan for a spare charged pack on larger lots. Several wooded acres may call for a backpack battery system, gas power, or staged cleanup.
How do I stop wet leaves from clogging my blower?
Keep wet material away from the intake, avoid vacuum mode unless the manual permits wet debris, and clear buildup before it hardens. Switch off the machine and disconnect its power source before touching a nozzle, tube, guard, or impeller area. Use a soft brush or nonmetal tool rather than your fingers.
Can I use a leaf blower on wet grass without damaging the lawn?
You can work lightly on firm turf, but avoid repeated passes over saturated soil. Heavy foot traffic can compact the ground, while a low, concentrated blast may expose mud or disturb young grass. If your boots sink or leave shiny ruts, wait for firmer conditions.
Conclusion
Match the air stream to the leaf, not your frustration. Dry leaves need a broad, controlled push; wet leaves need a narrow bite, shorter passes, and enough patience to peel the layer from below. When the ground is saturated or the mat will not lift, a rake and two hours of drying can outperform raw blower power.
Before your next cleanup, scuff the leaves with your boot, check the wind, and choose your nozzle deliberately. That quick read turns a roaring battle into an orderly sweep—the kind where the driveway appears behind you in clean gray strips and stays clean when you walk away.
Fall Picks
fall essentials
As an affiliate, we earn on qualifying purchases.