TL;DR

Get business pricing on tools and workshop supplies
- Business-only prices and quantity discounts
- Tax-exempt purchasing
- Multiple users, one account, clear invoices
Cutting a first edge on an overgrown driveway starts with finding the original boundary, marking it, and cutting several shallow passes rather than forcing one deep pass. Use a dedicated blade edger for thick turf, a string trimmer for light growth, and hand tools near fragile asphalt, gravel, utility boxes, or hidden obstacles.
Your driveway may be several inches wider than it looks. Grass creeps over the edge, catches windblown soil, and builds a dark mat of roots until concrete or asphalt disappears beneath a green shelf. When the mower rolls over it, the hidden boundary stays buried and the problem grows sideways.
Cutting a first edge is different from routine trimming. You are not clipping soft grass tips; you are slicing compacted roots, prying away damp soil, and finding a hard edge you may not have seen for years. Done well, the job reveals a crisp line and makes every later mowing session easier. Done badly, it can scar asphalt, throw stones, chew through irrigation tubing, or leave a crooked trench that collects water.
This guide shows you how to find the original driveway edge, match the tool to the overgrowth, set a sensible cutting depth, and work without turning the area into flying grit and shredded turf. You will also see where battery tools make sense, where gas power still earns its keep, and why two controlled passes usually beat one aggressive cut. The goal is simple: expose the driveway you already own, then keep that clean line with a few minutes of regular care.
Probe every 3 to 5 feet and mark the original hard boundary before removing turf; guessing can sacrifice good lawn or leave a visibly wavy edge.
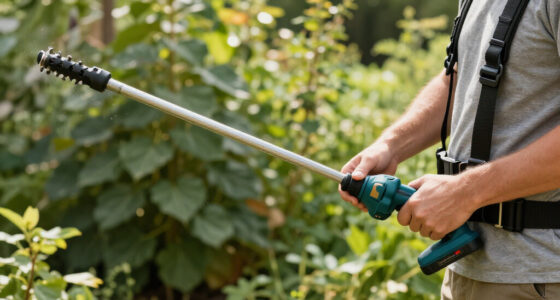
Use a blade edger for thick sod beside sound concrete, hand tools beside fragile asphalt or gravel, and a vertical string trimmer mainly for light growth and l…
Open the line with a shallow pass, then deepen it to roughly 1 to 2 inches where root thickness and buried services allow.
Remove the severed turf and loose soil immediately so the exposed boundary does not become a fresh seedbed.
Repeat a light maintenance pass every 4 to 6 weeks during active growth instead of waiting for another thick root shelf.
Cutting a First Edge on an Overgrown Driveway
Find the pavement you already own, mark its true boundary, then sever the root shelf with controlled passes. The cleanest result comes from matching the tool to the turf and surface—not from forcing the deepest possible cut.
Find the real boundary
The visible grass line records years of spreading roots, trapped soil and mowing—not the structural edge of the driveway. Probe first so you do not sacrifice sound lawn or leave pavement buried.
Start where pavement is visible
Use the garage apron, street end or an exposed corner as a reliable reference. Clear loose debris before taking measurements.
Test every 3–5 feet
Push a screwdriver, narrow trowel or soil probe vertically. Move outward in half-inch steps until the tool drops beside the slab.
Mark a smooth cutting line
Use taut mason’s string on straight runs and a garden hose on curves. Stand back and inspect the entire line before cutting.
A buried shelf can be surprisingly wide. If repeated probes reveal pavement beneath several inches of lawn, follow the original construction—not the irregular visible grass edge.
Match force to the edge
A steel blade severs dense roots efficiently, flexible trimmer line handles light growth, and hand tools provide the feedback needed around fragile materials and hidden obstacles.
Dedicated blade edger
Produces the cleanest repeatable trench through mature sod. Keep the blade vertical and avoid forcing it against the slab.
Vertical string trimmer
Useful for soft growth and later maintenance. Line wears quickly against pavement and struggles with a compacted root mat.
Half-moon edger and spade
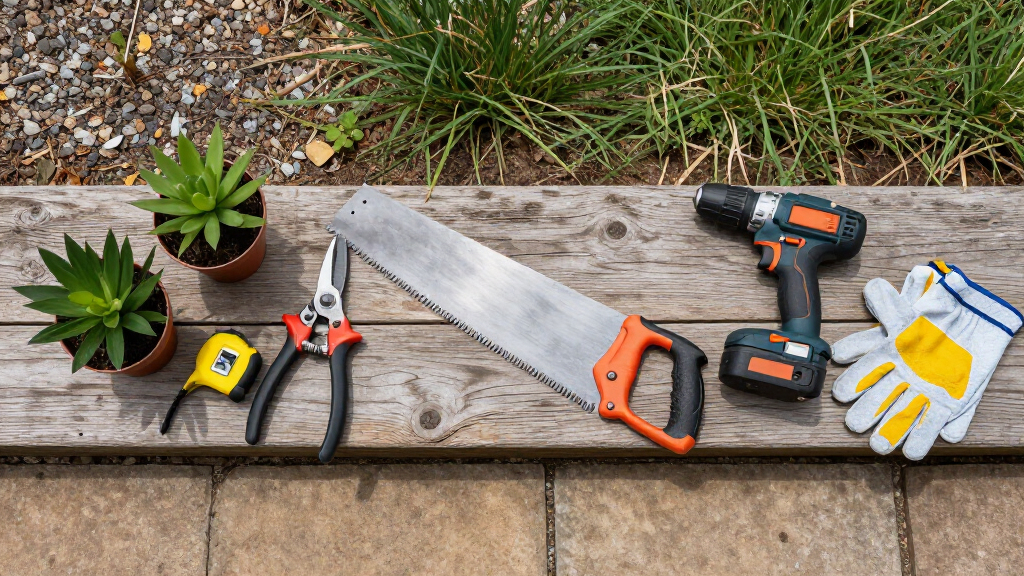
Slower but precise beside crumbly asphalt, gravel, utility boxes, irrigation components and uncertain buried objects.
| Tool | Dense sod | Fragile asphalt | Long run | Primary tradeoff |
|---|---|---|---|---|
| Manual half-moon | Precise and quiet; slow in dry clay or thick roots. | |||
| Dedicated blade edger | Fast, clean trench; can chip edges or throw grit. | |||
| Vertical string trimmer | Convenient for light growth; line wears rapidly. | |||
| Powerhead edger | Strong residential option; attachment balance varies. | |||
| Spade and grub hoe | Lifts root shelves well; needs a finishing pass. |
Build the edge in stages
Treat the marked line as a guide, not a command. If newly exposed pavement consistently falls inside or outside it, stop, probe again and correct the course before deepening.
Inspect
Clear stones, debris and visible hazards.
Probe
Locate the continuous hard boundary.
Mark
Connect reference points smoothly.
Cut twice
Open shallow, then reach root depth.
Remove
Lift sod and sweep away loose soil.
Depth by task
Depth is a target, not a command. Stay shallower wherever buried services, brittle pavement or unknown objects limit safe cutting.
Why two passes win
Protect the surface—and yourself
A rotating blade can turn hidden gravel into flying grit. Slow down whenever resistance changes, switch to hand tools near uncertain objects and keep people clear of the discharge path.
Wear impact protection
Use eye protection, gloves, hearing protection and sturdy closed footwear.
Check the working corridor
Remove stones and identify drains, lighting cable, irrigation, utility covers and invisible-fence wire.
Investigate changed resistance
Do not power through a hard contact. Stop the machine and probe the location by hand.
Find the Real Boundary Before You Cut Away Good Lawn
Cutting a first edge on an overgrown driveway begins with locating the original hard boundary, not guessing where it ought to be. Probe through the turf every few feet, mark the exposed edge, and connect those marks into a smooth line. That ten-minute check prevents a permanently crooked cut and protects sound lawn.
This matters because an overgrown edge contains two different boundaries: the visible edge of the grass and the structural edge of the driveway. The grass line reflects years of spreading roots, trapped soil, mowing patterns, and erosion; it is not reliable evidence of where the pavement ends. Cutting along that false line may leave buried pavement behind or remove healthy turf outside the original footprint. Once sod has been cut away, correcting the mistake means reseeding, patching, or accepting a conspicuous wave.
Start where the edge remains visible, often near the garage apron or street. Push a flat screwdriver, soil probe, or narrow trowel straight down through the grass until you feel concrete or asphalt. Move outward in half-inch steps until the tool drops beside the slab. That small change in resistance tells you where the driveway ends.
Probe vertically rather than sweeping the tool sideways. A sideways motion can slide across the top of pavement, snag a root, or damage a shallow line, making the feedback difficult to interpret. Concrete usually feels like a broad, unyielding stop; compacted soil or a large stone may also feel hard, but repeated probes nearby will not trace the same continuous plane. The pattern matters more than one isolated contact.
Imagine a driveway with only one visible corner. You probe beside that corner, find the slab, then repeat the test at 3- to 5-foot intervals. Soon, little chalk marks reveal that nearly four inches of pavement sit under the lawn. The edge may wander slightly, but your marks keep the new cut tied to the original construction rather than to the uneven grass.
Closer probe spacing provides more certainty around curves, repairs, and transitions, while wider spacing saves time on an obviously straight run. That is the central tradeoff: too few reference points can turn a small irregularity into a long crooked cut, but probing every few inches adds work without improving a uniform edge. Add marks wherever the projected line changes unexpectedly instead of forcing the evidence to fit a perfect geometric line.
Use a taut mason’s string for a straight run or a garden hose for a gentle curve. Mark the line with landscape marking paint only after checking both ends and standing back for a full-length view. A line can look straight at your boots and still carry an obvious wave when seen from the street.
The string and hose solve different problems. String reveals deviations from a straight architectural edge, but it can falsely cut across an intentional curve. A hose follows curves naturally, although small bends can introduce unnecessary wiggles. In either case, the mark is a guide for the first shallow pass, not permission to ignore what the blade or hand tool uncovers. If the exposed pavement consistently falls inside or outside the mark, stop and verify the boundary before deepening the cut.
Do not assume every buried object is driveway. Irrigation heads, low-voltage lighting cable, invisible-fence wire, drain outlets, and utility covers often sit close to pavement. Probe by hand around anything unfamiliar, and call the local utility-marking service before digging where buried services may cross the work area.
As an affiliate, we earn on qualifying purchases.
Choose the Tool That Matches the Roots, Surface, and Runtime
The best tool depends on turf thickness, driveway material, and total distance. A manual half-moon edger handles short or delicate runs, a blade edger cuts mature sod cleanly, and a string trimmer suits light maintenance. For a long neglected boundary, power and control matter more than speed alone.
| Tool | Best use | Main advantage | Main drawback |
|---|---|---|---|
| Manual half-moon edger | Short runs, soft soil, fragile edges | Precise and quiet | Slow in dry clay or thick roots |
| Dedicated blade edger | Dense sod beside concrete or sound asphalt | Clean, repeatable trench | Can chip surfaces or throw grit |
| String trimmer turned vertical | Light growth and later upkeep | Uses a tool you may own | String wears fast against pavement |
| Edger attachment on a powerhead | Medium and long residential runs | Good control without another engine | Attachment balance varies |
| Spade and grub hoe | Root mats, soil shelves, spot repairs | Lifts stubborn material | Leaves a rougher line without finishing |
The table describes more than convenience. Each tool transfers force differently. A blade concentrates force along a narrow rotating edge, which severs roots efficiently but reacts sharply to stones and pavement. Trimmer line yields on contact, making it less likely to chip sound concrete but less capable of cutting a dense root mat. Hand tools are slow because your body supplies the force, yet that direct feedback lets you stop immediately when the material changes.
A blade edger is usually the cleanest choice for a buried concrete edge. Its steel blade severs roots below the surface instead of shredding them. On old asphalt with a crumbly black edge, hand tools offer more control because a spinning blade can knock loose aggregate from an already weak shoulder.
The cleanest cut is not automatically the safest cut. A blade edger earns its advantage only when the pavement supplies a stable guide and the buried zone is reasonably clear. Near a fractured corner, irrigation head, drain fitting, or tapered asphalt shoulder, the same rigid blade becomes a liability. Switching tools for a few feet may feel inefficient, but it preserves material that would take much longer and cost more to repair.
Battery versus gas comes down to workload. A modern cordless edger offers low noise, instant starts, and no exhaust, which feels civilized beside windows and parked cars. A neglected 300-foot drive through dense Bermuda grass, however, can drain batteries quickly; gas provides longer refueling-based runtime but brings fumes, hot surfaces, fuel storage, and more maintenance.
Runtime is not simply a question of distance. Deep roots, dry clay, repeated passes, and frequent starts consume more energy than a light continuous cut. A battery platform makes sense when you already own compatible packs or can finish within their realistic loaded runtime. Gas becomes more attractive when stopping to recharge would split the job across several sessions, although its longer runtime does not justify forcing the blade through obstructions or skipping inspection breaks.
For example, a homeowner reclaiming 40 feet of suburban concrete can often finish with one charged battery and a blade attachment. A property-care crew working around two acres may carry several matched batteries or use gas so the job does not pause at the far gate. Battery is quieter; gas is relentless. That is the honest trade.
Ergonomics also affect the result. A powerful attachment that feels nose-heavy may be harder to hold vertically, producing a trench that widens and narrows as the operator tires. A lighter manual tool may create the better edge on a short run because it remains controllable to the end. Before committing to the full driveway, make a test cut and check whether you can see the guide, maintain posture, and control depth without twisting your wrists or leaning your weight into the machine.
According to Outdoor Pro Masters [1], tool choice should follow both overgrowth severity and driveway construction. Avoid mini-excavators or other heavy equipment unless roots, buried rubble, or failed pavement truly call for excavation. Near utilities, drainage, or structural damage, use an insured professional who can identify what lies below.
As an affiliate, we earn on qualifying purchases.
Set Up the Work Zone So Debris Goes Somewhere Safe
Cutting a first edge on an overgrown driveway safely means clearing stones, controlling the discharge direction, and keeping people well outside the work zone. A spinning blade or trimmer line can turn pea gravel into fast projectiles. Your setup should send dirt and debris away from windows, cars, and bystanders.
The discharge path deserves attention because debris does not always travel in the direction the operator expects. Blade rotation, guard design, tool angle, and contact with an irregular stone can redirect material sideways or backward. Treat the visible spray of soil as only the most likely path, then keep fragile property and people out of the wider surrounding area.
Walk the route before starting. Pick up sticks, wire, glass, loose gravel, sprinkler parts, and anything hidden under the green lip. The surface should be dry enough to see clearly; saturated soil smears across pavement, clogs guards, and makes your footing slick. Lightly damp ground cuts well, but mud does not.
Soil moisture creates a practical tradeoff. Slight dampness softens root-bound soil and reduces dust, but excess water hides the boundary and adds heavy paste to the guard. Very dry soil provides good visibility yet can harden around roots and produce more dust and blade bounce. If footprints fill with water or soil sticks to the shovel in thick sheets, wait; if the blade skates across baked ground, lightly water the area and allow time for moisture to soak in before cutting.
- Wear ANSI-rated eye protection, hearing protection, long trousers, gloves, and sturdy closed-toe boots.
- Keep children, pets, and observers at least 50 feet away, or farther when the equipment manual calls for it.
- Move cars and shield nearby glass when the blade could discharge toward them.
- Inspect the guard, blade fastener, shaft, handle, and battery latch before use.
- Set cones near the street so you do not step backward into traffic.
These controls work together rather than substituting for one another. Eye protection reduces injury if a particle escapes, but it does not make it acceptable to aim debris toward a bystander. A guard limits the normal discharge zone, but it cannot contain every ricochet. Distance, direction, clearing, guarding, and personal protection form overlapping layers for the moments when one precaution is not enough.
Consider a typical gravel-strewn apron after winter. The grass looks harmless, but a rake uncovers three pale stones sitting beside the concrete. Without that sweep, the first blade contact could produce a sharp metallic crack followed by a stone skipping across a car door. Five minutes with a rake saves paint, glass, and nerves.
Street-side work adds another hazard: attention can become fixed on the cutting line while traffic approaches outside your field of view. Work facing traffic when the layout safely permits, avoid stepping backward, and pause when vehicles or pedestrians enter the area. Cones improve visibility, but they do not create a protected work zone or transfer responsibility to drivers.
Before clearing a jam or inspecting a blade, switch the machine off and isolate its power. Remove the battery, unplug a corded tool, or disconnect the spark-plug lead on gas equipment once the engine cools. According to common equipment safety guidance [2], guards should stay installed and damaged blades should be replaced rather than straightened for reuse.
Isolation matters because a stopped blade is not necessarily a safe blade. A cordless trigger can be pressed accidentally while a hand is inside the guard, a gas engine can restart during manipulation, and packed roots can release stored tension as they are pulled free. Wait for every moving part to stop, disconnect the energy source, and use a stick or suitable tool rather than fingers to remove tightly wrapped material.
Never work around a damaged outdoor receptacle, exposed cable, or questionable buried electrical line. Turn off the relevant circuit from a safe location and bring in a licensed electrician. Water, metal tools, and faulty outdoor wiring make a dangerous combination, and local electrical rules still apply.
As an affiliate, we earn on qualifying purchases.
Make the First Cut Without Fighting the Machine
A clean first cut comes from shallow, overlapping passes with the blade held vertical and the guide wheel riding on the hard surface. Follow your marked boundary slowly, let the tool reach working speed, and deepen the trench only after opening the line. You want steady cutting, not a wrestling match.
The first shallow pass has two purposes: it establishes a path the blade can follow and reveals conditions hidden under the turf. Once that narrow seam exists, the blade is less likely to wander across the lawn or climb onto the pavement during the deeper pass. The approach takes another trip along the line, but it trades a small amount of time for greater control, lower motor load, and an opportunity to find stones or weak pavement before the blade reaches full depth.
- Open a test section. Choose two feet of visible edge, set the blade shallow, and confirm which side throws debris.
- Follow the marked line. Move at a walking pace that keeps the motor from bogging or the blade from bouncing.
- Deepen the second pass. Aim for roughly 1 to 2 inches where roots are thick, unless the driveway base or nearby services call for less.
- Lift the severed shelf. Use a flat shovel or grub hoe to peel turf toward the lawn, keeping the pavement exposed.
- Finish the wall. Trim stray roots by hand and rake loose soil away from the driveway.
The 1- to 2-inch range is a functional target, not a rule that every edge must reach. The cut needs to pass through the active mat of stems and roots so the overhanging shelf can separate cleanly. Cutting deeper than that adds little visual benefit and increases the chance of contacting irrigation, wire, aggregate, or the driveway base. If the turf releases at a shallower depth, stop there; if dense roots remain connected, deepen incrementally rather than dropping immediately to the maximum setting.
Listen to the machine. A steady electric hum or even engine note means the blade is cutting. A harsh chatter, repeated kickback, or sudden drop in speed means you are hitting stone, forcing too much depth, or traveling too quickly. Stop, isolate the power, and inspect. The tool should advance under guidance; your arms should not have to drag it through the soil.
Changing only one variable at a time makes the machine’s feedback easier to diagnose. First slow your forward pace. If the motor still labors, raise the blade and reopen the section more shallowly. If chatter remains localized at one point, inspect for stone, concrete, or metal instead of assuming the soil is merely hard. More throttle or body weight may push past the symptom while increasing damage at the cause.
On one neglected 60-foot run, you might start with a dark green mat extending three inches over concrete. The first pass draws a thin brown seam. The second produces a low ripping sound as roots separate, and a flat shovel lifts the turf in heavy strips that smell like wet earth. What looked like organized chaos becomes a pale, straight concrete edge.
Lifting the shelf is part of cutting the edge, not cosmetic cleanup. Until the severed material is removed, you cannot inspect whether roots remain attached, whether pavement has been exposed continuously, or whether the trench slopes toward a vulnerable shoulder. Pull strips toward the lawn so the shovel does not pry against the pavement, and divide heavy mats into shorter sections rather than levering one long piece against the edge.
Keep the blade near vertical. Tilting it under the lawn creates an unsupported lip that breaks later, while tilting it toward the driveway can shave pavement or widen the trench. Cut turf, not concrete; expose the edge, do not carve it. If the blade sparks continuously, stop. Brief accidental contact can happen, but sustained metal-on-pavement contact damages both blade and surface.
A vertical wall also affects how the edge ages. An undercut lawn may look sharp on the day of the job, but the unsupported top collapses under foot traffic, mower wheels, and rain, carrying soil back onto the pavement. An excessively wide trench exposes soil where weeds can germinate and water can concentrate. The durable result is the narrowest cut that cleanly separates roots while leaving the lawn supported.
As an affiliate, we earn on qualifying purchases.
Adjust Your Technique Before Concrete, Asphalt, or Gravel Gets Damaged
Cutting a first edge on an overgrown driveway requires a different touch on each surface. Concrete tolerates a guided blade well, asphalt needs a lighter pass near weak shoulders, and gravel needs hand shaping rather than a rigid pavement-style trench. Match the method to what supports the driveway edge.
The visible surface is only part of the system. Concrete generally carries loads through a rigid slab, asphalt depends more heavily on a compacted base and supported shoulder, and gravel relies on confinement to keep loose stone in place. Removing the same amount of soil beside each surface therefore has different consequences: it may simply expose concrete, destabilize asphalt, or allow gravel to spread.
Concrete rewards a straight guide
Sound concrete gives an edger wheel a firm track, so you can make a clean vertical cut beside the slab. Watch for expansion joints, lifted corners, and spalled areas where the gray surface flakes like stale pastry. At those points, lift the blade and finish by hand rather than striking a broken corner.
Concrete’s rigidity makes the guide wheel stable, but it also means defects can concentrate impact. A rotating blade that catches an intact slab usually wears the blade or leaves a superficial mark; the same contact at a spalled corner can dislodge an already weakened fragment. The practical implication is to use powered equipment for continuity and hand tools for transitions, not to demand one uninterrupted powered pass.
For example, an intact sidewalk-style edge may reveal itself after one pass, while a cracked driveway apron needs a narrow trowel around the damaged section. The powered tool handles the long straight run; the hand tool handles the last six inches. Fast on the open line, gentle at the flaw.
Asphalt needs a softer boundary
Asphalt often tapers at the shoulder instead of ending in a square wall. Do not chase every black stone or cut underneath the edge. Follow the stable top boundary, use a shallow blade setting, and leave supporting soil in place. Removing too much can expose a thin edge that crumbles under tires and winter moisture.
A perfectly vertical cosmetic trench can be the wrong goal beside asphalt. The tapered shoulder may look less precise than concrete, but the surrounding soil helps resist lateral movement and supports the outer portion of the pavement. Preserve that support even if it means leaving a modest soil slope below the visible edge. Structural stability matters more than making asphalt imitate the geometry of a slab.
If your shovel reveals loose aggregate and a hollow beneath the pavement, stop treating the job as simple lawn edging. That may point to washout or base failure. Keep vehicles away from the weak spot and ask a qualified paving contractor to inspect it; edging cannot repair failed support.
Covering the hollow with loose soil or mulch may hide the symptom without restoring compacted support. Water can continue moving through the void, while a tire load above it breaks more of the unsupported edge. Stopping early leaves the defect visible for assessment and avoids turning a landscaping task into a larger pavement repair.
Gravel calls for reshaping, not trenching
A gravel drive has no fixed slab edge for the guide wheel to follow. Rake displaced stone back into the travel lane, cut invading sod with a half-moon edger, and remove the root mat by hand. A power blade hitting loose stone creates noise, chipped edges, and dangerous projectiles.
The boundary of a gravel driveway is partly maintained by the balance between stone depth, compaction, and the adjacent soil. A deep open trench can let edge stones roll outward and collect water, while cutting before raking can bury or discard usable aggregate with the turf. The goal is not a concrete-style slot; it is a stable transition where gravel remains in the drive and roots remain out of it.
Think of a country drive where pale limestone has migrated into the grass. Rake first, and the true boundary appears as a firm change from stone to soil. Then cut the sod. Recover the gravel before removing vegetation, or you will throw useful driveway material away with the roots.
After reshaping, observe the area during the next heavy rain or after several vehicle passes. Fresh stone migrating immediately into the lawn suggests that the edge lacks confinement or that the travel surface is crowned poorly. Repeatedly cutting the grass back will not solve that underlying movement; the gravel profile or edging system may need correction.
Keep the New Edge Sharp With Ten-Minute Maintenance Passes
A reclaimed driveway edge stays clean when you trim it every 4 to 6 weeks during active growth, before roots rebuild a thick shelf. Routine passes need less depth, less power, and far less cleanup than the first cut. The aim is to clip new growth while the boundary remains plainly visible.
The interval is a trigger for inspection rather than a fixed calendar requirement. Warm-season grasses with surface runners can cross the line quickly in heat and rain, while cool, dry, or dormant conditions slow growth. What matters is catching flexible new stems before they trap soil and form a rooted shelf. At that stage, a trimmer can remove growth without reopening a deep trench.
After the initial job, sweep or blow the pavement and remove every strip of severed turf. Leaving damp clumps along the boundary traps soil and seed, which gives new weeds a ready-made bed. Direct a leaf blower away from traffic, people, windows, and gravel beds; lower air speed often gives better control than a full-throttle blast.
Cleanup also lets you inspect the finished grade. Loose soil should not form a ridge against the pavement or leave a depression that holds water. A ridge encourages grass to root across the edge again; a depression can erode the shoulder or create a muddy strip. Redistribute excess soil into low lawn areas only when it will not bury healthy grass crowns.
Imagine checking the edge after a month of warm rain. Fine grass blades lean over the concrete, but the deep root mat has not returned. You turn a string trimmer vertically, walk the line once, and blow away a light green ribbon. The work takes ten minutes instead of the sweaty afternoon that the first cut demanded.
- Trim early when runners begin crossing the boundary.
- Pull isolated weeds before they seed into joints and cracks.
- Keep soil and mulch at least slightly below the pavement surface.
- Check runoff after storms so erosion does not hollow out the shoulder.
- Sharpen or replace worn blades according to the equipment manual.
These checks protect more than appearance. Soil below the pavement surface makes it harder for roots to bridge the boundary, while runoff inspections catch the loss of supporting material before a visible pavement failure develops. A sharp blade cuts roots cleanly and requires less force; a worn blade encourages slower, hotter, and more aggressive contact that can widen the trench or strain the tool.
Be careful with weed controls. Vinegar-based products can burn visible leaves but may also injure nearby lawn, and household vinegar does not magically remove established roots. Corn gluten meal has mixed practical results and can affect wanted seed germination. If you use any herbicide or pre-emergent, read the complete label, follow local restrictions, wear the listed PPE, and keep the product out of drains and waterways.
Chemical control is most useful when it addresses a specific weed problem that mechanical edging cannot manage efficiently. It is not a substitute for restoring the physical boundary: dead vegetation can still trap soil, and underground structures may survive a burned top. The tradeoff is between reduced hand pulling and the risk of harming desirable plants, affecting future seeding, or moving product into runoff, so treatment should remain targeted and label-directed.
A narrow strip of mulch can slow regrowth beside planting beds, but mulch piled against asphalt may hold moisture and hide damage. Near lawn, regular mechanical edging remains the most predictable approach. Maintenance is quiet prevention: a short pass now prevents another buried edge next season.
If maintenance repeatedly takes as much effort as the first cut, look for the cause instead of simply edging more deeply. Soil may be washing onto the driveway, mower wheels may be collapsing an undercut lawn edge, mulch may be migrating, or aggressive turf may need a physical border. Correcting that source can reduce future work more effectively than increasing cutting frequency.
Frequently Asked Questions
How deep should I cut the first driveway edge?
A practical starting depth is about 1 inch, followed by a second pass down to roughly 2 inches where thick roots require it. Stay shallower near weak asphalt, shallow irrigation, wiring, drainage parts, or an uncertain base.
Can I create the first edge with a string trimmer?
You can use a string trimmer held vertically for light overgrowth, but thick sod quickly consumes line and often leaves a ragged trench. For example, a half-inch fringe beside concrete is manageable; a three-inch shelf of compacted roots calls for a blade edger or manual half-moon tool.
Should the ground be wet or dry when I edge?
Work when the soil is slightly damp but not muddy. Damp roots cut and lift cleanly, while saturated soil smears across the driveway and clogs the guard; bone-dry clay can feel like brick and make the blade bounce.
Why does my edger keep bouncing out of the cut?
Bouncing usually means the blade is set too deep, moving too fast, or striking stones. Raise the blade, reopen the line with a shallow pass, and clear hidden debris before trying again. Stop and isolate the power before inspecting the blade or guard.
Will edging damage an asphalt driveway?
A careful shallow pass beside sound asphalt is usually workable, but a spinning blade can break a thin or crumbling shoulder. Use hand tools around loose aggregate, and do not remove soil that supports the pavement edge. Hollow areas or visible washout need attention from a qualified paving contractor.
How often should I edge after making the first cut?
Check the boundary every few mowings and plan a light pass every 4 to 6 weeks during active growth. Fast-spreading grasses may need attention sooner, while dry or dormant lawns may need none. Cut when runners first cross the line, not after soil and roots bury it again.
Conclusion
Find the real edge, then cut it in controlled passes. That single rule protects the lawn, the driveway, and the machine. Probe before digging, clear stones, wear proper PPE, and slow down near cracks, loose asphalt, gravel, wiring, irrigation, or anything you cannot identify. A first edge is excavation in miniature, not ordinary trimming.
Once the heavy strips of turf are gone, guard the result with a short pass every few weeks. You will trade an afternoon of soil, sweat, and snarling roots for ten quiet minutes of maintenance. The reward is easy to see: a clean ribbon of pavement running straight to the street, sharp enough to make the entire property look cared for.
Fall Picks
fall essentials
As an affiliate, we earn on qualifying purchases.