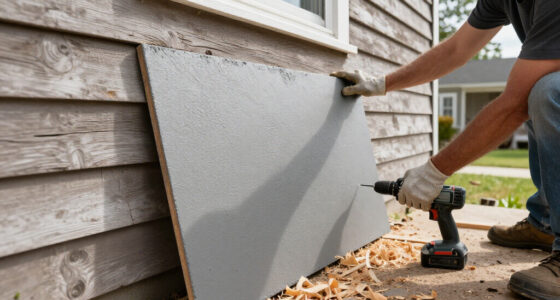

DIY and woodworking turn practical problems into manageable projects. Whether you are repairing a gate, building shelves, improving a garden, organizing a workshop, or preparing equipment for an outdoor job, success usually depends on the same fundamentals: a clear plan, suitable materials, the right tools, and safe working habits.

Get business pricing on tools and workshop supplies
- Business-only prices and quantity discounts
- Tax-exempt purchasing
- Multiple users, one account, clear invoices
This hub is an orientation point for homeowners, makers, gardeners, and outdoor-project enthusiasts. It explains how to plan work, assemble a versatile tool kit, choose materials, improve accuracy, and tackle increasingly ambitious projects. It also connects related Outdoor Pro Masters guides covering workshop-adjacent gear, garden transport, kindling preparation, storage, travel, and work-friendly clothing.
Start With the Project, Not the Tool
It is tempting to buy an impressive tool and then search for reasons to use it. A more reliable approach begins with the intended result. Define what you are building or repairing, where it will be used, how much weight or weather it must withstand, and what level of finish it needs.
Turn the idea into a short project brief. Record the finished dimensions, preferred material, available workspace, budget, and any restrictions. A wall-mounted cabinet, for example, raises questions about stud locations and mounting hardware. An outdoor planter requires attention to drainage, moisture, and material durability. A wheelbarrow ramp needs adequate width, grip, and structural support.
Break the work into stages before purchasing supplies:
- Measure the installation area and identify obstacles.
- Sketch the finished project with its main dimensions.
- Create a cut list and hardware list.
- Identify each operation, such as cutting, drilling, joining, sanding, or finishing.
- Choose tools that match those operations.
- Plan a safe assembly sequence.
This process reduces forgotten materials, incompatible fasteners, and cuts made in the wrong order. It also reveals when a project exceeds your current equipment or experience.
As an affiliate, we earn on qualifying purchases.
Build a Practical DIY Tool Kit
A useful starter collection does not need to fill an entire workshop. Begin with tools that support measuring, fastening, cutting, gripping, and basic maintenance. A tape measure, combination square, level, hammer, utility knife, screwdrivers, pliers, adjustable wrench, clamps, and a dependable drill-driver cover a broad range of household tasks.
Purchase tools according to expected use. A frequently used measuring tool benefits from clear markings and comfortable handling. A specialty tool needed for one project may be better borrowed or rented. Compatibility matters as well: drill bits must suit both the material and the chuck, saw blades must match the machine, and fasteners must be appropriate for the joint and environment.
Hand Tools
Hand tools offer control, portability, and straightforward setup. A handsaw can complete occasional cuts without requiring a dedicated cutting station. Chisels refine joints, remove waste, and clean corners. A block plane can adjust an edge gradually when another saw cut would remove too much material. These tools also teach how grain direction, sharpness, and body position affect the result.
Power Tools
Power tools increase speed, but they do not replace planning or careful layout. For many DIYers, a drill-driver is the natural first purchase, followed by a circular saw, random-orbit sander, or jigsaw according to project needs. Woodworkers who repeatedly make straight, dimensioned cuts may eventually consider stationary equipment, provided they have sufficient space, dust management, and safe electrical capacity.
Some accessories adapt common power tools to narrowly defined jobs. Anyone preparing small firewood pieces can explore the considerations in this guide to drill-powered log splitter bits for kindling. Treat such attachments as task-specific equipment: confirm drill compatibility, read the manufacturer’s instructions, secure the work, and keep hands away from the operating area.
As an affiliate, we earn on qualifying purchases.
Measure, Mark, and Cut Accurately
Accuracy begins before the blade touches the material. Use one measuring reference whenever possible, mark waste sides clearly, and check important dimensions twice. If several components must match, cut them from the same setup or use a stop block rather than measuring each piece independently.
A square helps establish perpendicular lines and check assemblies. A marking knife can create a finer reference than a thick pencil for close-fitting joinery, while a pencil is convenient for general construction. The important point is consistency: know whether your cut should remove, split, or preserve the marked line.
Support the full workpiece during cutting. Long boards can tip, bind, or tear out when their offcuts are unsupported. Sheet goods need a stable surface and a cutting path that will not contact a bench or floor. Before starting a power tool, confirm the blade or bit is secure, the depth is appropriate, and the cord, battery, fence, and clamps will not interfere with the cut.
As an affiliate, we earn on qualifying purchases.
Understand Wood and Sheet Materials
Material choice affects appearance, strength, cost, movement, and finishing. Solid wood has grain direction and expands or contracts as moisture conditions change. Construction lumber works well for many structural and utility projects but may require drying, straightening, or careful board selection. Hardwood is often chosen where appearance, wear resistance, or fine joinery matters.
Plywood is stable and useful for cabinets, jigs, furniture, and shop fixtures. Its exposed edges may be covered with solid-wood edging, edge banding, or trim. Medium-density fiberboard offers a smooth surface for paint and templates but is heavy, creates fine dust, and should be kept away from unsuitable damp conditions. Other engineered panels have their own fastening, finishing, and exposure requirements.
Inspect boards for twist, bow, cup, knots, splits, and damaged edges. Consider how defects will fall within the cut list rather than judging a board only by its full length. Allow material to adjust to the working environment when appropriate, especially before building indoor furniture or fitted components.
As an affiliate, we earn on qualifying purchases.
Choose Joints and Fasteners for the Job
A joint should match the forces acting on it. Butt joints are easy to form but often need screws, nails, brackets, dowels, or other reinforcement. Rabbets and dados increase registration and glue area in cabinets and shelving. Mortise-and-tenon and similar interlocking joints can provide strength in furniture, although they demand more careful layout and execution.
Screws are useful where clamping force, disassembly, or strong mechanical attachment is needed. Nails are efficient for trim, framing, and assemblies where their characteristics suit the load. Adhesive can create strong wood-to-wood bonds when surfaces fit properly and the assembly is clamped according to the product instructions. Exterior projects require fasteners and finishes rated for their exposure conditions.
Dry-fit complicated assemblies before applying glue. Confirm that joints close, diagonals match when squareness matters, and clamps can reach their intended positions. Prepare cauls, protective pads, and cleanup supplies in advance because glue-up is a poor time to redesign the clamping arrangement.
Set Up a Safer, More Efficient Workspace
A good workspace can be a dedicated shop, garage bay, shed, driveway, or temporary bench. It needs stable support, adequate lighting, sensible tool clearance, and a way to control clutter. Keep cutting paths free of cords and offcuts. Store sharp tools so their edges are protected, and separate finishes or chemicals according to their labels.
Personal protective equipment should follow the operation. Eye protection is a baseline around flying chips and dust. Hearing protection is appropriate around loud tools, while respiratory protection should be selected for the dust, spray, or vapor involved. Avoid loose clothing and unsecured hair near rotating machinery. Footwear should provide secure footing and reasonable protection for the environment.
Comfort also affects concentration during long project days. If you move frequently between a workshop, yard, and errands, the guide to knitted sneakers offers a starting point for considering everyday footwear. For hazardous shop operations, however, choose protection based on the actual risk rather than appearance or casual comfort.
Tackle Outdoor and Garden Projects
Outdoor DIY introduces heavier materials, uneven ground, weather exposure, and longer carrying distances. Plan access before materials arrive. Determine where lumber, soil, gravel, or concrete will be staged and how it will reach the work area without damaging paths or creating trip hazards.
A suitable cart or wheelbarrow can reduce repeated lifting during landscaping and hardscaping. The comparison of heavy-duty wheelbarrows for concrete and gravel can help frame questions about capacity, construction, balance, and terrain. Do not assume that a larger load is always better; manageable weight and safe control are more important than filling a tray to its limit.
Garden structures also need seasonal planning. Shade frames, supports, irrigation layouts, and movable containers may help a garden cope with demanding conditions, but each setup should suit the plants and climate. Browse these garden heatwave protection products when planning how tools, structures, and supplies might fit into a broader hot-weather strategy.
Make Storage Part of the Design
Storage is not an afterthought; it determines whether a room, workshop, or garden system remains usable. Build around the items that need to be stored, allowing clearance for handles, lids, ventilation, and removal. Adjustable shelves increase flexibility, while labeled bins make small hardware easier to inventory.
Match containers to their contents and environment. Food storage has different requirements from screw organizers, finish cabinets, or outdoor bins. For an example focused on harvested produce, see the guide to cherry tomato storage containers. It is a useful reminder that ventilation, protection, visibility, and convenient access can matter as much as raw capacity.
Kitchen improvements often blend woodworking, organization, and product selection. Before building dividers, racks, or shelving, review what must fit and how often it is used. The roundup of Williams Sonoma kitchen products can provide context for the shapes and categories of items a kitchen storage project may need to accommodate.
Plan DIY Systems for Travel and Mobile Living
Mobile projects impose strict limits on weight, space, fastening, and access. Storage inside a vehicle must remain secure during movement, and frequently used equipment should be reachable without unloading everything else. Use rounded edges where people move through tight spaces, avoid obstructing safety equipment, and account for ventilation, moisture, and electrical requirements.
For a broad look at vehicles intended for mobile adventures, visit the guide to adventure camper vans. Even if you are modifying an existing vehicle rather than shopping for one, comparing layouts can help you think through sleeping space, storage zones, work surfaces, and gear access.
Traveling with animals adds another design layer. Bowls and bedding need stable, cleanable storage and convenient access at stops. The guide to travel pet bowls and beds can inform the dimensions of a pet station, drawer, or removable travel organizer.
Improve Through Small, Repeatable Projects
Skill develops through repetition. Start with projects that teach one or two core operations: a shop stool, wall shelf, planter box, clamp rack, simple bench, or storage crate. Record dimensions, mistakes, and setup details so the next build benefits from the first.
Evaluate completed work honestly. Check whether the object is stable, square where required, comfortable to use, and suitably finished. Notice which steps caused confusion or delay. A better measuring method, sharper blade, improved jig, or revised assembly sequence may deliver more progress than buying another major tool.
The strongest DIY practice is a cycle: define the need, plan the work, choose appropriate tools and materials, build safely, and learn from the result. With those habits in place, woodworking and home projects become easier to estimate, more satisfying to complete, and increasingly tailored to the way you actually live and work.
Halloween Picks
halloween
As an affiliate, we earn on qualifying purchases.