
TL;DR
Open a free Amazon Business account
Business pricing, bulk buying and tax-exempt orders.
Create a free accountAs an affiliate, we earn on qualifying purchases.
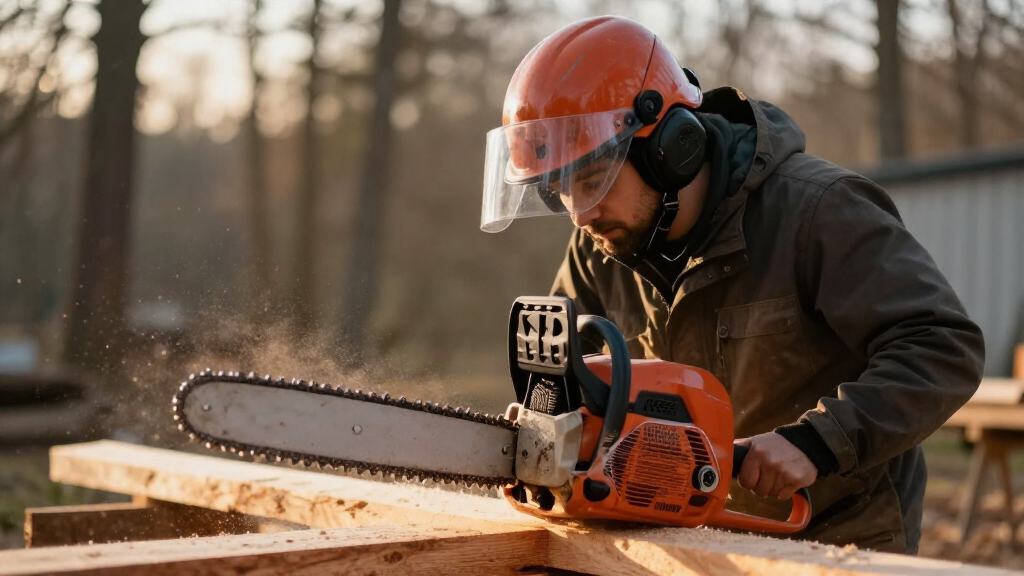
Chainsaw helmet systems combine a hard shell, visor and earmuffs, but they do not replace safety glasses, chainsaw-protective legwear, gloves or suitable boots. The molded date inside a plastic shell usually shows when it was made—not when it expires—so use the model-specific instructions, recorded first-use date, condition and impact history to decide when to retire it.
A clean-looking helmet can be unfit for another cut, even when its shell still shines and its visor has no obvious crack. One hard branch strike, three summers on the rear parcel shelf or a splash of aggressive solvent can leave hidden damage beneath that smooth plastic. When a saw is screaming through dry oak, that is a poor time to discover the difference between tidy gear and sound gear.
You will learn what the shell, visor and earmuffs actually do, where each part falls short and how to interpret the mysterious molded clock inside the shell. You will also see why mesh and clear visors suit different jobs, why published hearing ratings can crumble in the real world and why battery saws still call for hearing protection. The goal is simple: help you inspect the whole setup before fuel, oil and chips start flying.
This matters whether you cut two cords of firewood each winter or clear storm damage across 20 wooded acres. A chainsaw helmet is part of a larger PPE setup, not a force field, and a mismatched visor or poorly sealed muff can create a quiet weak spot. Treat the system like a pickup’s brakes: every part has to work together, and one worn component can spoil the performance of the rest.
Treat the helmet, suspension, visor and earmuffs as one approved system; a part that merely clips on may still interfere with fit or certification.
Wear certified safety glasses or goggles beneath a mesh or open-sided face visor when flying-particle rules or the job hazard call for them.
Read a molded clock as a manufacturing mark unless the model instructions state otherwise, and record the first-use date separately.
Replace any helmet after a major impact and retire shells showing cracks, chalking, brittleness, warping or damaged attachment points.
Check earmuff seals around hair and glasses during actual cutting, including when using a battery-powered chainsaw.
Chainsaw Helmet Systems: Visors, Muffs and the Expiration Date on Plastic
A clean-looking helmet can still be unfit for another cut. Inspect the shell, suspension, visor and earmuffs as one coordinated system—and remember that head, face and hearing protection do not cover every chainsaw hazard.
One system, three jobs
A compatible helmet assembly reduces several hazards at once. It is not a force field: certified eye protection, chainsaw-protective legwear, gloves and suitable boots may still be required.
Shell + suspension
The shell spreads force while the internal cradle maintains energy-absorbing space between the plastic and the head.
Weak point: stretched, torn, reversed or poorly adjusted suspension.Visor
Mesh or clear material deflects chips, sawdust and small debris, but open edges and mesh openings leave exposure pathways.
Weak point: fine particles, side entry, clouding and distortion.Earmuffs
Rated cups reduce hazardous sound only when cushions remain resilient and form an uninterrupted seal around both ears.
Weak point: hair, eyewear, dirt and parked cups.Type I or Type II?
Type I helmets primarily address impacts to the crown. Type II helmets add tested protection against front, rear and side impacts. Standards and workplace rules vary; choose for the actual hazard and jurisdiction.
Mesh or clear?
Choose for the debris, airflow and visibility conditions at the stump. Neither option automatically replaces certified safety glasses or goggles.
Mesh visor
Comfortable in heat, resistant to fogging and effective against coarse wood chips. Fine dust, smoke and liquids can pass through its openings.
Clear visor
A broader barrier against fine sawdust and wind, but polycarbonate can fog, scratch, collect condensation and retain sticky debris.
| Job condition | Mesh visor | Clear visor | Practical choice |
|---|---|---|---|
| Coarse green chips | ✓ Strong airflow | ~ Good coverage; sap may cling | Mesh often improves comfort |
| Fine, dry sawdust | ✗ Particles can pass through | ✓ Better particle barrier | Clear plus suitable eye protection |
| Cold or humid weather | ✓ Usually stays clear | ~ Fog or condensation possible | Balance clarity against debris size |
| Wind across open ground | ✗ Air and grit reach the face | ✓ Better wind protection | Clear visor offers more enclosure |
| Liquid or chemical splash | ✗ Not suitable | ~ Depends on product rating | Use task-rated splash protection |
Ratings begin in the lab. Protection happens at the ear.
NRR, SNR and H-M-L values are controlled-test ratings—not guarantees for a muddy woodlot. Hearing damage is cumulative and usually irreversible.
Clear the hair
Pull long hair away from each cushion.
Check eyewear
Thick temples can open a sound path.
Seat the cups
Move both muffs fully into working position.
Trace the seal
Run a finger around each cushion.
Recheck in use
Confirm the visor does not disturb the fit.
The seal is the hidden variable
Hats, dirt, glasses, facial movement and hardened cushions can reduce delivered protection. Very high exposure may require muffs plus earplugs, but their published ratings cannot simply be added.
Battery does not mean silent
Battery saws may be quieter between cuts, yet chain-on-wood noise can still be hazardous.
Assess cutting noise—not idle noise.Manufacture date is not the same as retirement date.
The arrow-and-clock mark commonly identifies the month and year the shell was molded. It does not establish one universal expiry interval for every helmet.
Use five signals together
Run this seven-point check
A repeatable inspection catches quiet failures before vibration, noise and flying chips make them harder to notice.
Shell
Look for impact marks, cracks, fading, chalking, warping and chemical damage.
Suspension
Confirm correct orientation, secure anchors, adjustment and clearance.
Visor
Replace cracked, cloudy, deeply scratched, bent, loose or distorted parts.
Muffs
Check cushions, cup position, seal, tension and compatible attachment points.
Compatibility
Verify every fitted component belongs to the approved helmet system.
Dates
Review manufacture mark, first-use record and maker’s replacement guidance.
Whole fit
Bend, turn and lower the visor; the helmet should stay stable and sealed.
What One Helmet System Protects—and What It Leaves Exposed
Chainsaw helmet systems are coordinated PPE assemblies that protect your head, face and hearing from several hazards at once. The system normally combines three kinds of protection: a hard shell with suspension, a chip-deflecting visor and rated earmuffs. It does not protect your legs, hands, feet or fully enclosed eye area.
- A hard shell and suspension spread impact energy while holding the shell away from your skull.
- A mesh or clear visor intercepts chips, sawdust and small flying debris before they strike your face.
- Helmet-mounted earmuffs reduce hazardous sound when their cushions seal completely around both ears.
The suspension matters as much as the plastic above it. Think of the gap between shell and head as the crumple space in a vehicle: it gives the assembly room to absorb energy instead of passing the entire blow into you. If the cradle is stretched, torn or fitted backward, the helmet loses part of its protective design, even when the outside looks untouched.
Helmet classifications also change what you get. Type I helmets mainly address blows to the crown, while Type II helmets add tested protection against front, rear and side impacts. On a flat firewood landing, overhead debris may drive your choice; while clearing tangled windthrow, side impacts from spring-loaded limbs deserve more attention.
Vents feel excellent during a humid July cut, when sweat runs down your neck and the air smells of hot pine resin. Yet a vented helmet generally lacks the electrical protection offered by a properly rated non-vented design. If branches touch power lines, stop work and contact the utility or a qualified line-clearance professional; no helmet turns an energized tree into a safe DIY job.
Standards such as ANSI/ISEA Z89.1 in North America and EN 397 in Europe address defined helmet hazards. Arborists may use EN 12492 climbing-style equipment, but climbing and industrial certifications do not cover identical risks. A snug chinstrap helps during aloft work, yet its release behavior and snag risk must match the job, local rules and helmet instructions.
chainsaw helmet with visor and earmuffs
As an affiliate, we earn on qualifying purchases.
As an affiliate, we earn on qualifying purchases.
Choose Mesh or Clear Without Guessing at the Stump
Mesh suits hot, chip-heavy cutting, while clear polycarbonate suits fine dust, wind and smaller particles. Neither visor wins every job, and neither automatically replaces certified safety glasses or goggles. Choose by the debris you expect, then check the certification required where you work, such as ANSI Z87.1, EN 166 or EN 1731.
| Job condition | Mesh visor | Clear visor |
|---|---|---|
| Coarse green chips | Good airflow and low fogging | Good coverage but may collect sap |
| Fine, dry sawdust | Particles can pass through openings | Better particle barrier |
| Cold or humid weather | Usually stays clear | Can fog or bead with condensation |
| Wind across an open field | Air and grit reach the face | Better wind protection |
| Liquid or chemical splash | Not suitable | Protection depends on its rating |
A mesh visor feels almost invisible on a muggy afternoon. Air moves through it, sawdust falls away and your breath does not paint a milky film across the view. But its open weave behaves like a garden fence: it stops the larger pieces while fine dust, smoke and liquid pass through.
A clear visor creates a broader barrier, which helps when you are bucking bone-dry ash and the kerf throws powder like tan flour. The tradeoff appears after twenty minutes: condensation gathers near your nose, scratches catch low sunlight and sticky chips cling to the surface. A cloudy shield can turn a shaded cut into a sharp, gray blur, so replace it before visibility starts changing your stance or sightline.
According to OSHA eye and face protection guidance, workers exposed to flying particles need suitable eye protection, and a face shield commonly works as secondary protection over safety glasses or goggles [1]. Ordinary prescription glasses rarely meet safety-eyewear requirements unless certified for that purpose. Side entry is the weak spot; one ricocheting chip can curl around a visor like rain under a porch roof.
Replace a visor that is cracked, deeply scratched, cloudy, loose or permanently warped. Bent or corroded mesh also belongs out of service. Wash the approved surface with mild soap and water unless the maker permits another cleaner, because strong solvents can weaken polycarbonate without leaving an immediate scar.
chainsaw safety helmet replacement parts
As an affiliate, we earn on qualifying purchases.
As an affiliate, we earn on qualifying purchases.
Get the Rated Hearing Protection You Paid For
Chainsaw helmet systems protect hearing only when the muff cushions form a complete seal and the cups sit in their working position. Published NRR, SNR and H-M-L ratings come from controlled tests, not a muddy woodlot. Hair, glasses, hats, dirt and aging cushions can reduce the protection reaching your ears.
Imagine cutting rounds beside a stone wall with a gas saw at full load. The exhaust note barks, the chain tears through wood and reflected sound comes back hard enough to feel metallic. According to NIOSH, repeated workplace noise above its recommended exposure limits can damage hearing, and that loss is usually permanent and cumulative [2].
Run a finger around each cushion after placing the cups over your ears. Pull long hair clear, check that safety-glass arms lie flat and press the muffs out of their airy parking position. A 3-millimeter gap from a thick glasses temple may look harmless, yet it gives sound a direct path past the soft sealing ring.
Battery saws change the sound pattern, not the need for a noise check. Between cuts, the woods may fall into a clean, bright silence because no engine idles; during a hard cut, chain, sprocket, bar and wood still create hazardous noise. Judge protection during actual cutting, especially when working beside buildings, trailers or other surfaces that bounce sound toward you.
Inspect the cups, attachment arms, foam inserts and sealing cushions before use. Replace cushions that feel hard like stale rubber, show splits or fail to spring back after you press them. If the entire muff assembly droops away when you bend to limb a trunk, the mount or adjustment needs attention.
Warning: For very high exposure, you may need earplugs beneath earmuffs, but you cannot simply add the two printed ratings. Follow local occupational-noise guidance or a workplace hearing-protection assessment.
Communication muffs can help a crew hear speech and radio calls, but the electronics do not replace certified attenuation. Keep volume low enough to recognize machinery and warning calls, maintain the batteries and set a clear crew rule for non-work audio. A podcast playing over a felling signal is not a harmless comfort; it is a distraction beside moving wood.
As an affiliate, we earn on qualifying purchases.
Read the Molded Date Without Retiring Good Gear Too Early
Chainsaw helmet systems do not share one universal expiration date. The molded clock inside many shells usually shows the month and year of manufacture, not an automatic discard day. The correct retirement point comes from the exact model’s instructions, its first-use date, storage limits, physical condition and impact history.
Three time markers cause most of the confusion. The manufacturing date tells you when the shell was made; the service life covers its permitted working period after issue; and shelf life covers approved storage before first use. A maker may place separate limits on each period, so one date cannot answer every question.
Many manufacturers call for replacing plastic shells after roughly three to five years in service, but that range is a common pattern, not a rule for every helmet. One model may allow a longer warehouse period but a shorter working life. Another may require its suspension, sweatband or cushions to be changed sooner than the shell.
Suppose a helmet carries a molded mark for March 2024 but stayed boxed in a cool storeroom until April 2026. You should not blindly add five years to either date. Check the model instructions for total shelf limits, record April 2026 as the issue date if the guidance bases service life on first use and set a planned retirement date from that document.
The expiration date on workplace records should function as an action trigger, not a guess printed with a marker. Record the model, manufacturing mark, first-use date, inspection history and unusual exposures. For a small acreage crew, a durable tag in the PPE cabinet and a matching digital log can prevent two identical orange helmets from trading histories.
If the first-use date is unknown, make a conservative call based on the manufacturing mark, condition and manufacturer guidance. A yard-sale helmet with no instructions and an unknown impact history is not a bargain; it is an unanswered safety question strapped to your head. Replace it with gear whose identity and history you can verify.
chainsaw helmet impact damage repair
As an affiliate, we earn on qualifying purchases.
As an affiliate, we earn on qualifying purchases.
Spot the Abuse That Ages Plastic Faster Than the Calendar
Plastic ages through sunlight, heat, chemicals, impact and repeated stress, so calendar age tells only part of the story. A shell can reach the end of safe service early after hard use or poor storage. Retire it immediately after a major strike, even when the surface still looks smooth and bright.
Ultraviolet light can bleach a vivid red shell toward tired pink and leave a dusty, chalk-like surface. Heat makes matters worse, especially inside a closed truck where summer temperatures climb far above the air outside. Leaving your PPE on the dashboard for months is like slow-roasting the plastic beneath a sheet of glass.
Fuel, chain oil, paint, resin remover, insect repellent and harsh cleaners can attack helmet materials or obscure defects. That does not mean every tiny oil speck ruins a shell, but contamination calls for prompt cleaning by the maker’s method. Use mild soap and water unless the instructions approve something else, then let the parts dry away from direct sun and heaters.
After a falling limb hits the shell, remove the helmet from service. The internal material may have absorbed energy without producing a dramatic crack, much like a car bumper hiding crushed structure beneath glossy paint. No visible damage does not mean no damage, and a helmet is not designed to prove itself twice after a severe blow.
Watch for cracks, deep gouges, dents, chalking, brittleness, warping and damaged accessory slots. Check the cradle and adjustment hardware as well; a sound shell riding on a torn suspension will not sit or absorb energy as designed. If the helmet rocks forward when you bend over a log, fix the fit or retire the failed parts before starting the saw.
Do not drill ventilation holes, engrave the shell, coat it with paint or cover it in unapproved stickers. Solvents and adhesives may affect the plastic, while a wide decal can hide a hairline crack. Skip the old squeeze-and-flex test too; forced bending is not a universal inspection method and may create damage rather than reveal it.
Run This Seven-Point Check Before the Saw Starts
Chainsaw helmet systems stay dependable through a repeatable pre-use check that covers the shell, suspension, visor, muffs, compatibility and dates. The inspection takes about two minutes once you know the sequence. Perform it in good light before gloves, engine noise and a waiting crew pressure you to rush.
- Inspect the shell. Look and feel for cracks, cuts, dents, fading, chalking, deformation and damaged mounting slots.
- Check the suspension. Examine the cradle, sweatband, headband and chinstrap for tears, stretching, contamination or twisted webbing.
- Test every adjustment. Tighten the headband, move the attachments and confirm that each setting holds when you bend and turn.
- Inspect the visor. Check its viewing area, mesh, hinges and locking positions; replace cloudy, bent, loose or cracked parts.
- Test the earmuffs. Examine cups, arms, foam and cushions, then seat them fully over clean, uncovered ears.
- Confirm compatibility. Use only helmet, visor, muff and chinstrap combinations approved by the helmet maker.
- Verify the dates. Read the manufacturing mark, check the documented first-use date and compare both with model-specific instructions.
Take a common Saturday job: you are removing storm-thrown spruce along a half-mile fence. During the check, the left muff arm clicks into place but slowly creeps outward. That small failure changes the day’s plan; replace the approved arm or muff assembly instead of hoping pressure returns once cutting starts.
Component replacement can save serviceable equipment, but the parts must belong together. A visor that physically clips onto a helmet may interfere with a muff arm, prevent full visor closure or fall outside the tested configuration. Fits the slot does not mean approved as a system.
Store the clean assembly dry, shaded and away from fuel cans, pesticides and vehicle heat. Keep the visor lowered or protected from scratching, and do not crush the muff cushions under other equipment. A dedicated cabinet or ventilated gear bag costs little compared with replacing plastic that spent July beneath a black truck window.
For a workplace, log the model, manufacture date, issue date, inspections, impacts, chemical exposures and each component change. If the saw crew shares PPE, hygiene, fit and traceable history all need control; swapping sweatbands may address cleanliness, but it cannot recover a missing impact record. Unknown history calls for a conservative retirement decision.
Reference points: [1] OSHA, eye and face protection requirements and guidance. [2] NIOSH, occupational noise exposure guidance. Your local rules, helmet certification and manufacturer instructions still govern the exact equipment and replacement schedule used on your site.
Frequently Asked Questions
Is the date stamped inside my chainsaw helmet an expiration date?
Usually, no. A clock-shaped stamp commonly identifies the month and year of manufacture. Check the exact model instructions for its allowed shelf life, working life and the date from which each period begins.
How long does a plastic chainsaw helmet last?
There is no universal lifespan. Many manufacturers use a working-life range of about three to five years, but some specify different limits for the shell, suspension and accessories. Impact, UV exposure, chemicals and poor storage can require much earlier retirement.
Does a mesh visor replace safety glasses?
A mesh visor generally does not replace certified eye protection because dust and small fragments can pass through its openings or enter around the sides. Wear approved safety glasses or goggles beneath it when required by the hazard assessment or workplace rules. Ordinary prescription lenses may need certified over-glasses or a prescription safety design.
Is a clear visor always safer than mesh?
No single visor suits every cutting condition. Clear polycarbonate blocks finer debris and wind, while mesh offers better airflow and strong fog resistance. Clear material can fog and scratch; mesh admits fine dust, liquids and very small particles.
Must I replace a helmet after a branch strikes it?
Replace it after a significant strike, even when you cannot see a crack. The shell and suspension may have absorbed damaging energy beneath an apparently normal surface. Record the incident and remove the helmet from circulation so nobody unknowingly wears it again.
Why do my helmet earmuffs sound less effective than before?
The seal may be broken by hair, glasses, dirt, headwear or hardened cushions, or the cups may still be in their ventilation position. Clean and inspect the cushions, move hair aside and press both cups fully into place. Replace split or stiff sealing rings with manufacturer-approved parts.
Do I need hearing protection with a battery chainsaw?
Yes, when actual cutting noise reaches hazardous levels. A battery saw may be quiet between cuts, but its chain, bar, sprocket and contact with wood still generate substantial sound under load. Base your choice on cutting exposure, not the peaceful pause after you release the trigger.
Conclusion
Your safest habit is simple: inspect the complete helmet system before every use, record when it entered service and let the manufacturer’s instructions—not folklore about a stamped date—set its retirement limit. Match the visor to the debris, seat the muffs fully and keep certified eye protection beneath the shield when the hazard or local rules call for it.
If a branch delivers a hard strike, the shell turns chalky or the equipment’s history disappears, retire it without bargaining. Helmets cost far less than hearing aids, eye treatment or a head injury, and replacement takes minutes. Start the saw only when the shell sits steady, the visor gives you a clean view and the muff cushions close around your ears with a soft, even seal.
NFL season / tailgating Picks
team gear
As an affiliate, we earn on qualifying purchases.