
TL;DR
Listen free for 30 days with Audible
Thousands of audiobooks and originals — cancel anytime.
Start your free trialAs an affiliate, we earn on qualifying purchases.
Storm debris cleanup workflow is the sequence of staging zones, tools, and hauling steps you set up before cutting anything: a chainsaw zone, a tarp containment zone, and a cart-to-trailer hauling loop. Proper staging cuts cleanup time dramatically and prevents the injuries that send unprepared homeowners to the ER every storm season.
The morning after a bad windstorm, most people grab a chainsaw and start hacking. By noon they’re exhausted, the yard looks worse, and the brush is scattered across three different corners of the property. The difference between a two-day slog and a half-day cleanup usually isn’t muscle — it’s staging.
After years of clearing downed limbs, snapped fence boards, and the occasional full-grown oak off driveways and fence lines, the workflow that saves your back is always the same: set your zones first, cut second, haul third. Cart, tarp, and chainsaw each have one job, and they only work as a system.
In this guide, you’ll get a field-tested staging plan you can deploy on anything from a suburban quarter-acre to a five-acre rural lot. We’ll cover PPE, zone spacing, tarp dragging technique, battery-versus-gas saw tradeoffs, and a step-by-step order of operations. Safety first — every year, thousands of do-it-yourselfers end up in emergency rooms from storm cleanup injuries, and nearly all of them are preventable.
Set three zones before cutting: chainsaw zone at the debris, tarp containment zone 15–30 feet away, and cart/trailer at the haul-out point — debris should move…
Full PPE is non-negotiable: helmet with face screen, chaps, gloves, hearing protection, and steel-toe boots prevent the leg-laceration and head-strike injuries…
Cut material to fit your cart, not the tree — 4-foot limbs and 16–24 inch trunk sections load cleanly into a typical 10 cu ft cart.
Drag tarps, never carry armloads; a loaded tarp drag moves 80–150 lbs of brush across grass at a fraction of the effort.
Sort debris by type at the pile (brush, clean wood, construction/hazardous) as you haul — municipalities require separated piles, and mixing them delays pickup…
Anything near power lines, over a structure, or requiring cuts above shoulder height is licensed-arborist work — document debris with photos for insurance and…
Storm Debris Cleanup Workflow: Cart, Tarp & Chainsaw Staging
Set your zones first, cut second, haul third. A three-zone staging layout — chainsaw zone, tarp containment zone, and cart loading loop — turns a two-day slog into a half-day cleanup and keeps you out of the ER.
What Staging Actually Means
Staging pre-positions tools, containment gear, and the haul-out path before a single cut. Unstaged cleanup is reactive — you re-handle the same branches two or three times. Staged cleanup is linear: every piece is touched once at the saw, once onto the tarp, once into the cart, once at the pile. In debris work, labor cost is almost entirely handling, not cutting.
Cutting Zone
Chainsaw operates at the downed limbs. Helpers stay behind the operator, never across. Face the cut zone away from other zones on tight lots.
Kickback radius kept clearTarp Zone
Brush and loose debris collect on tarps staged 15–30 feet from the saw. Grommets intact, seams rip-free. Drag tarps — never carry armloads.
15–30 ft from cut zoneCart Loading Zone
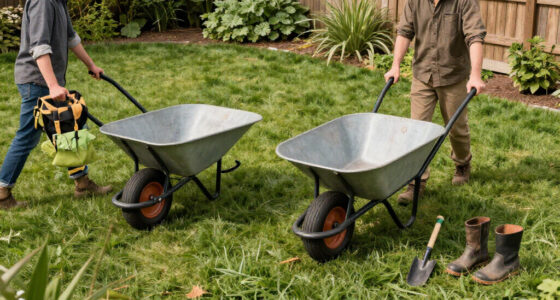
Cart or trailer parked at the gate or curbside pile. Cut material to fit the cart: 4-foot limbs and 16–24 inch trunk sections load cleanly into a 10 cu ft cart.
Tires aired, 20–30 PSIThe 7-Step Cleanup Sequence
Doing these steps out of order is where injuries and wasted hours come from. Run it in exactly this order, every time.
Walk & Assess
Survey the property; spot hanging limbs (widowmakers) and hazards first.
Clear Hazards
Anything near power lines, over structures, or above shoulder height is arborist work.
Set Zones
Saw at the debris, tarp 15–30 ft away, cart at the haul-out point.
Cut
4-foot limbs, 16–24 inch trunk sections. Cut to fit the cart, not the tree.
Drag to Tarp
One touch onto the tarp — a loaded drag moves 80–150 lbs across grass.
Load the Cart
Lift with legs while fresh; material flows one direction only.
Haul & Segregate
Sort at the pile: brush, clean wood, construction/hazardous — municipalities require separation.
Battery vs. Gas: The Honest Tradeoff
A ten-minute equipment readiness check before the first pull: sharp chain, correct tension, full bar oil, clean air filter, fresh fuel mix (under 30 days), or two charged battery packs minimum.
| Factor | Battery Saw (40V class) | Gas Saw (45–60cc) | Best Fit |
|---|---|---|---|
| Max diameter | ~ up to 12 in | ✓ Trunk wood, all-day | Most storm debris is under 12 in |
| Runtime | ~ 20–40 min per charge under load | ✓ All-day with fuel | One afternoon: battery / full tree: gas |
| Noise & maintenance | ✓ Quiet, no fuel mixing | ✗ Loud, mix required | Suburban lots favor battery |
| Weight & handling | ✓ Lighter, easier start | ~ Heavier, more power | Fatigue matters by hour six |
Full PPE Before the First Pull
CDC data shows chainsaw injuries spike after major storms — most commonly leg lacerations and head strikes from spring-loaded limbs. Nearly all are preventable.
Helmet with Face Screen
Blunts head strikes from spring-loaded limbs released under tension.
Chaps or Cut-Resistant Pants
Designed to stop the chain before the leg — the #1 injury in storm cleanup.
Grip Gloves
Grip strength degrades by hour six; gloves maintain control of rope and bar.
Hearing Protection
Sustained saw noise damages hearing fast, especially on all-day jobs.
Steel-Toe Boots
Rolling limbs and dropped trunk sections crush unprotected toes.
Photo Documentation
Document debris for insurance before hauling anything away.
Where the Day Actually Goes
On a typical suburban limb drop, saw work takes 45 minutes. The rest of the day is picking up, carrying, and setting down the same branches — unless staging makes the flow linear.
Quarter-acre lot, two mature maples, straight-line wind event — staged workflow finished in under 4 hours with two people.
Every Piece Moves Once, In One Direction
What Staging Actually Means (And Why It Cuts Your Cleanup Time in Half)
Staging means pre-positioning your tools, containment gear, and haul-out path into three distinct zones before you make a single cut: a cutting zone for the chainsaw work, a tarp containment zone for brush and loose debris, and a cart or trailer loading zone at the haul-out point. But the real point of staging isn’t the zones themselves — it’s that staging forces a decision about material flow before fatigue sets in. Unstaged cleanup is reactive: you cut where you stand, drop brush where you finish, and then spend the rest of the day re-handling the same material. Staged cleanup is linear: every piece is touched the minimum number of times — once at the saw, once onto the tarp, once into the cart, once at the pile.
Why does that matter so much? Because in debris work, labor cost is almost entirely handling, not cutting. The chainsaw work on a typical suburban limb drop takes 45 minutes; the other seven hours of the day is picking up, carrying, and setting down the same branches two or three times each. Skip staging and you’ll walk the same 200 feet forty times carrying one armload per trip — that’s not just slow, it’s how backs get strained on hour six, when judgment and grip strength are already degraded. Stage properly and every piece of debris moves through the system once, in the right direction, while you’re fresh enough to lift with your legs instead of your spine.
Think of it like a kitchen during a dinner rush. A cook with mise en place — everything chopped, measured, and within reach — moves fast and cleanly. A cook hunting for the salt mid-sauté makes a mess. Same kitchen, same ingredients, totally different outcome. The stakes in the yard are higher, though: a cluttered kitchen costs you a burned pan, while a cluttered cleanup zone costs you a trip hazard six feet from a running chainsaw.
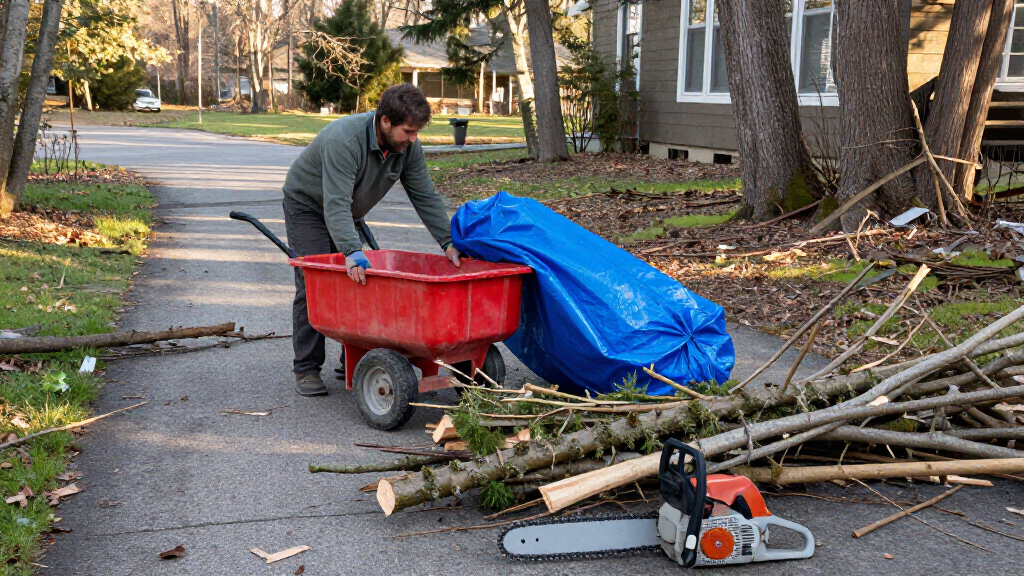
Here’s a real example from a quarter-acre lot after a straight-line wind event: two mature maples dropped limbs across the backyard. Without staging, that’s an 8-hour day of hauling armloads to a curbside pile. With zones set — saw at the downed limbs, tarp staged 20 feet away, cart parked at the gate — the same job took under 4 hours with two people. Same debris, same tools. The workflow did the work.
Zone spacing matters too, and it’s a genuine tradeoff rather than a fixed rule. Keep your cutting zone and your tarp zone 15 to 30 feet apart: closer is easier on your body when dragging, but closer also means the tarp edges, rope, and helper traffic sit inside the radius where a kickback or a rolling limb can reach someone. The 15–30 foot band is the sweet spot — close enough to drag a loaded tarp without resting, far enough that nobody trips over a tarp edge while running a saw. On tight suburban lots where you can’t get full spacing, compensate by facing the cut zone away from the tarp and keeping helpers behind the saw operator, never across from them.
As an affiliate, we earn on qualifying purchases.
Gear Check Before You Cut: PPE, Fuel, and Blade Condition
Before the first pull of the starter cord, run a full gear check: chainsaw chaps or cut-resistant pants, a helmet with face screen, hearing protection, gloves, and steel-toe boots are the minimum kit for anyone touching a saw. According to the CDC, chainsaw injuries spike after major storms, and the most common ones — leg lacerations and head strikes from spring-loaded limbs — are exactly what PPE is designed to blunt. Prioritizing personal safety isn’t caution for its own sake; it’s what keeps you working until the job’s done instead of riding in an ambulance.
Your equipment readiness check should take ten minutes and cover three things:
- Chainsaw condition: sharp chain, correct tension (the chain should snap back into the bar when pulled), bar oil reservoir full, air filter clean.
- Fuel and batteries: gas saws need fresh mix — anything older than 30 days with stabilizer is suspect. Battery saws need two charged packs minimum; a 40V commercial saw runs roughly 20–40 minutes of cutting per charge under load.
- Cart and tarps: tires aired up on the cart (check for a 20–30 PSI rating on small utility carts), tarp grommets intact, no rips along the seams.
That last point about grommets sounds fussy until you’ve dragged a half-loaded tarp across a lawn and had the rope tear through a rotted grommet, dumping a full load of black walnut brush at your feet. Ask me how I know.
Battery versus gas, honestly: a battery saw is quieter, needs no mixing, and handles anything under about 12 inches of diameter — most storm debris fits that. A gas saw, 45–60cc class, is the right call for trunk wood, multiple cords of cutting, or all-day runtime. If your cleanup is one afternoon of limbs, battery wins. If a tree came down across your fence line, gas wins.
As an affiliate, we earn on qualifying purchases.
The 7-Step Storm Debris Cleanup Order of Operations
The right sequence for storm debris cleanup is: walk and assess, clear hazards, set zones, cut, drag to tarp, load the cart, haul and segregate. Doing these steps out of order is where injuries and wasted hours come from. Here’s the workflow as an overview, in the exact order you should run it:
- Walk the property and assess. Look for hanging limbs (widowmakers), downed power lines, gas meter damage, and leaning trees. If you see lines down, stop and call the utility — never approach.
- Clear the hazards you can safely handle. Small ground debris first, so you’re not tripping while working.
- Set your three zones. Cutting zone at the debris, tarp zone 15–30 feet away, cart or trailer at the haul-out point with a clear path between them.
- Cut big material into haulable lengths. Limbs under 4 feet, trunk sections sized to what you can actually lift or roll — usually 16–24 inches for two-person handling.
- Drag brush to the tarp, don’t carry it. Use the tarp as a sled for loose material; bundle the tarp corners and drag to the cart zone.
- Load the cart in layers, heavy on the bottom. Keep loads below the cart’s rim; an overloaded 400-lb-capacity poly cart will tip on any side slope.
- Haul out and segregate by type. Stack clean hardwood for firewood, pile brush for municipal pickup or chipping, and bag anything the city won’t take.
One related tip along with common mistakes: don’t cut first and assess later. Spring-loaded branches under tension can kick violently when cut, and a poorly planned cut sequence leaves you with 6-foot sections that don’t fit in the cart. Measure your cuts against your cart’s bed length — a typical 10 cu ft cart fits limbs up to about 4 feet comfortably.
As an affiliate, we earn on qualifying purchases.
Cart, Tarp, or Trailer? Matching the Tool to the Debris
The right hauling tool depends on debris type: tarps for loose brush and leaf litter, carts for cut limbs and medium material, trailers for trunk wood and volume hauling. Here’s how the three compare on a real cleanup:
| Tool | Best For | Typical Capacity | Key Limitation |
|---|---|---|---|
| Poly yard cart (dump) | Cut limbs, fence boards, bundled brush | 6–13 cu ft, 300–600 lbs | Tips on side slopes if overloaded |
| Tarp (8×10 or 10×12 ft) | Loose leaves, twigs, small brush, dragging loads | ~1 pickup-truck bed per drag | Rips on stumps; useless in high wind |
| Utility trailer | Trunk sections, whole-tree volume | 1–2 cubic yards, 1,000+ lbs | Needs a tow vehicle and access path |
The tarp is the most underrated tool in the kit. Lay it flat in the tarp zone, toss brush on as you cut, then gather the corners and drag, never lift. A loaded tarp can weigh 80–150 lbs — dragging it across grass takes a fraction of the effort of carrying that load in armloads. In windy conditions, though, tarps become sails. Weight the corners with the debris itself as you load, and never leave an empty tarp unsecured in gusts above 20 mph.
On acreage, the cart becomes your shuttle. Run a loop: cut at the tree, fill the tarp, drag to the cart, dump, repeat. When the cart’s full, make the longer run to the trailer or burn pile. On a small lot, you may skip the cart entirely and drag tarps straight to the curb. The principle is the same — debris moves in one direction, never back toward the cutting zone.
As an affiliate, we earn on qualifying purchases.
Chainsaw Safety Zones: The Setup That Prevents Kickback Injuries
A chainsaw safety zone is a cleared, 15-foot-radius work area around every cut, with no bystanders, no trip hazards, and an established escape path at 45 degrees behind you. Most serious chainsaw injuries during storm cleanup happen when someone cuts in a cluttered area with helpers standing too close — the saw kicks back, or the limb rolls, and there’s nowhere to go.
Set your cutting zone like this:
- Clear the ground first. Remove brush and debris within your reach so you’re standing on flat, stable footing.
- Post a 15-foot rule. Anyone not running a saw stays outside that radius. Kickback happens in under a quarter second; nobody reacts that fast.
- Plan your escape path. If a cut limb moves, you move — always at a 45-degree angle away from the direction the wood will fall.
- Never cut above shoulder height. Overhead limbs are a professional’s job, full stop. That’s an arborist with a harness and insurance.
Watch for tension wood — limbs pinned under other limbs or bent against the ground. A limb under tension can snap like a steel spring when cut. Cut from the top of a sagging limb first to release compression, then finish from underneath. If you can’t read the tension, leave it. No branch is worth a fractured wrist.
And if the debris involves anything near utility lines, a leaning tree over a structure, or a trunk thicker than your saw’s bar can reach in two passes — that’s licensed-professional territory. Call a certified arborist. The bill stings less than the alternative.
Disposal and Segregation: Sort It Once, Not Twice
Segregating debris means separating material by type at the pile — clean wood, brush, and mixed or hazardous waste — rather than dumping everything into one mountain you’ll have to pick apart later. The reason is economic as much as tidy: municipalities almost universally require separated piles for storm pickup — brush in one (usually limbs under 4 feet, no thicker than 6 inches), construction debris in another, and appliances or hazardous materials handled separately. Those rules exist because each stream goes to a different endpoint. Brush gets chipped into mulch; clean lumber may be recycled; treated lumber, painted fencing, and pressure-treated boards are often barred from chipping and mulch programs entirely because treated wood contaminates the whole load. Mix a few pressure-treated fence boards into your brush pile and you haven’t just delayed pickup — you may have turned a chipper-bound pile into landfill-bound waste, which some crews will refuse to touch at all.
That’s why the timing of sorting matters more than the sorting itself. Sort as you haul, not after: each cart run goes to a designated pile while the material is already in your hands. Sorting later means paying for every pound of debris twice — once to move it and once to re-identify and re-move it — and it’s always the second handling that gets skipped once you’re tired, leaving you with a mixed pile nobody will take.
Before you burn anything, check local burn bans and permit rules — many jurisdictions prohibit open burning of storm debris entirely, and violations carry real fines. The ban logic is worth understanding: storm debris is rarely fully seasoned, so it burns dirty, and post-storm conditions often mean dry leaf litter everywhere and fire departments already stretched. Better options along with common alternatives:
- Firewood: seasoned hardwood from downed trunks — a single oak can yield a half cord or more. Note the tradeoff: fresh-cut hardwood needs 6–12 months of seasoning stacked before it burns clean, so this is a next-winter resource, not this-weekend disposal.
- Mulch and chips: rental chippers turn brush into usable mulch; many areas have municipal chipper programs. The tradeoff here is handling and machine risk — a chipper rental makes sense at roughly a full pickup load of brush or more; below that, the delivery fee and feed time outweigh the mulch you get.
- Composting: leaves and small material break down fine in a simple three-bin setup, though woody material breaks down slowly — balance it with layered greens or it just sits there.
Keep records too — photos of debris volume and disposal receipts. After declared disasters, FEMA and insurance reimbursement often hinges on documented quantities, because adjusters need evidence of loss, not estimates. Thirty seconds of phone photos per pile can be worth real money — a documented pile of a declared disaster is a reimbursable expense; an undocumented one is just your word.
Your Pre-Storm Staging Kit: What to Have Ready Before the Next One
A pre-storm staging kit is the set of tools and gear you assemble before weather hits, so you’re not fighting the hardware store crowd the morning after. After a major event, chainsaw chaps, tarps, and gas cans sell out within hours — the people who recover fastest are the ones who staged before the radar lit up.
Here’s the kit we keep ready year-round:
- PPE: helmet with face screen, chaps, gloves, hearing and eye protection — stored together in one bin, not scattered across the garage.
- Tarps: two heavy-duty 10×12 ft tarps with reinforced grommets, one for debris, one for covering equipment.
- Cart: a 400-lb-capacity poly dump cart, tires checked seasonally, hitch pin tied to the handle with a short cord so it never walks off.
- Saw supplies: two gallons of stabilized fuel mix (or two charged battery packs), an extra chain, bar oil, and a file kit.
- Rope and bungees: for bundling, tarp dragging, and securing loads.
Battery gear deserves a spot in this conversation. A modern 40V or 80V battery chainsaw stored with charged packs starts on the first trigger pull every time — no stale fuel, no carburetor grief after six months in storage. For the typical homeowner’s storm kit, that reliability is worth more than raw gas-saw power. Keep both if you run acreage; battery for limbs, gas for trunks.
The kit lives on one shelf, in one spot, and everyone in the house knows where. When the sirens fade, you’re working in fifteen minutes.
Frequently Asked Questions
How do I organize debris staging after a storm?
Establish three designated zones: a cutting zone around the downed material, a tarp containment zone 15–30 feet away, and a cart or trailer loading zone at your haul-out point. Clear a path between all three before cutting. Segregate debris by type — brush, clean wood, and mixed waste — as you haul, so piles are disposal-ready from the start.
Should I use a gas or battery chainsaw for storm cleanup?
It depends on the material. A 40V-class battery saw handles most storm debris — anything under about 12 inches in diameter — with 20–40 minutes of runtime per charged pack, and it’s always ready with no fuel maintenance. A 45–60cc gas saw is the better choice for trunk wood, all-day cutting, or multiple trees down. Many rural property owners keep both: battery for limbs, gas for trunks.
What PPE do I need to run a chainsaw during storm cleanup?
The minimum kit is a helmet with face screen, chainsaw chaps or cut-resistant pants, hearing protection, cut-resistant gloves, and steel-toe boots. According to the CDC, chainsaw injuries spike after major storms, and leg lacerations and head strikes from spring-loaded limbs are the most common — exactly what PPE protects against.
When should I call a professional instead of doing storm cleanup myself?
Call a licensed arborist for anything near utility lines, trees leaning on structures, limbs requiring cuts above shoulder height, or trunks under heavy tension you can’t read. Downed power lines are always a utility company call — never approach them. The professional bill is always cheaper than the injury or structural damage a bad cut can cause.
Can I burn or mulch storm debris instead of hauling it?
Check local burn bans and permit rules first — many jurisdictions prohibit open burning of storm debris and fine violators. Cleaner options: season hardwood for firewood, rent a chipper or use a municipal chipping program to turn brush into mulch, and compost leaves and small material. Sorting debris by type at the pile makes every disposal route easier.
Conclusion
If you remember one thing from this, make it this: stage before you cut. The fifteen minutes you spend walking the property, setting your three zones, and checking your gear is what separates a controlled half-day cleanup from a two-day slog with an ER visit in the middle. The cart, tarp, and saw aren’t three tools — they’re one system, and staging is what makes the system run.
Build your kit this weekend, while the sky is still blue. Because the best time to figure out where your tarp grommets are torn isn’t with a maple across your driveway and the whole neighborhood running chainsaws at once.
Fall Picks
fall essentials
As an affiliate, we earn on qualifying purchases.