TL;DR
Open a free Amazon Business account
Business pricing, bulk buying and tax-exempt orders.
Create a free accountAs an affiliate, we earn on qualifying purchases.
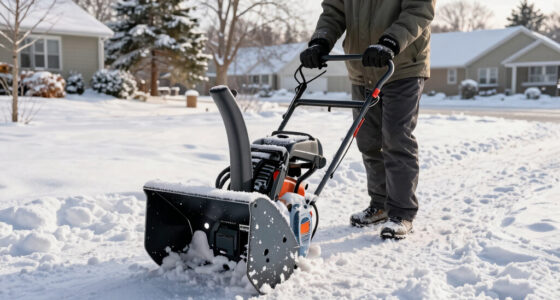
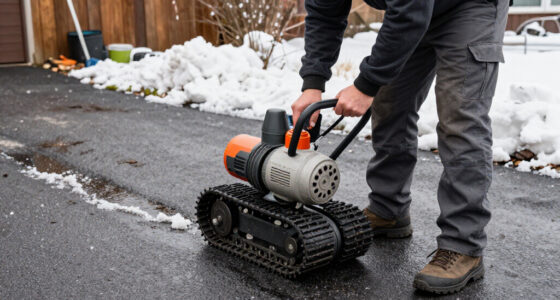
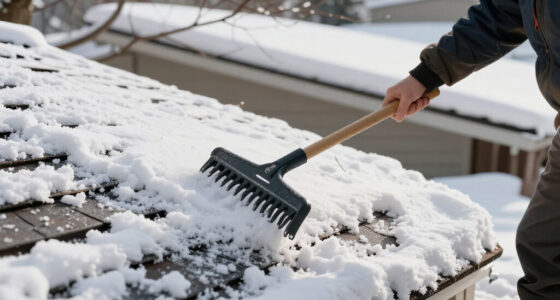
Proper off-season snow blower storage means preparing the fuel system, releasing and inspecting cables, checking paddles and scraper bars, removing salt, repairing chipped paint, and storing the dry machine in its approved position. Gas models need either fresh stabilized fuel or an emptied system as directed by the manual, while cordless models need a removed battery stored indoors at the specified charge.
The first cold snap arrived, the driveway turned white, and a neighbor pulled until his starter cord felt like a steel saw. His snow blower had run perfectly in March, but untreated fuel had spent eight warm months turning sour inside the carburetor. One missed spring chore bought him a repair bill and a shovel workout.
Good off-season storage prevents more than hard starting. It heads off seized controls, cracked rubber parts, corroded augers, damaged batteries, and the orange rust that creeps beneath chipped paint like fire under dry leaves. You will learn what to do with fuel, cables, paddles, metal surfaces, oil, and lithium-ion packs without creating fresh problems along the way.
The right routine depends on whether you own a single-stage gas machine, a two-stage blower for a long gravel drive, or a cordless unit that clears a compact city lot. The manual gets the final say, especially for fuel and battery procedures, so always follow the model-specific instructions. The work usually takes an afternoon; the payoff arrives months later when the machine starts, grips, and throws snow instead of coughing in the garage.
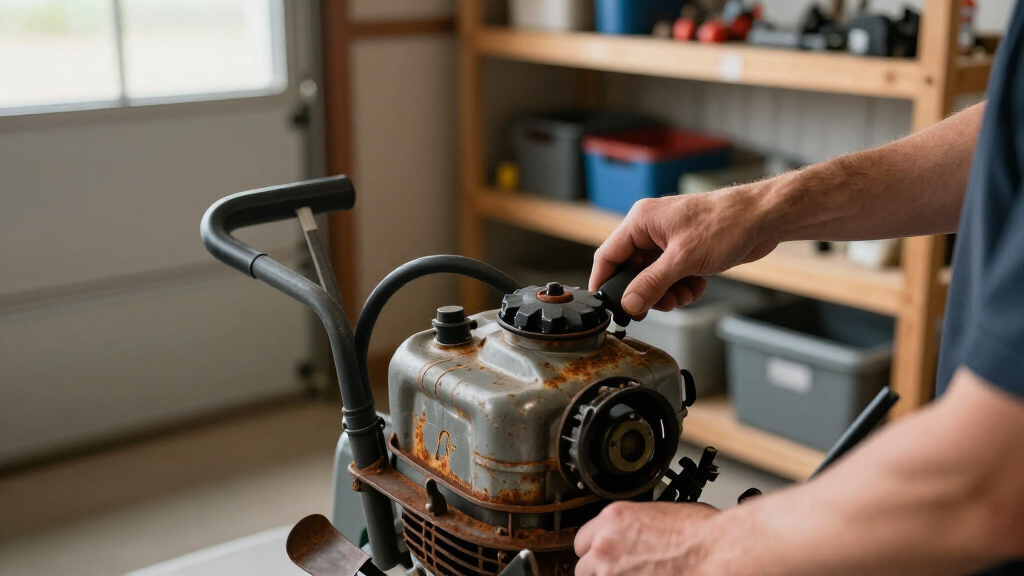
Prepare the entire fuel system as the manual directs; draining the tank while leaving untreated gasoline in the carburetor does not solve the storage problem.
Release control levers, inspect cable housings and ends, and keep lubricant away from belts, friction wheels, brake parts, and traction surfaces.
Replace worn single-stage paddles as a matched set when specified, and inspect the scraper bar during the same service.
Remove salt, dry seams fully, repair paint chips, and use a breathable cover only after the machine is completely dry.
Remove cordless batteries and store them indoors at the maker’s specified charge and temperature, never fully depleted or attached to an unapproved charger.
Fuel, cables, paddles and rust.
One missed spring chore can turn the first snowfall into a repair bill and a shovel workout. Proper storage protects the fuel system, frees the controls, preserves wearing parts and stops corrosion before eight warm months amplify the damage. The owner’s manual always gets the final say.
Choose one complete fuel strategy.
Gasoline loses volatility as it oxidizes and may leave sticky deposits in fine jets and passages. Ethanol blends can absorb water, increasing corrosion and phase-separation risk. Stabilizer is preventive—it cannot restore gasoline that is already stale, cloudy, sour-smelling or separated.
Fresh stabilized fuel
Best for models whose manuals call for treated gasoline during storage.
- Add the measured dose to fresh, approved fuel.
- Run the engine long enough to circulate it.
- Close the fuel valve when the procedure requires it.
- Do not overdose; more provides no extra benefit.
Empty fuel system
Best for models with a manufacturer-approved tank and carburetor drain procedure.
- Pump or drain the tank safely.
- Empty the carburetor bowl or run dry only as directed.
- Recycle unwanted gasoline through an approved service.
- Inspect the cap, lines, primer bulb and grommets.
Draining only the tank does not solve the problem if untreated gasoline remains in the carburetor. E15 and E85 are generally unsuitable for conventional small engines unless expressly approved.
Cold engine. Open air. No ignition source.
Wear eye protection and fuel-resistant gloves. Keep gasoline away from heaters, pilot lights, flames, sparks and hot engine parts.
Check manual
Confirm fuel grade, ethanol limit and the specified storage method.
Assess fuel
Fresh fuel may be stabilized; stale or separated fuel must not be “rescued.”
Treat or empty
Complete the selected procedure through the tank and carburetor.
Inspect seals
Replace hardened bulbs, cracked lines and leaking grommets before winter.
Free the controls now.
Remove the ignition key and disable the machine: disconnect the spark-plug wire, remove the battery or unplug the cord. Release every lever, then confirm each control moves smoothly and returns fully.
Follow every cable
Run your fingers from lever to linkage. Look for cracks, kinks, crushed housings, abrasion, rust and hidden bends beneath the console.
Release and return
Check traction, auger, chute and deflector controls. An overtightened cable can leave the drive or auger partially engaged.
Lubricate selectively
Use only the specified product on approved pivots, ends, chute gears and linkages. Replace frayed or seized cables instead of taping them.
Catch worn paddles before they leave a white stripe.
Single-stage rubber or reinforced-polymer paddles must sweep close to the pavement. As diameter and grip decline, throwing distance falls and a ribbon of snow remains behind—ready to glaze into ice.
Inspect cracks, missing chunks, exposed reinforcement, uneven wear and model-specific wear indicators. Replace paddles as a matched set when specified, and inspect the scraper bar during the same service.
Even edges, intact reinforcement and clearance within specification.
Reduced sweep, uneven contact or a scraper bar approaching its limit.
Cracks, exposed fabric, missing material or wear marks at replacement point.
| Inspection point | Single-stage | Two-stage | Cordless note |
|---|---|---|---|
| Paddles | ✓ Primary wear item | ~ Usually metal augers | Disable by removing battery |
| Scraper bar | ✓ Inspect with paddles | ✓ Check edge and height | Use model wear limit |
| Shear pins / skid shoes | ✗ Usually not applicable | ✓ Essential inspection | Architecture dependent |
| Gearbox leakage | ~ Model dependent | ✓ Inspect seals and housing | Seek qualified service if found |
Break the salt-to-rust chain.
Salt and trapped moisture attack seams, fasteners, auger housings and exposed steel. Cleaning is only the beginning: the machine must be completely dry before paint repair, covering or storage.
Remove residue
Clear compacted snow debris, road salt and grit from the housing, chute, seams and hardware.
Open the seams
Let hidden pockets, joints and folded areas dry fully. Trapped water defeats the cleaning work.
Seal paint chips
Remove loose corrosion and repair chipped coating with the manufacturer-approved finish.
Let it breathe
Use a breathable cover only after the machine is completely dry and in its approved position.
Off-season storage in seven moves.
Follow model-specific oil, fuel, folding, orientation and lithium-ion storage requirements. Keep batteries indoors at the specified charge and temperature—never fully depleted or attached to an unapproved charger.
Choose the Fuel Method That Prevents a Dead First Start
Your off-season snow blower storage should use one of two approved fuel methods: circulate fresh stabilized gasoline through the system, or empty the tank and carburetor as the manual directs. The wrong middle ground is draining only the tank while untreated gasoline remains trapped in the carburetor for months.
| Storage method | What you do | Best fit | Main mistake |
|---|---|---|---|
| Stabilized fuel | Add the measured dose to fresh approved gasoline, then run the engine long enough to circulate it. | Models whose manuals call for treated fuel during storage. | Adding stabilizer to fuel that is already stale. |
| Empty system | Pump or drain the tank, then empty the carburetor or run the engine dry only when directed. | Models with an approved drain procedure. | Leaving untreated fuel in the bowl or passages. |
Stale fuel is gasoline that has lost useful volatility and begun leaving sticky deposits in fine jets and passages. Ethanol blends can absorb moisture, which adds corrosion and phase-separation risk. According to Outdoor Pro Masters [1], stabilizer is preventive; pouring it into sour-smelling, cloudy, or separated gasoline does not turn the clock backward.
Suppose you have half a tank left after the final storm. If the manual specifies stabilization, measure the product for the actual fuel volume, add it to fresh gasoline, and run the engine for the stated time so treated fuel reaches the carburetor or injection system. More stabilizer is not better, and E15 or E85 is generally unsuitable for conventional small engines unless the manufacturer expressly approves it.
Gasoline safety: Work outdoors with a cold engine, wear eye protection and fuel-resistant gloves, and keep fuel away from pilot lights, heaters, flames, and sparks. Take unwanted gasoline to an approved hazardous-waste or fuel-recycling service.
Inspect the fuel cap, lines, primer bulb, and grommets while the tank is accessible. A primer bulb that feels hard like old plastic, or a line with hairline cracks at the fitting, can leak next winter. Close the fuel valve when the manual calls for it, and never store the machine beside an ignition source.
As an affiliate, we earn on qualifying purchases.
Free the Controls Now So They Do Not Bind in January
Off-season snow blower storage protects cables by leaving control levers released, checking every housing and end fitting, and lubricating only the points named in the manual. An overtightened or oily cable is not extra protected; it can bind, attract grit, or leave an auger or drive partly engaged.
Start with the ignition key removed and the engine cool. Disconnect the spark-plug wire on a gas model, or remove the battery and unplug a corded machine. Wear work gloves and eye protection, then squeeze each traction, auger, chute, and deflector control; it should move smoothly and return fully when released.
- Trace each cable housing from lever to linkage, looking for cracks, kinks, abrasion, rust, and crushed sections.
- Check exposed strands for fraying or broken wires; replace damaged cables instead of wrapping them with tape.
- Lubricate approved pivots, cable ends, chute gears, and linkages with the specified product.
- Keep oil away from belts, pulleys, brake parts, friction wheels, and rubber drive discs.
On one acreage machine, the chute lever may move freely while a hidden bend under the console pinches its cable every time the handle folds. Follow that cable with your fingers before storage. That five-minute inspection can save a cable and your temper when a northeast wind packs snow against the barn.
Do not force heavy oil into a sealed or lined cable unless the manufacturer calls for it. Some liners swell or collect grit after the wrong lubricant goes inside. If adjustment requires removing guards near belts or drives, follow the service procedure; for damaged electrical controls or wiring, use a qualified service technician rather than improvising a bypass.
snow blower control cable replacement kit
As an affiliate, we earn on qualifying purchases.
As an affiliate, we earn on qualifying purchases.
Catch Worn Paddles Before They Leave a White Stripe Behind
Your off-season snow blower storage inspection should replace single-stage paddles when they show cracks, missing chunks, exposed reinforcement, uneven wear, or a wear indicator at its limit. Inspect the scraper bar at the same time, because both parts work against the same gritty pavement and often wear together.
A healthy single-stage machine sweeps close to the surface and feeds snow into the housing. Worn paddles lose diameter and grip, so throwing distance drops and a pale ribbon of snow stays behind. On a 60-foot driveway, that thin residue can glaze into ice after one sunny afternoon and a hard overnight freeze.
- Look for splits, missing pieces, and exposed fabric or reinforcement.
- Compare each paddle with the model’s wear holes, marks, or minimum dimension.
- Check for one side wearing faster, which can point to uneven contact or damaged hardware.
- Replace paddles as a matched set when the manufacturer specifies it.
Mixing one new paddle with one badly worn paddle is like putting one fresh boot and one worn slipper on a runner. The rotor can become unbalanced, shaking the handle and loading bearings with every revolution. Matched replacement parts restore even contact and keep the machine from rattling across the pavement.
A two-stage season snow blower usually has metal augers rather than rubber paddles that sweep the ground. Check those machines for bent flights, missing or incorrect shear pins, gearbox leakage, worn skid shoes, and scraper-bar damage. Never put your hands near an auger or impeller until you have removed the key and disabled the power source; packed debris can hold spring-like tension even when the engine is off.
As an affiliate, we earn on qualifying purchases.
Stop Salt and Moisture Before Rust Takes the Housing
Off-season snow blower storage stops rust when you remove salt and debris, dry the machine fully, clean loose corrosion, repair chipped paint, and protect approved bare metal. Washing alone is not enough. Water trapped beneath a cover or inside a seam can feed corrosion all summer.
- Disable the machine. Remove the key and battery, unplug a corded model, or disconnect the spark-plug wire as directed.
- Brush away packed debris. Clear the housing, chute, frame, wheels, and accessible auger surfaces with gloves and a stiff nylon brush.
- Rinse with control. Use a damp cloth or gentle water flow without blasting bearings, seals, connectors, engine openings, or the carburetor.
- Dry every seam. Let the machine air-dry in a ventilated spot, then wipe bolt heads, folds, and chipped areas.
- Repair and protect. Brush away loose rust, apply compatible primer and paint, then use the approved corrosion protectant on exposed metal.
Think of rust prevention as building a seawall. Cleaning removes the salt tide, drying closes its channel, paint forms the wall, and a light protective film guards the exposed gates. Miss one break in that barrier, and orange staining can creep beneath the finish from a chip no wider than a grain of rice.
A blower used beside a salted road needs closer attention than one clearing clean powder on a rural lane. Salt hides around fasteners, welds, scraper mounts, and chute seams, where a pressure washer can drive water farther inside. Controlled cleaning takes longer, but it protects bearings and electrical connections from a needle-hard jet.
Keep corrosion spray and lubricant off belts, brake surfaces, handles, tires, friction discs, and traction surfaces. Slippery drive parts can create poor control or unwanted movement.
Surface rust can often be cleaned and coated. Perforated steel, cracked welds, deep structural corrosion, or a badly weakened auger housing calls for professional assessment before use. A thin housing spinning an auger under load is not a sensible place for a casual patch.
As an affiliate, we earn on qualifying purchases.
Give the Engine and Drive System a Clean Summer Break
A reliable spring service checks oil, spark plug, belts, shear pins, tires, and fasteners before the machine disappears behind lawn furniture. Completing scheduled maintenance before storage removes contaminants and exposes small defects while parts are easy to order, rather than during the first heavy snowfall.
Used engine oil can carry combustion byproducts and fine debris. If the service schedule calls for a change, warm the engine only as directed, shut it down, let hot parts cool, and drain the oil into an approved container. Refill with the specified viscosity and quantity, then verify the level on flat ground using the manual’s dipstick procedure.
Do not tip a gasoline machine onto whatever side looks convenient. Fuel or oil can run into the cylinder, intake, carburetor, or muffler, causing smoke, leakage, or internal damage later. Use only the approved service position, and wear gloves and eye protection when working below guards or near sharp housing edges.
Imagine finding an ordinary hardware-store bolt where a shear pin belongs. That harder bolt can pass shock into a gearbox when the auger catches a frozen newspaper, turning a cheap sacrificial part into an expensive repair. Fit only the specified shear pins, torque loose hardware to the listed value, and inspect belts without coating them in lubricant.
Check tire pressure against the machine specification; a difference of only a few PSI can make a two-stage blower pull sideways under load. Many snow engines do not use a conventional air filter, so do not invent one or pack an intake with foam. Clean the muffler area, inspect the spark plug on schedule, and leave ventilation and exhaust openings clear even when adding rodent protection.
Store a Cordless Battery Without Sacrificing Next Winter’s Runtime
Battery snow blower storage starts by removing the pack, drying the compartment and contacts, and keeping the battery indoors at the manufacturer-specified charge. Choose a cool, dry, frost-free location away from direct sun, heaters, and combustible materials, then check it only as often as the manual recommends.
Cordless machines skip gasoline, carburetors, and oil changes, but they do not skip wear or corrosion. You still need to inspect paddles, cables, scraper bars, fasteners, and metal surfaces. The tradeoff is plain: you exchange fuel-system work for disciplined battery care and may need multiple packs to cover a long drive or wet, dense snow.
For example, leaving a lithium-ion pack in a sun-baked shed can expose it to temperatures far beyond a comfortable indoor room. Leaving it empty after the final storm is also poor practice because lithium-ion batteries generally should not sit fully depleted for months. According to battery guidance summarized by Outdoor Pro Masters [2], the maker’s storage-charge range and temperature limits should control your routine.
Do not use or charge a battery that is swollen, cracked, wet, leaking, unusually hot, or physically damaged. Move away from combustible material only when you can do so safely, avoid touching leaked material, and contact the manufacturer or local hazardous-waste authority for handling instructions. Use only chargers and packs approved for that tool system.
Before electrical inspection, unplug corded equipment and remove batteries. If a garage outlet, breaker, cord, or charger shows burning, melted insulation, repeated tripping, or exposed conductors, switch the affected circuit off at the breaker and call a licensed electrician. Electrical repairs must meet local code and permit rules; PPE does not make live work safe for an unqualified owner.
Pick a Storage Spot That Does Not Undo Your Work
The best storage spot is dry, ventilated, secure, and free of corrosive chemicals, with the snow blower resting in its normal approved position. Keep it away from fertilizer, pool chemicals, road salt, ignition sources, and damp concrete corners, and use a breathable cover only after every surface is dry.
A tight plastic tarp can turn a clean machine into a small greenhouse. Warm daytime air carries moisture under the sheet, cool nights condense it onto steel, and the cover holds those droplets against bolt heads and paint chips. A breathable fitted cover lets residual moisture escape while keeping dust off the controls.
Keep the blower upright unless the manufacturer specifically approves folding or vertical storage. A compact machine may have a designed storage position with seals and balance points built around it; a conventional gas model may leak oil or fuel when stood on end. Vertical-storage approval is model-specific, not a shortcut you can safely copy from another machine.
One common garage scenario is a folded handle wedged behind bicycles. If the fold traps a chute cable in a sharp bend, that neat footprint can buy you a seized or kinked control. Guide cables into a broad, relaxed curve, stabilize the machine against rolling, and keep children from reaching keys, fuel valves, or starter controls.
Before the first forecasted storm, uncover the blower in daylight and inspect for leaks, nests, chewed wires, loose hardware, and flat tires. Install or charge the battery, add fresh approved fuel where needed, verify the oil level, and test the machine outdoors. A ten-minute trial on a clear afternoon beats diagnosing a no-start machine while six inches of wet snow pile against the garage door.
Frequently Asked Questions
Should I drain the gas or add fuel stabilizer?
Either method can be correct, depending on the owner’s manual. The goal is to prevent untreated gasoline from sitting in the tank, carburetor, or injection system for months; do not drain only the tank and assume the carburetor is empty.
Can I add stabilizer after the gasoline has gone stale?
No. Stabilizer slows the breakdown of fresh fuel, but it cannot reverse oxidation, deposits, moisture contamination, or phase separation. Dispose of questionable gasoline through an approved local service.
Can I pressure-wash my snow blower before storage?
Controlled rinsing and hand cleaning are safer than a concentrated pressure-washer jet. High-pressure water can push moisture into bearings, seals, electrical connectors, engine openings, and fuel-system parts, creating corrosion where you cannot see it.
How do I know when rubber paddles need replacement?
Replace paddles when you find cracks, missing material, exposed reinforcement, uneven wear, or reached wear indicators. Poor pavement contact and shorter throwing distance are practical warnings, but the manufacturer’s dimension or wear mark sets the replacement point.
Should a cordless snow blower battery stay on its charger all summer?
Leave it connected only when the manufacturer expressly approves long-term charger maintenance. Otherwise, remove the pack and store it at the specified charge level in a cool, dry, frost-free room, checking it at the intervals listed in the manual.
Can I store my snow blower vertically?
Store it vertically only if that exact model is designed and approved for the position. An unapproved orientation can move fuel or oil into the wrong places, strain cables, create leaks, or make the machine unstable.
Is ethanol-free gasoline automatically safe for long storage?
Ethanol-free fuel reduces some moisture and phase-separation concerns, but gasoline still degrades with age. It must meet the engine’s required octane and fuel specifications, and you still need to follow the prescribed stabilization or empty-system procedure.
Conclusion
The rule that matters is simple: store each system on its own terms. Fuel needs an approved plan, cables need free movement, paddles need measured wear limits, steel needs clean and dry protection, and batteries need controlled temperature and charge. Good end-of-season storage prevents a small spring shortcut from becoming a cold-weather repair when your driveway is already disappearing.
Set aside one dry afternoon, open the manual, wear the right PPE, and work from the tank to the handle instead of tossing a tarp over the machine. When the first flakes hiss across the pavement next winter, your snow blower should answer with a clean start, a smooth control pull, and a strong white arc from the chute. That sound is summer work paying you back.
College move-in / dorm season Picks
dorm essentials
As an affiliate, we earn on qualifying purchases.