
TL;DR

Get business pricing on tools and workshop supplies
- Business-only prices and quantity discounts
- Tax-exempt purchasing
- Multiple users, one account, clear invoices
Loading trimmer line without tangles comes down to choosing the right line, winding it tightly and in the correct direction, and securing it properly. Modern tools and spool designs simplify this process, boosting your efficiency.
Nothing kills your trimming flow faster than a tangled mess of line. You’re ready to clear some weeds, and suddenly, the line unwinds or knots up, wasting your time and testing your patience. But here’s the truth: most tangling happens before you even start trimming. It’s all about how you load that spool.
If you want a clean cut without constant stops, you need a straightforward method to load your trimmer line properly. This guide walks you through proven techniques, modern innovations, and simple tips to keep your line tangle-free from the moment you load it to the last cut.
Choose the correct line diameter and type for your trimmer to prevent unnecessary tangles.
Wind the line tightly and evenly in the direction indicated by the spool—practice makes perfect.
Follow the manufacturer’s instructions carefully, especially when threading and securing the line.
Use modern tools or pre-wound spools to simplify the loading process and avoid mistakes.
Regularly check your winding technique to catch and fix tangles before they happen.
Load the spool cleanly before the yard fights back.
Most trimmer line tangles are created before the first weed is cut. The fix is simple: match the line to the tool, wind in the marked direction, keep firm even tension, and lock the tail so the spool feeds without knots, loops, or mid-yard stops.
Incorrect winding causes over 80% of line tangles during trimming.
Choose the line that your spool actually wants.
Wrong diameter or line type makes the spool behave badly: it slips, stacks unevenly, binds in the housing, or overloads the motor. The manual is the starting point, not a suggestion.
Match the printed spec.
Too thin can break and feed unpredictably. Too thick can strain the motor and create rough, uneven winding.
Use smooth, quality line.
Nylon and multi-filament options wind more cleanly when they suit the trimmer head and are not kinked from poor storage.
Avoid overloading.
Stuffing too much line onto the spool creates pressure, crossing, and feed jams. Use the length recommended for the spool design.
Five moves, one clean feed.
Think of loading trimmer line like winding a hose: firm, even, parallel coils. Slack and crossing are the enemies; direction and tension are the control points.
Check the spool arrow
Start in the direction marked on the spool body.
Anchor the line
Seat it in the starter hole, notch, or center channel.
Wind with tension
Keep firm pressure so each wrap lies flat beside the last.
Thread the eyelet
Leave 6 to 8 inches outside the spool housing.
Lock and test
Use tabs or clips, then tug lightly before trimming.
Where tangles begin.
The largest risk comes from winding errors, but line mismatch, excess tail, and skipped securement all add friction to the system.
Tangle Risk by Cause
Relative contribution based on common troubleshooting patterns and loading failure points.
Line Fit Spectrum
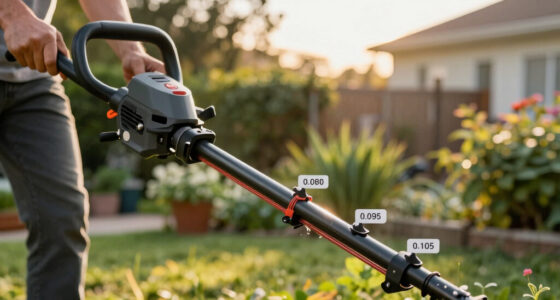
The sweet spot is the diameter range printed for your trimmer head, not the thickest line on the shelf.
Manual winding versus modern shortcuts.
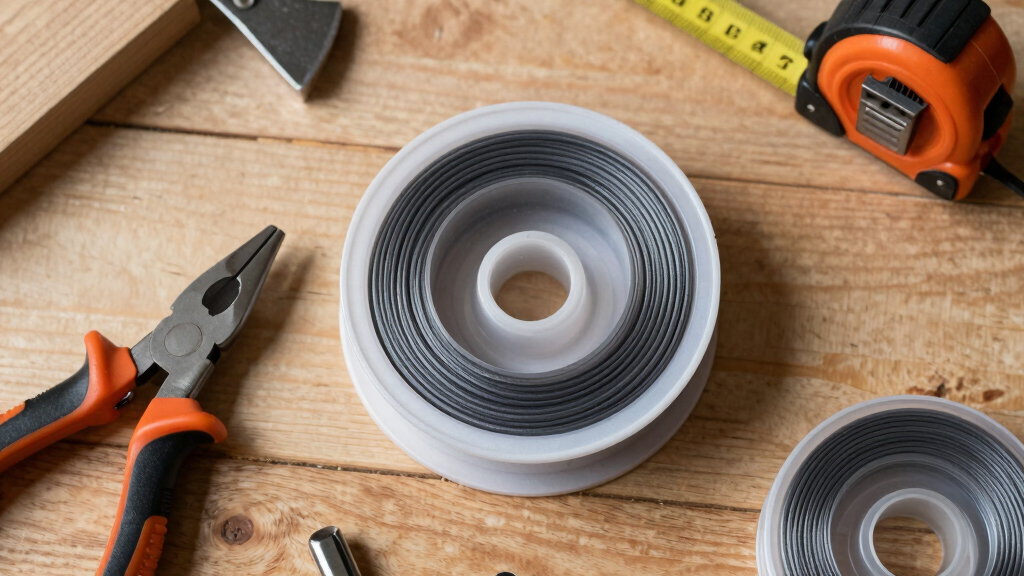
Pre-wound spools, quick-load heads, and winding tools reduce mistakes. Manual loading still works beautifully when you control direction, tension, and securement.
| Method | Tangle Control | Speed | Cost | Best Use |
|---|---|---|---|---|
| Manual spool winding | ~ | ~ | ✓ | Users comfortable following the spool arrow and keeping steady tension. |
| Spool winder tool | ✓ | ✓ | ~ | Fast, repeatable loading with cleaner wrap spacing. |
| Pre-wound spool | ✓ | ✓ | ✗ | DIYers who want fewer loading errors and quicker swaps. |
| Auto-feed quick-load head | ✓ | ✓ | ✗ | Frequent trimming where downtime matters more than accessory cost. |
Small upgrades that make loading calmer.
A clean load does not require a workshop. The most useful helpers are the ones that improve tension, reduce friction, or make the correct pattern visible.
Use a winding aid.
A spool winder holds the head steady so the line lays down in tight, even rows instead of crossing over itself.
- Keep the spool fixed while both hands guide the line.
- Stop before the spool is packed past its intended capacity.
- Practice once on a scrap length to learn the tension.
Reduce friction before it feeds.
A light silicone spray or line conditioner can help stiff line settle more smoothly, especially if it has been stored in coils.
- Use only a light application so the line is not slick or messy.
- Store replacement line away from heat and harsh sunlight.
- Double-check every locking tab before the spool goes back in.
From spool choice to clean cut.
Each loading decision affects the next one. Keep the chain intact and the line has fewer chances to twist, bind, or dump slack into the head.
Before you snap the cap back on.
A 20-second inspection prevents most mid-yard frustration. Look for loose loops, crossed wraps, too much tail, or any line that is not seated under the clip.
- 01Line matches the manual. Diameter, type, and length all fit the trimmer head.
- 02Wraps follow the arrow. The line is wound in the direction printed on the spool.
- 03Tension is firm, not extreme. Coils are snug without stretching or crushing the line.
- 04Tail is controlled. About 6 inches protrudes through the eyelet, with no loose slack inside.
- 05Tabs are locked. The line is secured before the head is closed and tested with a light tug.
Choose the Right Line for Your Trimmer — Avoid Tangles From Day One
The first step to loading without tangles is selecting the correct line. Match your trimmer’s specifications—diameter, type, and length. For example, a 0.095-inch nylon line is common for lightweight trimmers, while beefier models might need 0.105-inch or 0.130-inch lines.
Using the wrong size or type can cause uneven winding or line slipping, leading to tangles. Stick to the manufacturer’s recommendations—your trimmer’s manual is your best guide. When you buy replacement line, opt for spool-ready options or high-quality multi-filament lines designed for smooth winding.
Choosing the right line isn’t just about fit; it directly impacts your trimming efficiency. A line that’s too thin may break easily under stress, while a line that’s too thick can cause excess strain on your trimmer’s motor and lead to uneven cuts. Properly matched lines ensure consistent performance and reduce the risk of tangles caused by improper winding or line slippage.
As an affiliate, we earn on qualifying purchases.
Master the Art of Winding Line Tightly and Evenly
Proper winding is the secret sauce. Start by pulling the line in the direction indicated on the spool—this ensures it winds in the correct direction. Keep the line taut as you wind, avoiding loose loops or overlaps. Imagine winding a garden hose neatly onto a reel—tight, even, and without crossing.
For example, if you wind too loosely, the line can catch and knot during use. Practice makes perfect: a few tries with a scrap spool can help you develop a steady hand and a clean winding pattern.
Winding the line tightly and evenly is crucial because loose or uneven winding creates slack that can cause the line to overlap or twist during operation. This slack not only hampers cutting efficiency but also increases the likelihood of tangles and line breakage. Achieving a uniform tension during winding helps the line spool smoothly, reduces stress on the trimmer, and ensures predictable, snag-free operation. The tradeoff is that winding too tightly can sometimes cause the line to snap if overdone, so aim for a firm but not overly tight wind—think of it as a gentle, secure coil that holds firm without strain.
As an affiliate, we earn on qualifying purchases.
Follow the Manufacturer’s Loading Instructions Carefully
Every spool is a little different. Some have multiple eyelets or holes to thread the line through. Follow the specific instructions—skipping this step often leads to tangles later. For instance, some spools require you to secure the line under a locking tab or clip during winding.
When threading the line through the eyelet, leave a few inches protruding—usually 6 to 8 inches. This length is enough to feed through the holes and avoid pulling out too much during use, which can cause slack and tangles.
Adhering to the manufacturer’s instructions ensures that the line is loaded in a manner optimized for the spool’s design. Incorrect threading or securing can lead to uneven tension, which causes the line to slip or twist during operation. Proper securement prevents the line from unwinding or crossing over itself, which are common causes of tangles. The tradeoff here is that ignoring these instructions might seem faster initially, but it greatly increases frustration and time spent fixing tangles during trimming. Precise following of these steps maximizes spool lifespan and trimming efficiency.
As an affiliate, we earn on qualifying purchases.
Manage the Line Length and Tension — Keep It Neat
Once wound, leave a few inches of line hanging out. Cutting the line to the right length prevents excess slack, which is a common cause of tangles. Aim for about 6 inches of line protruding from the spool—long enough to trim weeds but not so long it loops or knots.
Keep the line taut as you secure it, and use any locking clips or tabs to hold it in place. This prevents unwinding during operation, reducing the risk of tangles mid-yard.
Managing the line length and tension is vital because slack or overly long protrusions can easily coil, loop, or snag during use. If the line is too short, it might not extend adequately for efficient cutting, forcing you to rewind more frequently. Conversely, too long a line increases the chance of it catching on weeds or other objects, leading to tangles and possible line breakage. Achieving a balanced length—roughly 6 inches—is a tradeoff that offers enough extension for effective trimming while minimizing tangles. Tension management during securing also prevents the line from slipping or unraveling, which could cause operational hiccups and more tangles later.
As an affiliate, we earn on qualifying purchases.
How Modern Spools and Tools Make Loading Tangle-Free
Newer spools and tools are game-changers. Pre-wound or auto-feed spools eliminate winding errors entirely. They come with guides that keep the line in perfect tension and alignment, almost foolproof.
For example, some brands now offer quick-load spools with a simple twist or clip mechanism—push in the line, wind a few turns, and clip it in place. These innovations cut down on tangles and frustration, especially for DIYers who dread winding.
Modern spools and tools are designed with user experience in mind, reducing the skill required to load the line correctly. They often feature integrated guides, locking mechanisms, or automatic tensioners that ensure the line is wound evenly and secured properly. These features minimize the risk of improper winding, which is a primary cause of tangles. The tradeoff is that these advanced spools may be more expensive, but they significantly save time and hassle, making them ideal for those who prefer quick, reliable solutions and want to avoid the common pitfalls of manual winding.
Tools and Tricks to Load Line Without the Mess
Several simple tools and tricks can make your life easier:
- Use a spool winder or winding tool—these hold the spool firmly and help you wind tightly.
- Apply a little oil or silicone spray on the line before winding—reduces friction and helps the line lay smoother.
- Watch quick tutorials online—visual guides clarify winding patterns and common pitfalls.
- Always double-check the line’s securement before trimming and using.
For example, a quick video from Outdoor Pro Masters shows how to wind a spool in under a minute—no tangles, no fuss.
Using specialized tools like spool winders ensures consistent tension and neat winding, which directly impacts how smoothly the line feeds during trimming. Applying a light coating of silicone or oil reduces the friction between the line and spool, preventing the line from sticking or crossing over itself. Watching tutorials provides visual confirmation of proper technique, helping you avoid common mistakes that lead to tangles. Double-checking securement before use ensures the line won’t unwind during operation, saving time and frustration. The tradeoff is that these small investments in tools and techniques significantly improve your loading success rate and overall trimming experience.
Troubleshooting Common Tangle Problems
If your line keeps tangling, it’s usually because of improper winding, overloading, or incompatible line. To fix a tangle:
- Remove the spool carefully, catching any loose lines.
- Untangle knots gently, avoiding pulling too hard.
- Rewind, following the proper method—tight, even, and in the correct direction.
- Check for line overlaps or crossing points, and fix them during rewinding.
Remember—tangles are almost always due to winding mistakes, not the line itself.
Understanding why tangles occur helps prevent them from happening in the first place. Most issues stem from winding the line too loosely, unevenly, or in the wrong direction. Overloading the spool with too much line can cause excessive slack and crossing, which increases the risk of tangles. Using incompatible or damaged line can also lead to poor winding and operational issues. The main goal is to develop a consistent winding technique that maintains tension and alignment. When troubleshooting, focus on correcting these habits—untangling carefully preserves the line’s integrity and allows you to learn from mistakes. The tradeoff is that persistent issues may require re-evaluating your winding method, but investing time in proper technique will save much more time fixing tangles later.
Frequently Asked Questions
How do I know which trimmer line size is right for my trimmer?
Check your trimmer’s manual or the label on the spool. Most residential trimmers use lines between 0.095 and 0.130 inches in diameter. Using the wrong size can cause uneven cuts or line breakage, so matching the specs is key.
What’s the best way to wind the line to prevent tangles?
Wind the line tightly, following the spool’s indicated direction. Keep it even—no overlaps or crossing. Use a winding tool if available, and leave about 6 inches of line protruding for easy threading and securement.
Can I reuse old line, or should I replace it completely?
If the line is cracked or frayed, replace it. Reusing damaged line increases the risk of tangles and breakage during trimming. Always start fresh with a new, quality spool for best results.
What tools can help me load line more easily?
Spool winders, line winding kits, and quick-load spools make the process smoother. Applying a tiny bit of silicone or oil on the line before winding also helps it lay flat and reduces tangles.
How often should I re-wind or replace the line?
Rewind or replace when the line becomes frayed, cracked, or too short after trimming. Regular checks after each use help maintain smooth operation and prevent unexpected tangles.
Conclusion
Loading your trimmer line without tangles is all about technique and the right tools. Once you master the art of tight, even winding and proper securement, yard work becomes smoother and faster. No more stopping every few minutes to untangle.
Keep your lines neat, your tools updated, and your technique sharp. Your yard will thank you with cleaner cuts and less frustration—making your outdoor chores almost enjoyable.
Halloween Picks
halloween
As an affiliate, we earn on qualifying purchases.