TL;DR

Get business pricing on tools and workshop supplies
- Business-only prices and quantity discounts
- Tax-exempt purchasing
- Multiple users, one account, clear invoices
Weak throw distance usually comes from excessive impeller clearance, belt slip, low operating speed, chute restrictions, worn parts, or feeding the machine too fast. Check those items in order; use an impeller-clearance kit only on a mechanically sound two-stage snowblower with a confirmed gap problem, especially when wet snow churns inside the housing instead of leaving the chute.
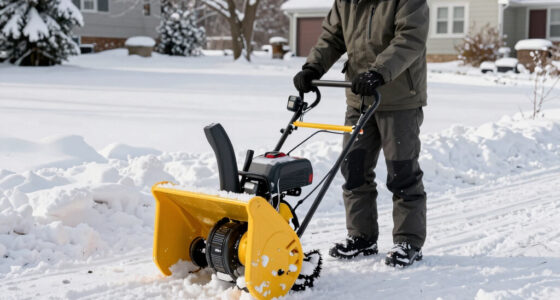
Weak throw distance is a common snowblower complaint, especially in wet, heavy snow that folds from the chute like gray oatmeal. A machine advertised to throw snow 30 or 40 feet may suddenly manage six feet, leaving a dense ridge beside your driveway. That short throw wastes time, overloads the next pass, and can bury areas you already cleared.
The tempting answer is an impeller-clearance kit, a set of flexible paddles that closes the gap between the impeller blades and housing. Sometimes that modification works remarkably well. Yet a glazed belt, half-open deflector, broken shear pin, cold battery, or crust of ice can produce the same symptom, and no rubber paddle will repair those faults.
You will learn how to separate an impeller problem from restricted chute movement, power loss, ordinary wear, and poor operating technique. You will also see what safe kit installation demands, why balance matters at high speed, and when a simple cable adjustment beats drilling steel. The goal is straightforward: restore useful throwing performance without trading a nuisance for bearing damage, a torn housing, or a flying fastener.
Test weak throw under load because a glazed or loose belt may look normal when the auger and impeller spin empty.
Suspect excessive impeller clearance when powder moves well but wet snow circulates inside the housing despite full speed and a clear chute.
Check every impeller blade through a complete rotation; an out-of-round housing can hide a tight contact point.
Restore full deflector travel, remove ice, and repair rough chute surfaces before drilling or altering the impeller.
Stop immediately if a newly modified machine vibrates, scrapes, or clicks; unequal paddles and loose fasteners can damage the housing or become projectiles.
Weak Throw Distance: Impeller Clearance Kits & Chute Fixes
A six-foot throw from a machine rated for 30 or 40 feet is a symptom—not a diagnosis. Trace speed, drive, clearance, and discharge restrictions before drilling steel or adding paddles.
Follow the snow path
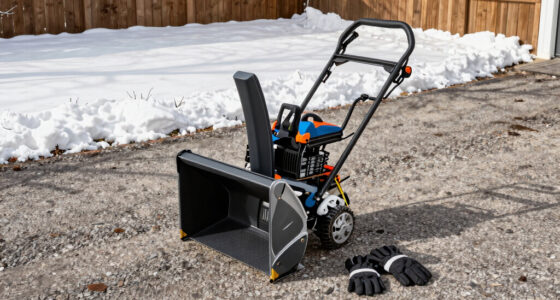
A two-stage snowblower works like a shop vacuum in reverse. The auger supplies material, the impeller creates velocity, and the chute aims the stream. A fault anywhere in that chain steals distance.
Auger gathers
Uneven intake, one weak bucket side, or interrupted feeding points toward a shear pin, auger, or gearbox issue.
Impeller accelerates
Slush swirling inside the housing at full operating speed suggests excessive clearance or lost impeller speed.
Chute directs
A fast stream landing close often indicates a low deflector, cable problem, ice, corrosion, or distorted chute geometry.
Clearance becomes a recirculation leak
Excess space between the blade tips and housing allows snow and air to cycle around the impeller instead of moving upward into the discharge chute. Wet, sticky snow exposes that leak sooner than dry powder.
Use these 9 checks before modifying the impeller
An empty machine can sound healthy while a glazed or loose belt loses speed as soon as dense snow reaches the impeller. Work through the system in order.
Use representative snow
Test in the conditions that trigger the fault. An isolated pile of powder may conceal a wet-snow problem.
Confirm operating speed
Run at the manufacturer-specified clearing speed or power mode. Check fuel, throttle, battery charge, and temperature.
Verify rotation
Confirm every auger section and the impeller rotate correctly, without abnormal play, binding, or noise.
Inspect shear hardware
A broken pin can leave half the bucket feeding weakly. Use only the specified shear pin—not a hardened substitute.
Check belt and tension
Look for glazing, oil, cracking, poor tension, hot-rubber odor, or speed collapse during a full-width pass.
Move chute and deflector
Verify full travel, correct cable adjustment, secure mounting, free pivots, and an upward position that holds under load.
Inspect the impeller
Check for bent blades, looseness, bearing play, uneven gaps, interference, and clearance through a complete rotation.
Clear the discharge path
Find ice, rust, dents, residue, rough paint, protruding fasteners, or a poorly fitted replacement chute.
Change the feed rate
Reduce walking speed or pass width. Improvement suggests overload, insufficient power, or technique—not automatically clearance.
The decisive test happens under load
If the engine holds speed while the auger note drops, discharge collapses, or hot rubber appears, inspect the belt and pulley system before considering an impeller kit.
Kit, chute fix, or mechanical repair?
Match the corrective action to what the snow is doing. A strong but low stream, trapped slush, and a collapse under load indicate different failure points.
| What you see | Likely area | Best next check | Kit signal |
|---|---|---|---|
| Wet snow remains inside the housing | Impeller clearance | Measure every blade through a full rotation | ✓Possible fit |
| Snow exits fast but lands close | Deflector or chute geometry | Open the deflector fully and inspect its cable | ✗Fix trajectory |
| Throw drops sharply in dense snow | Belt or power source | Inspect belt, speed, fuel, charge, and battery temperature | ✗Repair drive |
| Snow sticks at a rusty entrance | Chute surface or icing | Clean, dry, treat corrosion, and restore smoothness | ✗Clear path |
| One side of the bucket feeds poorly | Shear pin or auger | Inspect both auger sections and specified shear hardware | ✗Repair intake |
| Machine vibrates after kit installation | Imbalance or interference | Stop immediately; inspect every paddle and fastener | ✗Unsafe |
| Performance declines over several winters | Wear, corrosion, bearing, belt | Perform a complete mechanical inspection | ~Diagnose first |
Where an impeller kit can—and cannot—help
Flexible rubber or reinforced-polymer extensions reduce the blade-to-housing gap and act like squeegees. Their value depends on a mechanically sound machine with a confirmed clearance problem.
Close the gap without creating a hazard
At impeller speed, unequal paddle projection, interference, or loose hardware can damage bearings and housing—or turn a fastener into a projectile. Follow both manufacturers’ instructions.
Isolate all power
Remove the ignition key and disconnect the spark-plug lead. Follow the manual’s battery-isolation procedure on electric machines.
Measure every blade
Check clearance through one full rotation. Account for an out-of-round housing, ice, flex, bearing movement, and irregularities.
Match weight and projection
Every flexible extension must project equally and have equivalent mass to preserve impeller balance at high speed.
Use suitable hardware
Use corrosion-resistant fasteners, washers, and locking hardware specified by the kit. Avoid protrusions into the snow path.
Rotate manually first
Before restoring power, turn the complete assembly by hand and confirm clearance at every blade and housing position.
Recheck after initial use
Inspect projection, wear, fastener security, scraping, and vibration. Drilling or modification may affect warranty coverage.
Vibration, scraping, or clicking means stop
Do not “run it in.” Isolate power and inspect paddle equality, fasteners, housing contact, bearing play, and blade condition immediately.
Restore the path before drilling steel
The chute does not create throwing power, but it can waste it. Full deflector travel and a clean, smooth passage can recover distance without changing the impeller.
Open the deflector fully
Adjust cables, free frozen pivots, repair worn bushings, and confirm the deflector holds its upward position under load.
Remove ice and residue
With the machine safely stopped, clear compacted snow and ice from the entrance. Clean and dry the chute after use.
Repair rough interiors
Treat rust, scratches, flaking paint, and accumulated residue. Restore a smooth surface that does not grab wet snow.
Correct bent components
Straighten or replace a deformed chute base, discharge opening, or poorly fitting replacement component as specified.
Remove internal snags
Tighten loose mounts and correct fasteners protruding into the snow path. Do not remove guards or enlarge openings.
Reduce feed pressure
Use a narrower bite or slower walking speed in dense snow. Overfeeding can overwhelm an otherwise healthy discharge system.
Observe → isolate → correct → verify
The safest repair path keeps symptom, cause, action, and verification connected. Modification belongs near the end—not at the beginning.
Bottom line
Use an impeller-clearance kit only when wet snow recirculates despite full speed, sound drive components, a clear chute, and confirmed excessive clearance. In every other case, repair the restriction, power loss, wear, or operating problem first.
Follow the Snow Path and Find Where the Power Disappears
Weak throw distance starts somewhere along a three-part snow path: the auger gathers snow, the impeller accelerates it, and the chute aims it. Watch what happens at each stage. Snow that enters unevenly points toward an auger fault, while material swirling inside the housing points toward impeller clearance or lost speed.
A two-stage snowblower works a little like a shop vacuum running backward. The auger supplies material, the impeller acts as the fan, and the chute serves as the hose. A blockage, leak, or slow fan steals performance even when the other parts work perfectly; likewise, throw distance reflects the whole system, not one component.
The most common causes are excessive impeller clearance, belt slip, low engine or motor speed, worn bearings, damaged shear pins, and restricted chute movement. According to Outdoor Pro Masters’ snow-removal guidance [1], excessive space at the blade tips lets snow and air recirculate instead of entering the chute. Sticky slush exposes that leak far faster than dry powder.
For example, suppose your machine throws January powder across a 24-foot driveway but barely pushes March slush beyond the tire track. Stop after a short pass and look through the discharge opening only after shutting down safely. Wet snow packed around the impeller housing, rather than moving cleanly upward, makes clearance a reasonable suspect.
Throw distance is an outcome, not a diagnosis. Follow the snow from auger to chute before you buy parts or drill an impeller blade.
As an affiliate, we earn on qualifying purchases.
Use These 9 Checks Before You Modify the Impeller
Weak throw distance should be diagnosed under a real load, then traced from operating speed through the drive system and discharge path. An empty machine can sound healthy while a slipping belt sheds speed the moment dense snow reaches the impeller. Work through these nine checks in order before modifying anything.
- Test the machine in representative snow, not an isolated pile of powder.
- Run it at the manufacturer-specified clearing speed or power mode.
- Confirm that every auger section and the impeller rotate correctly.
- Inspect each shear pin or shear bolt for breakage or an incorrect substitute.
- Check the auger belt for glazing, oil, cracking, poor tension, and slip.
- Move the chute and deflector through their full travel.
- Inspect the impeller for bent blades, looseness, bearing play, and uneven gaps.
- Check the chute entrance for ice, rust, dents, rough paint, and protruding hardware.
- Change feed width and walking speed, then compare the result.
A classic belt-slip example happens during a 10-inch wet snowfall. The machine throws well for the first few yards, then its discharge collapses under a full-width pass. You may smell hot rubber or hear the engine hold speed while the auger note drops; those clues point toward the belt and pulley system, not clearance.
Battery machines add another layer. A pack stored in an unheated shed may deliver less power when its cells are cold, while a partly depleted pack may trigger power-management limits during a heavy pass. Bring the battery to the temperature range allowed by its manual, start with a full charge, and select the proper snow mode before blaming the impeller.
Check shear hardware carefully as well. One broken pin can leave half the bucket feeding weakly, producing a lopsided stream that looks like a chute problem. Fit only the specified shear pin; an ordinary hardened bolt can defeat the designed overload protection and send shock loads into the gearbox.
wet snow snowblower chute repair kit
As an affiliate, we earn on qualifying purchases.
As an affiliate, we earn on qualifying purchases.
Match the Symptom to an Impeller Kit, Chute Fix, or Repair
Weak throw distance needs a repair matched to its exact symptom: trapped slush favors an impeller-clearance check, a strong but low stream favors the deflector, and performance that collapses under load favors the belt or power source. This table gives you a fast diagnostic starting point, not permission to skip inspection.
| What you see | Likely area | Best next check |
|---|---|---|
| Wet snow remains inside the housing | Excessive impeller clearance | Measure every blade through a full rotation |
| Snow exits fast but lands close | Deflector angle or chute geometry | Open the deflector fully and inspect its cable |
| Throw drops sharply in dense snow | Belt slip or insufficient power | Inspect belt condition, speed, fuel, or battery charge |
| Snow sticks at a rusty entrance | Chute surface or icing | Clean, dry, and repair the rough surface |
| One side of the bucket feeds poorly | Shear pin or auger fault | Inspect both auger sections |
| Machine vibrates after a kit installation | Imbalance or interference | Stop immediately and inspect every paddle |
| Performance declines over several winters | Belt, bearing, corrosion, or wear | Perform a full mechanical inspection |
Consider a machine that produces a hard, narrow stream but places it only eight feet away. If raising the deflector sends that same stream 18 feet, the impeller already supplied enough exit speed. The fault was trajectory, much like aiming a garden hose at the ground and blaming the water pressure.
Now take the opposite case: powder leaves cleanly, but slush rolls around the housing and dribbles from the chute. If the belt holds, the impeller has no play, and the chute remains open, a large blade-to-housing gap moves higher on the list. That is where impeller clearance kits can produce a visible improvement.
Snow conditions still set the ceiling. Wind can flatten a light stream, while saturated snow may weigh several times more than loose powder occupying the same bucket volume. Compare repairs under similar conditions, using the same deflector angle and pass width, or your distance measurements will tell a muddy story.
As an affiliate, we earn on qualifying purchases.
Know When an Impeller-Clearance Kit Will Actually Help
Weak throw distance responds best to an impeller-clearance kit when a sound two-stage machine has visibly wide blade-tip gaps and leaves wet snow circulating in the housing. The flexible extensions act like squeegees on a curved window, pushing slush toward the chute instead of letting it slip around the blade tips.
A kit usually contains reinforced rubber or abrasion-resistant polymer paddles, templates, and mounting hardware. The paddles extend each impeller blade toward the housing, reducing bypass and producing a more consistent discharge near the end of a pass. You may also see fewer clogs because less sticky material remains behind after each revolution.
Results depend on the starting condition. If a factory impeller already runs with tight clearance, a kit may offer little gain while adding installation risk. It also cannot repair a slipping belt, slow engine, depleted battery, bent blade, loose pulley, failing bearing, or broken shear pin.
Imagine clearing the wet ridge left by a street plow. Your machine feeds evenly, holds full governed speed, and has a clean, fully open chute, yet brown-gray slush keeps churning behind the impeller. A measured, model-compatible kit may turn that dribble into a coherent stream because it attacks the actual leak rather than masking another fault.
Do not rely on one gap measurement. Rotate the impeller by hand after isolating its power source, then check every blade at several housing positions. Snowblower housings are not always perfectly round, so a paddle that clears at the top may strike near the bottom. Compare measurements with service information for your exact model; no universal clearance number fits every housing, bearing arrangement, and paddle design.
Avoid improvised old-tire strips and ordinary hobby-printed plastic. Hidden tire reinforcement can make drilling unpredictable, while common printing plastics may turn brittle in freezing weather. A purpose-made kit offers more dependable cold resistance, equal weight, and fastener retention, though you still need to confirm model fit and warranty implications.
As an affiliate, we earn on qualifying purchases.
Restore a Smooth, Fully Open Chute Before Chasing More Power
Weak throw distance often improves when you restore full chute and deflector movement, remove ice, and smooth the snow path. The chute does not create power, but it can waste exit speed through sharp bends, rough rust, sagging controls, or a deflector that sits several degrees too low under load.
Start with the machine off, the key removed, the spark-plug lead disconnected on gas models, and every moving part stopped. Wear gloves and eye protection, and use the supplied clean-out tool rather than your hands. According to U.S. Consumer Product Safety Commission snowblower safety guidance [2], operators should shut the machine down before clearing a clogged discharge chute.
- Remove packed snow and ice from the chute entrance.
- Adjust the control cable so the deflector reaches and holds its full-open position.
- Tighten loose mounting hardware and replace worn bushings.
- Repair or replace bent chute bases, deformed openings, and damaged rotation parts.
- Remove loose rust and restore a thin, smooth finish suitable for cold, abrasive service.
- Use only a manufacturer-approved dry-film or snow-release coating compatible with the chute material.
A stretched deflector cable offers a good real-world example. The control lever may show full height while the deflector remains an inch below its stop. Under snow pressure it can droop farther, turning a strong stream downward and creating the illusion of a weak impeller.
Surface condition matters most with sticky snow. Rust bubbles and thick paint drips grab slush like coarse sandpaper grabbing a wet rag. Clean and dry the chute after use, repair corrosion before it spreads, and treat coatings as a temporary friction reduction, not a cure for bent metal or weak drive power.
Avoid oily sprays that can attack plastic, reach belts, or leave a slick patch where you walk. Do not cut away guards, enlarge the opening, or alter chute geometry without manufacturer-approved engineering information. A taller or wider chute does not automatically throw farther; extra friction and abrupt turns can consume the speed you hoped to gain.
Install a Kit Without Creating Vibration or Projectile Risk
Safe impeller-kit installation depends on equal paddle projection, secure corrosion-resistant hardware, and clearance through one complete rotation. Even a small mismatch can act like mud stuck to one side of a tire, except the impeller spins much faster. Poor balance can damage bearings, blades, and the housing.
Before reaching into the bucket or chute, remove the ignition key and disconnect the spark-plug lead on a gas machine. For a battery model, remove every battery and follow its lockout instructions. Support the machine securely, wear cut-resistant gloves and eye protection, and never trust a control lever alone to prevent movement.
- Read both the kit instructions and the snowblower service information.
- Inspect blades, shaft play, bearings, pulley security, and housing shape.
- Position each template exactly as directed and mark every hole.
- Drill only if the manufacturer and warranty terms permit the modification.
- Fit equal paddles with matching washers, locking hardware, weight, and projection.
- Rotate the impeller slowly by hand and check every blade around the full housing.
- Confirm clearance for paddle flex, ice buildup, bearing movement, and housing irregularities.
- Reassemble all guards, perform a brief low-load check, and recheck the fasteners after initial use.
Suppose one extension projects 3 millimeters farther than the others. It may brush the housing when you turn the impeller slowly, then strike hard after snow load flexes the paddle. Stop at any scrape, click, or tight spot; trimming or repositioning must follow the kit maker’s limits.
Severe vibration after installation calls for an immediate shutdown. Look for unequal paddle lengths, a loose fastener, trapped debris, or contact with the housing. Do not keep running the machine to see whether it settles in; a loose bolt can become a high-speed projectile.
Drilling can affect warranty coverage for the impeller, bearings, drive system, or housing. Contact the manufacturer or servicing dealer before altering a newer machine. If the blades are cracked, badly bent, heavily corroded, or attached to a shaft with obvious play, hire a qualified small-engine or outdoor-power-equipment technician and replace damaged parts instead of adding paddles.
Get More Distance From Better Passes and Steadier Power
Weak throw distance can improve without hardware changes when you narrow each pass, hold steady operating speed, and aim the deflector higher. Feed rate matters because an impeller can move only so much mass per second. Wet snow punishes a rushed, full-width cut like thick batter choking a small kitchen mixer.
On a 28-inch machine, try taking a 16- to 20-inch bite through heavy slush rather than filling the bucket edge to edge. Maintain a steady walking speed and let the engine or motor recover when its note falls. Surging forward packs the housing, while crawling too slowly can leave little material for the impeller to form into a clean stream.
Plan your route around the wind and available landing area. Start on the downwind side when the property layout permits, and throw snow far enough that later passes do not force you to move the same ridge twice. On a long driveway or several acres of lanes, pass planning saves runtime as surely as a fresh belt does.
Gas and battery machines demand different habits. A gas engine normally needs full governed clearing speed, fresh fuel, clean airflow, and correct linkage adjustment. A battery snowblower needs charged packs within the maker’s allowed temperature range; warming a pack indoors before use can help, but keep it away from open flame, heaters, and moisture, and never charge it outside its approved temperature limits.
Manufacturer distance claims usually reflect favorable snow, wind, load, and chute angle. Dry powder may scatter into a white cloud rather than form a long ribbon, while saturated snow may land close even from a healthy machine. Judge improvement by consistent clearing, fewer clogs, and less recirculation, not one heroic distance measurement.
Frequently Asked Questions
Does an impeller kit really increase snowblower throw distance?
An impeller kit can increase throw distance when excessive blade-to-housing clearance allows wet snow to recirculate. The gain may be small on a machine with tight factory clearance or when a slipping belt, low speed, or restricted chute limits performance. Confirm the gap and mechanical condition before buying a kit.
How much impeller clearance is too much?
No single clearance measurement fits every snowblower. Housing shape, blade design, bearing condition, and the kit maker’s required gap all affect the safe value. Measure every blade at several points through a full rotation, then compare those readings with service information for your exact model.
Can impeller paddles touch the housing?
Some kits allow very close clearance or light initial contact, while others specify a visible gap. Follow the kit instructions rather than guessing. Hard interference can overload the belt, pull out fasteners, tear a paddle, or damage the impeller housing.
Why does my snowblower throw powder but struggle with wet snow?
Wet snow is heavier and stickier than powder, so it exposes small performance losses quickly. It can slip around wide impeller gaps, cling to rusty chute surfaces, and overwhelm the housing during a full-width pass. Narrow the cut, verify full speed, and inspect the gap and chute entrance.
Will a chute coating stop every clog?
A compatible dry-film coating can reduce sticking, but it cannot fix ice buildup, bent metal, rough corrosion, a low deflector, or excessive feed speed. Clean and dry the chute first, repair damaged surfaces, and use only a product approved for its metal or plastic. Keep oily treatments away from belts and walking surfaces.
Why did the machine start vibrating after I installed a kit?
Stop the machine immediately because one paddle may be longer, heavier, loose, or striking the housing. Remove the key and all batteries, disconnect the spark-plug lead where fitted, and inspect the full rotation by hand. Do not operate it again until every extension has equal projection and secure hardware.
Should I install a larger impeller pulley for more distance?
Do not change pulley size without manufacturer-approved specifications. A larger speed increase can overload belts and bearings or push the impeller beyond its safe limit. High-speed component failure can tear the housing and throw debris, so leave custom drive-ratio work to the manufacturer or a qualified outdoor-power-equipment technician.
Conclusion
Diagnose the lost speed before you install the part. If the belt holds, the machine reaches its specified operating speed, every auger section feeds correctly, and the chute stays smooth and fully open, a measured impeller-clearance kit can give wet snow the firm shove it needs. If one of those checks fails, repair that fault first.
Keep your hands out of the discharge path, isolate every power source, and treat balance and clearance as safety specifications rather than rough guesses. The right repair should leave a steady ribbon of snow sailing across the yard, not a rattling machine flinging hardware into the dark.
Fall yard work Picks
leaf blowers
As an affiliate, we earn on qualifying purchases.