
TL;DR

Get business pricing on tools and workshop supplies
- Business-only prices and quantity discounts
- Tax-exempt purchasing
- Multiple users, one account, clear invoices
A generator that ran properly before storage but will not start usually has stale fuel, a restricted carburetor jet, or a stuck inlet needle. Drain the old gasoline, verify fuel flow and oil level, clean the bowl, jets, emulsion tube, and internal passages without enlarging them, then check for leaks before starting the generator outdoors with every load disconnected.
A portable generator that ran properly before storage but now refuses to fire usually has a fuel problem, not a worn-out engine. Gasoline can lose volatility within a few months, while its lighter ingredients evaporate and leave amber, sticky varnish inside passages no wider than a needle. One season in a hot shed can be enough.
You will learn the key facts and first checks that separate a clogged carburetor from low oil, weak fuel flow, a blocked tank vent, or an electrical-start problem. You will also get a step-by-step carburetor cleaning process, including the places most quick cleanups miss. That matters when a storm is rolling over your acreage and the engine coughs once, then goes silent.
This job rewards patience more than force. You need fresh fuel, eye protection, chemical-resistant gloves, and the correct service information for your engine. If fuel keeps leaking, the engine races, an electronic fuel-injection system is involved, or the generator has output or transfer-switch faults, stop and call a qualified small-engine technician or licensed electrician.
Check oil level, fuel flow, tank ventilation, spark-plug condition, and fresh fuel before removing the carburetor.
Clean the pilot jet, main jet, emulsion tube, bowl bolt passages, fuel inlet, and vents without using hardened wire or drill bits.
Photograph every governor spring, throttle rod, choke linkage, gasket, and spacer before disassembly.
Open the fuel valve and inspect every joint for leaks before reconnecting the spark plug and starting the generator outdoors.
Use fresh stabilized fuel or the manufacturer-approved drain procedure before storage; additives cannot restore gasoline that has already degraded.
Generator Won’t Start After Sitting: Carburetor Cleaning Step by Step
A generator that ran before storage usually has a fuel-delivery problem—not a worn-out engine. Rule out simple shutdown conditions, remove stale gasoline, clean every calibrated passage, and verify a leak-free repair before starting outdoors.
Rule out the five-minute fixes
Do these checks before disturbing gaskets, governor springs, or calibrated components. A low-oil shutdown, blocked tank vent, weak fuel flow, or electric-start fault can imitate a clogged carburetor.
Unload and level
Move outdoors, unplug every appliance, switch off the output breaker, and place the generator on level ground.
Verify the oil level
Check exactly as the manual specifies. The low-oil sensor may block ignition even when oil is visible near the filler.
Open valve and vent
Confirm the fuel valve is open and the cap vent is clear. A closed vent creates a vacuum that stops flow.
Replace suspect gasoline
Drain into an approved container. Add a small amount of fresh, manufacturer-approved fuel before deeper service.
Inspect plug and filter
Check for a fouled spark plug and blocked air filter. On electric-start models, inspect the battery and fuse.
Open the bowl drain
Little or no flow points upstream: tank outlet, filter, hose, shutoff valve, cap vent, or fuel solenoid.
Starting fluid is not the first remedy. Excess spray can ignite, harm some engines, and conceal the real fault. A brief fire on approved cleaner is a diagnostic clue—not a repair.
From fresh fuel to restricted jet
Gasoline loses easy-lighting components as it ages. Oxidation leaves sticky deposits, while ethanol-blended fuel can absorb moisture and contribute to corrosion or phase separation.
The contamination path
Volatile components evaporate
Stored fuel becomes harder to ignite.
Oxidation creates varnish
Amber residue coats the bowl and passages.
Moisture and debris accumulate
Water, corrosion, or rust moves downstream.
Small circuits restrict first
The engine coughs, surges, or runs only on choke.
Build the work area before fuel flows
Required setup
- Cold engine and exhaust system
- Outdoor ventilation and firm, level footing
- Fuel valve closed and spark-plug lead removed
- Battery negative cable disconnected when fitted
- Safety glasses and chemical-resistant gloves
- Catch pan, approved fuel container, and parts tray
Keep away
- Flames, heaters, pilot lights, and cigarettes
- Switches or tools capable of producing sparks
- Garages, sheds, basements, vehicles, and porches
- Drill bits, hardened wire, and welding-tip cleaners
- Ground drains and improper gasoline disposal
- Household wiring and energized transfer equipment
Clean the carburetor in 12 steps
Work in order. Preserve every linkage position, gasket orientation, jet diameter, and factory adjustment. The goal is to restore the original fuel path—not create a new calibration.
Make the generator safe
Cool fully, close the fuel valve, remove the plug lead, disconnect battery negative, and put on protective equipment.
Remove old gasoline
Drain the tank and bowl into an approved container. Look for water, rust, debris, sour odor, or separated layers.
Photograph every linkage
Capture the governor spring, throttle rod, choke link, hoses, spacers, gaskets, and their exact holes.
Remove the carburetor
Catch residual fuel, disconnect the hose and linkages, then slide the unit from its studs without bending rods.
Remove the float bowl
Hold the body upright. Note bowl orientation and inspect the bowl bolt for precisely sized fuel passages.
Check float and needle
The float must move freely. Examine the needle tip, seat, hinge, and bowl for varnish, wear, corrosion, or fuel inside the float.
Remove the main jet
Use a perfectly fitting driver. Soak with cleaner if needed; do not force or distort the soft brass.
Clean the emulsion tube
Remove when the design permits. Clear every side port with cleaner, soft copper, and controlled air.
Clear the pilot jet
Treat the smallest opening gently. Confirm a clean, round passage without pushing hardened material through it.
Flush internal passages
Spray the fuel inlet, vents, bowl-bolt ports, and drillings. Wear eye protection—cleaner may exit unexpectedly.
Reassemble with sound seals
Replace damaged O-rings and gaskets. Restore bowl, spacers, insulator, heat shield, rods, and springs exactly.
Check flow, leaks, and run
Open the fuel valve and inspect every joint. Reconnect ignition only after it stays dry, then start outdoors and unloaded.
A jet is a measuring instrument, not merely a hole. Never use a drill bit, hardened steel wire, or welding-tip cleaner that can enlarge its calibrated opening.
What the behavior suggests
| Observed symptom | Carburetor restriction | Fuel supply or vent | Oil / ignition | Float needle | First check |
|---|---|---|---|---|---|
| Coughs once, then stops | ✓ Likely | ~ Possible | ~ Possible | ✗ Less likely | Fresh fuel and bowl flow |
| Runs only with choke | ✓ Likely | ~ Possible | ✗ Less likely | ✗ Less likely | Pilot jet and air leaks |
| No fuel at bowl drain | ✗ Less likely | ✓ Likely | ✗ Unlikely | ~ Possible | Valve, vent, hose, and filter |
| Fuel leaks from carburetor | ~ Possible | ✗ Less likely | ✗ Unlikely | ✓ Likely | Needle, seat, float, and gasket |
| No response at all | ~ Possible | ~ Possible | ✓ Likely | ✗ Less likely | Switch, oil level, plug, and battery |
| Surges or stalls under load | ✓ Likely | ~ Possible | ✗ Less likely | ~ Possible | Main jet and steady fuel flow |
The repair logic from symptom to proof
Stored engine
Fuel aged in placeVerify basics
Oil, vent, spark, flowRestore passages
Jets, tube, inlet, ventsProve dry joints
Fuel on, ignition offRun outdoors
No loads, observe closelyStop and call a qualified professional when:
Fuel continues leaking, the engine races or overspeeds, electronic fuel injection is involved, damaged governor parts are found, or the problem concerns generator output, receptacles, a transfer switch, or household wiring. Small-engine fuel service and electrical-system repair are different disciplines.
Store fuel as carefully as you clean it
Start with fresh fuel
Use the grade and ethanol limit approved by the manufacturer. Keep fuel in a sealed, approved container away from heat.
Stabilize before aging
Mix stabilizer with fresh gasoline at the specified ratio and circulate it through the fuel system before storage.
Follow the approved drain plan
If the manual calls for draining, empty the tank and carburetor safely. Dispose of unusable fuel through an approved facility.
Rule Out the Five-Minute Fixes Before You Pull the Carburetor
Generator Won’t Start After Sitting does not automatically mean the carburetor must come off. Start by checking oil level, fresh fuel, fuel-valve position, and tank ventilation with the machine outdoors and every load disconnected. These quick checks can expose a simple shutdown condition before you disturb gaskets, springs, or calibrated parts.
- Place the generator on level ground, switch off its output breaker, and unplug extension cords and appliances.
- Check the oil against the manual. A low-oil sensor may block ignition even when oil is visible near the filler opening.
- Open the fuel valve and confirm the fuel-cap vent is open and clear.
- Drain suspect gasoline into an approved container, then add a small amount of fresh, manufacturer-approved fuel.
- Inspect the spark plug and air filter. On electric-start models, check the battery, fuse, and fuel-shutoff solenoid.
- Open the carburetor bowl drain over a catch pan. Weak or absent flow points toward the tank outlet, filter, hose, valve, or vent.
One owner may pull the starter rope twenty times after winter storage, only to discover that the generator sits on a slope and the low-oil shutdown has opened the ignition circuit. Another may find a closed tank vent creating a vacuum like a thumb over a drinking straw. Both problems imitate a clogged jet, yet neither needs carburetor removal.
Do not use starting fluid as your first repair. Excess spray can ignite, harm some engines, and hide the real fuel-delivery fault. If a tiny amount of approved cleaner makes the engine fire briefly, treat that as a diagnostic clue, not a cure.
As an affiliate, we earn on qualifying purchases.
Why Stored Fuel Turns a Clean Carburetor Into a Sticky Mess
Generator Won’t Start After Sitting commonly means gasoline has oxidized, lost easy-lighting components, and coated the carburetor with varnish or corrosion. The smallest passages clog first, so an engine may receive enough fuel to cough yet not enough to keep running. Ethanol-blended fuel can add absorbed moisture and separated layers to the trouble.
Think of the carburetor as a showerhead built for gasoline. The tank and fuel hose are the large supply pipe, but the pilot jet and main jet are tiny spray holes. A thin deposit that barely colors the float bowl can choke those openings, just as one grain of grit can spoil a fine mist nozzle.
According to current small-engine fuel-storage guidance [1], untreated pump gasoline can begin degrading within a few months, although heat, humidity, venting, and container quality change the timeline. Stabilizer slows oxidation when mixed with fresh gasoline; it cannot restore stale fuel or dissolve every hardened deposit after the fact.
For example, fuel left through a humid summer may pour from the tank with a sharp, sour smell and show pale droplets at the bottom of a glass inspection jar. Cleaning only the jet would give you a short-lived repair because water, rust, or debris upstream would soon enter the clean carburetor. When contamination reaches the tank, clean the full fuel path before reassembly.
As an affiliate, we earn on qualifying purchases.
Build a Safe Work Area Before Gasoline Starts Flowing
A safe carburetor job starts with a cold engine, outdoor ventilation, and zero ignition sources. Close the fuel valve, disconnect the spark-plug lead, and remove the starting battery’s negative cable on electric-start models. Wear safety glasses and chemical-resistant gloves because cleaner can shoot from an unexpected passage.
Set the generator on a firm surface away from heaters, pilot lights, cigarettes, switches, and tools that may spark. A breezy gravel drive can work, but keep parts in a shallow tray so the governor spring does not disappear into the stones. Never perform fuel work inside a garage, basement, shed, vehicle, or enclosed porch.
- Correct sockets, wrenches, and screwdrivers that fit each fastener closely
- Carburetor cleaner and controlled compressed air
- Soft nylon bristles or a strand of fine copper wire
- A catch pan, approved fuel container, and small parts tray
- Replacement bowl gasket, intake gaskets, O-rings, or the correct repair kit
- The generator service manual or an accurate carburetor diagram
Do not push drill bits, hardened steel wire, or welding-tip cleaners through a jet. A jet is a measuring instrument, not just a hole; enlarging it resembles drilling out the nozzle on a paint sprayer and hoping the pattern stays the same. Even a small change can produce black smoke, fouled plugs, excess fuel use, or poor load response.
Gasoline waste also deserves care. Drain it into an approved, clearly identified container and take unusable fuel to a local hazardous-waste or approved disposal facility. Keep power off during service, and leave generator receptacle, control-panel, transfer-switch, or household wiring repairs to a licensed electrician.
As an affiliate, we earn on qualifying purchases.
Clean the Carburetor in 12 Controlled Steps
A proper cleaning removes stale fuel, documents every linkage, opens the float bowl, clears each removable jet, and verifies flow through the carburetor body. Work in order and never alter jet size, governor position, or float height by guesswork. The goal is to restore the factory fuel path, not create a new calibration.
- Cool and isolate the generator. Close the fuel valve, disconnect the spark-plug lead, and remove the battery’s negative cable when fitted. Put on gloves and glasses before opening the system.
- Drain the tank and bowl. Catch the gasoline in an approved container and inspect it for rust, water beads, dirt, or separate layers. A teaspoon of water at the bottom means the tank and line need attention too.
- Photograph the linkages. Take close, bright images of the throttle rod, governor spring, choke linkage, hoses, gaskets, spacers, and heat shields. One spring fitted into the wrong hole can cause hunting or unsafe engine speed.
- Remove the air-filter housing. Keep each gasket and spacer in order. A torn intake gasket can admit extra air and make a clean carburetor behave as if its jet remains blocked.
- Remove the carburetor. Place a rag below it, disconnect the fuel line, release the throttle and choke linkages gently, and slide the body off its studs. Do not stretch or bend the governor spring.
- Open the float bowl. Hold the carburetor upright and remove the bowl bolt or retaining screw. Mark the bowl’s position because a shaped recess may need to face the float or drain.
- Inspect the float and needle. Remove the float pin, float, and inlet needle. The float should swing freely, the needle tip should look smooth, and the bowl gasket should feel flexible rather than hard like old plastic.
- Clean the main jet and emulsion tube. Use an exactly fitting screwdriver if removal is allowed. Spray through the center and side holes, then hold the jet toward a light; you want a clean, round opening, not a ragged or enlarged one.
- Clear the pilot circuit. Spray cleaner through the pilot jet, fuel inlet, bowl vent, choke passage, and accessible air bleeds. Follow with controlled compressed air while aiming every opening away from your face.
- Handle stubborn deposits gently. Use nylon bristles or fine, soft copper wire. An ultrasonic cleaner can reach hidden deposits, but remove rubber, plastic, coated, and electronic parts first and use a solution approved for carburetor metal.
- Reassemble without heavy torque. Refit the jets, needle, float, and pin, then confirm free movement. Install sound seals, orient the bowl correctly, and tighten the fastener evenly; soft carburetor metal strips easily.
- Reinstall the original stack. Return insulators, spacers, gaskets, linkages, fuel hose, and clamps to their photographed positions. Refit the air-filter housing because some small engines depend on that assembly for normal mixture behavior.
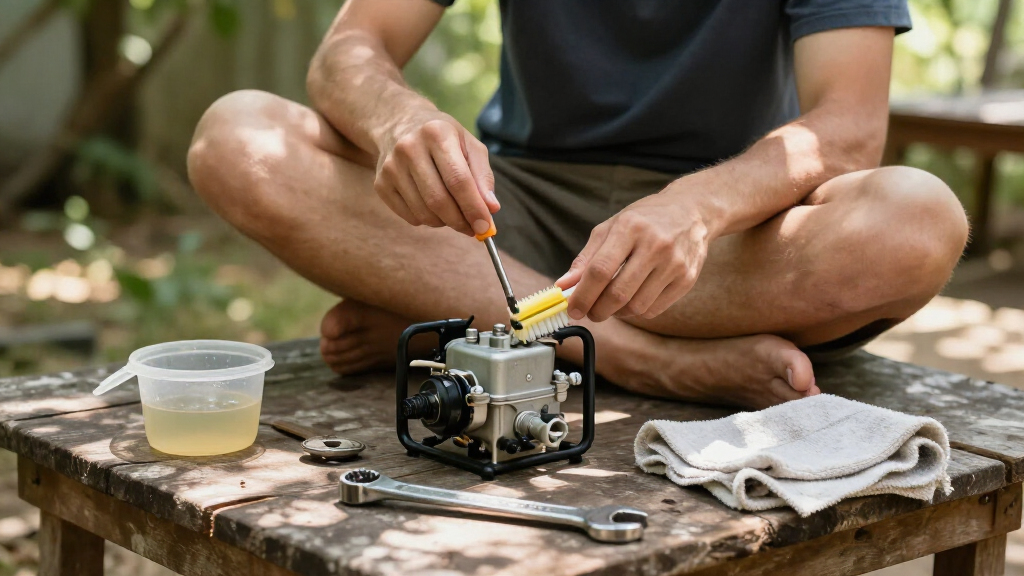
A useful real-world habit is to place removed parts from left to right on a white shop towel. When you reach reassembly, work back from right to left. That simple layout acts like a breadcrumb trail and makes a missing needle clip, gasket, or spacer obvious before fuel enters the bowl.
portable generator carburetor repair parts
As an affiliate, we earn on qualifying purchases.
As an affiliate, we earn on qualifying purchases.
Match the Symptom to the Passage That Is Still Blocked
Generator Won’t Start After Sitting symptoms reveal which part of the fuel or ignition system still needs attention. An engine that runs only on choke usually has a lean mixture, while black smoke points toward excess fuel or restricted air. Use the behavior as evidence instead of removing the carburetor repeatedly without a plan.
| What you observe | Most likely causes | Your next check |
|---|---|---|
| No start after storage | Stale fuel, clogged jet, stuck needle, or low-oil shutdown | Check oil, fresh fuel, bowl flow, and spark |
| Runs only with choke | Restricted pilot jet, low bowl level, tank-vent problem, or intake leak | Inspect pilot circuit, vent, and intake gaskets |
| Surges with no load | Partial pilot restriction, air leak, or governor response | Check passages and linkage placement |
| Dies under load | Restricted main jet, weak fuel flow, ignition fault, or overload | Verify main circuit and apply a smaller known load |
| Leaks from carburetor | Stuck float, dirty needle seat, damaged needle, or pinched gasket | Close the fuel valve and reopen the bowl |
| Black smoke | Stuck choke, high fuel level, or blocked air filter | Check choke travel, float system, and filter |
Suppose the engine starts with full choke, smooths briefly, then dies as you open the choke plate. The choke has been acting like a thumb over the intake, pulling extra fuel through a weak circuit. That pattern makes a restricted pilot passage or intake leak more likely than a failed ignition coil, although testing still beats guessing.
If the engine races or the governor hunts violently after reassembly, shut it down at once. A misplaced spring, binding throttle plate, or altered governor setting can create dangerous overspeed. Do not bend linkages until the speed sounds right; have a qualified technician check the setup with the correct specifications and measuring equipment.
Prove the Repair Without Risking a Fire or Damaged Appliance
Test the repair by checking for leaks first, starting with all electrical loads disconnected, and adding only a modest known load after the engine warms. Keep the generator outdoors, well away from doors, windows, and vents. A smooth idle means little if the engine starves for fuel as soon as the main jet must supply power.
Add a small amount of fresh gasoline, open the fuel valve, and wait several minutes. Inspect the hose connection, carburetor inlet, bowl gasket, drain screw, and bowl bolt with a bright light. If you see a wet sheen or smell raw gasoline, close the valve and do not start the engine.
Reconnect the spark-plug lead and battery, set the choke for a cold start, and start the engine without extension cords attached. Open the choke gradually as the engine warms. Listen for a steady mechanical hum rather than rhythmic rising and falling, and watch for smoke, leaks, abnormal speed, or stalling.
Once stable, apply a modest load that stays comfortably below the generator’s rated running watts. For example, a suitable resistive shop load may reveal a weak main circuit without exposing a refrigerator or sensitive electronics to unstable voltage. Follow your manual’s test procedure, since generator sizes and approved loads vary.
According to carbon-monoxide safety guidance [2], a running generator belongs outside and away from openings, never in a garage or shed even when doors stand open. Use battery-powered carbon-monoxide alarms in occupied buildings near the operating area, and never bypass a CO shutdown system.
Know When a New Carburetor Beats Another Round of Cleaner
Replace or professionally service the carburetor when its body is deeply corroded, a jet has been enlarged, the float contains fuel, a shaft is badly worn, or internal passages remain blocked. Cleaning removes deposits; it cannot rebuild missing metal, repair a cracked float, or restore a damaged fuel-shutoff solenoid.
Imagine opening the bowl and finding chalky white corrosion around the main well, with flakes lifting from the casting. An ultrasonic bath may make the surface brighter, but hidden passages can remain pitted or porous. That carburetor resembles a rusted garden nozzle: clean on the outside, unreliable where flow is measured.
Replacement has its own tradeoffs. Very cheap aftermarket units may differ in jetting, linkage geometry, solenoid design, and choke travel, even when the cast body looks identical in a photo. Match the generator model, engine model, specification code, and carburetor part number rather than buying by appearance alone.
Call a qualified small-engine technician if the generator still will not start after you verify fuel flow, spark-plug condition, choke movement, and clean passages. Poor compression, incorrect valve clearance, kill-switch wiring, a failed oil sensor, or an electronic control fault can sit beyond basic carburetor work. For receptacle, breaker, transfer-switch, or building-wiring faults, switch off the equipment and use a licensed electrician who understands local code and permit requirements.
Store the Generator So the Next Pull Actually Works
Prevent another storage no-start by managing fuel before the generator disappears behind mower decks and winter gear. Use fresh gasoline from a sealed container, follow the manufacturer’s storage method, and get treated fuel all the way into the carburetor. Leaving a shallow bowl of untreated fuel is usually the worst choice.
According to manufacturer storage guidance [1], fuel stabilizer should be added while gasoline is still fresh. Run the engine long enough for treated fuel to reach the carburetor, or use the approved fuel-off procedure to let the bowl run dry when the manual directs it. Stabilizer preserves; it does not turn old, sour fuel young again.
- Rotate stored gasoline within the fuel or stabilizer maker’s stated limit.
- Keep the tank either properly stabilized and filled as directed or completely drained using the manual’s method.
- Inspect fuel hoses, filters, oil, battery charge, and pest damage before storm season.
- Exercise the generator only when the manufacturer recommends it, always outdoors and with an approved load plan.
- Use ethanol-free fuel only when it meets the engine maker’s required grade; it still oxidizes during storage.
On a larger property, mark generator service on the same calendar you use for well checks, fence walks, or seasonal mower maintenance. Ten deliberate minutes before storage can save an hour of carburetor work during a blackout. When thunderheads turn the sky green and the utility line goes quiet, clean fuel and a dry carburetor bowl are worth far more than another can of cleaner.
Frequently Asked Questions
Will adding fresh gasoline fix fuel that went stale in the generator?
Fresh gasoline may dilute mildly degraded fuel, but it will not remove water, corrosion, or varnish from a blocked jet. If the old fuel smells sour, looks dark, or shows separate layers, drain it into an approved container and dispose of it through a local hazardous-waste program.
Can you clean a generator carburetor without removing it?
You can drain the bowl and clean an accessible bowl bolt or removable jet without taking off the entire carburetor. That may fix a light obstruction, but thorough cleaning usually requires removal so you can inspect the float, needle, pilot circuit, emulsion tube, and intake gaskets.
Why does the generator keep running only when the choke is on?
The choke enriches the fuel mixture, so needing it after warm-up usually points to too little fuel or too much intake air. Check the pilot jet, main circuit, bowl fuel level, tank vent, and intake gaskets. A partly closed choke is masking the fault, not fixing it.
Why is the carburetor leaking after reassembly?
A leak commonly comes from debris in the needle seat, a stuck float, incorrect float height, or a pinched bowl gasket. Close the fuel valve immediately and do not start the generator. Reopen the bowl and verify the needle clip, float movement, gasket position, and drain-screw seal.
Why will the generator still not start after carburetor cleaning?
Verify fuel flow, tank ventilation, choke movement, ignition spark, and the low-oil shutdown before cleaning the same parts again. The engine may also have a missed pilot blockage, failed fuel solenoid, kill-switch fault, poor compression, or incorrect valve clearance. Persistent faults call for a qualified technician.
Should you store the generator with a full or empty fuel tank?
Follow the generator manufacturer’s instructions because approved storage methods differ. Some call for a nearly full tank of fresh stabilized gasoline; others call for completely draining the fuel system during long storage. A small amount of untreated fuel left in the tank and bowl creates the highest risk of varnish and moisture trouble.
Conclusion
Your main takeaway is simple: diagnose first, clean with restraint, and test for leaks before pulling the starter rope. Most storage-related no-starts trace back to stale gasoline or a restricted fuel passage, but careless jet cleaning, misplaced governor springs, and indoor testing can turn a routine repair into a damaged engine or a serious safety hazard.
Before the next long layup, give the generator fresh treated fuel or a properly drained system, whichever its manual specifies. That small job is easy on a calm afternoon and miserable during a cold outage. Store it ready, and the next time the lights blink out, you should hear a steady engine note instead of the dry rasp of another failed pull.
Columbus Day / Indigenous Peoples' Day Picks
long weekend sales
As an affiliate, we earn on qualifying purchases.