
TL;DR

Get business pricing on tools and workshop supplies
- Business-only prices and quantity discounts
- Tax-exempt purchasing
- Multiple users, one account, clear invoices
Replacing battery mower blades safely hinges on disconnecting power, applying the correct torque, and installing blades in the right orientation. These steps prevent accidents and prolong blade life.
Ever had that sudden jolt of fear while working on your mower, wondering if it could start up unexpectedly? That’s a common concern when replacing blades. The good news: a few simple safety steps make the process safer and easier. You’ll save time, avoid injuries, and keep your mower running smoothly.
This guide dives into the essentials: locking out power properly, tightening blades to the right torque, and installing them in the correct orientation. Master these, and you turn a risky chore into a straightforward task you can do with confidence.
Always disconnect the battery and use lockout procedures before working on blades.
Use a torque wrench to tighten blade bolts to the manufacturer’s specified torque—avoid guesswork.
Check blade orientation carefully—install blades so the cutting edge faces the right direction for your mower.
Balance and secure blades properly to prevent vibrations and damage.
Handle old blades and batteries with care, following safety and disposal guidelines.
Replacing Battery Mower Blades Safely
Lock out power. Set exact torque. Verify blade orientation. These three checks turn a risky maintenance job into a controlled process—preventing accidental startup, loose blades, damaging vibration and premature component wear.
Three controls before the first test cut
Each control addresses a different failure mode. Skipping one leaves a gap between a blade that merely fits and an installation that is genuinely safe.
Remove stored power
Stop the mower, remove its key and disconnect or remove the battery. Apply the manufacturer’s lockout method, then confirm the machine cannot start.
Tighten by specification
Find the exact value in the manual or service label. Fit the correct socket and apply smooth pressure until the torque wrench signals the set point.
Match rotation and airflow
Follow blade arrows, “grass side” markings and the mower manual. Confirm the cutting edge faces the intended direction and the blade seats flat.
Stop
Park level and let every moving part halt.
Isolate
Key out, battery disconnected, interlock applied.
Secure
Stabilize mower and block blade with a suitable stop.
Install
Orient, seat and torque to the stated value.
Verify
Check clearance, balance, fasteners and rotation.
Torque without the guesswork
A “common” range is only context. Bolt size, spindle design and mower model determine the correct setting. The manual always wins.
Read the manufacturer’s specification
Check the operator’s manual, service guide or label near the blade assembly. Confirm units: ft-lb and N·m are not interchangeable numbers.
Use the proper wrench and socket
Select a torque wrench whose working range includes the specified value. A snug six-point socket helps protect the bolt head.
Pull smoothly until the signal
Keep the wrench aligned and apply steady force at its handle. Stop at the click or indicated reading; do not add an extra pull.
Confirm every fastener and seating surface
Where multiple bolts are used, tighten evenly in the manufacturer’s sequence. Make sure the blade sits flat and cannot rock.
Proper torque versus common failures
Both extremes are hazardous. Under-tightening permits movement; over-tightening can deform or weaken the fastening system.
| Aspect | ✓ Proper torque | ~ Under-tightening | ✗ Over-tightening |
|---|---|---|---|
| Blade security | Secure and consistently clamped | Can shift or loosen in operation | Fastener may be stressed or damaged |
| Threads and mount | Clamping force stays within design limits | Movement can wear mating surfaces | Threads may strip; mount may warp |
| Vibration and noise | Smooth when blade is balanced and seated | Wobble and noise can increase | Distortion may produce vibration |
| Operating risk | Lowest when all checks pass | Blade retention may be compromised | Sudden fastener or mount failure possible |
✓ controlled outcome ~ caution condition ✗ high-risk condition
Let the blade geometry tell the story
Modern blades are shaped for a specific rotation and airflow path. Correct installation aligns the cutting edge, lift surface and spindle forces.
Orientation checklist
Markings vary by brand, so treat the manual as the authority. “Cutting edge down” is typical, but mower-specific instructions take precedence.
- Match arrows or rotation marks to the mower’s direction.
- Follow “grass side,” “bottom” or equivalent blade labels.
- Seat the center hole and locating features completely.
- Check that the blade clears the deck through its full path.
- Confirm balance before installation; replace damaged blades.
What backward installation causes
A blade may physically bolt on while still being functionally wrong. Misorientation reverses the designed relationship between cutting, lift and airflow.
Uneven or ineffective cutting
The dull trailing surface can meet the grass first, producing ragged results and forcing repeated passes.
Incorrect airflow
Lift surfaces cannot move clippings as designed, reducing bagging or discharge performance and increasing resistance.
Vibration and accelerated wear
Poor seating or imbalance can loosen fasteners, stress the spindle and bearings, increase heat and shorten component life.
From isolation to a safe return to service
A disciplined sequence makes each decision verifiable. If any link fails, stop and correct it before reconnecting the battery.
Lockout
Battery removed, key out, controls disabled.
Identify
Correct replacement blade and model specification.
Orient
Rotation, markings, cutting edge and lift confirmed.
Torque
Correct socket, exact setting, smooth final pull.
Quality check
Seating, clearance, balance and fasteners verified.
Protect your hands
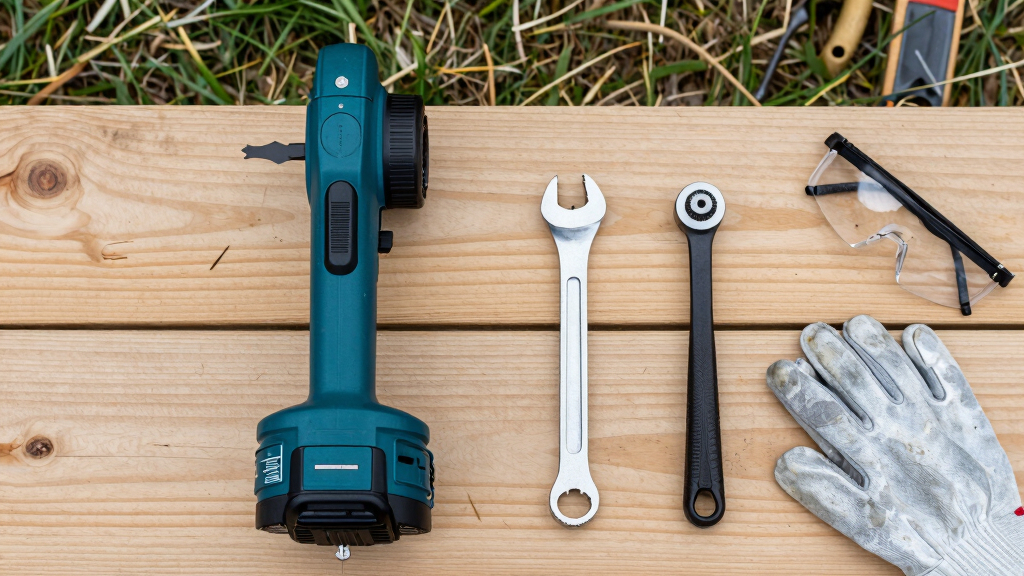
Wear heavy-duty gloves and eye protection. Hold old blades by their non-cutting surfaces and keep sharp edges controlled.
Respect the battery
Avoid puncture, crushing, moisture and extreme heat. Inspect for swelling or damage and follow the manufacturer’s handling guidance.
Recycle responsibly
Take metal blades to an approved scrap or recycling facility. Use an authorized battery collection point; never place lithium-ion batteries in household trash.
Why Lockout Is Your First Line of Defense
Lockout procedures are like putting your mower in a safe timeout. Disconnect the battery first—no juice means no chance of accidental startup. Use the manufacturer’s lockout/tagout (LOTO) system if available, or simply remove the key and unplug the battery. For example, if you forget to disconnect, a bump or accidental switch flick could turn the blades—injury waiting to happen.
Before starting, double-check that the mower can’t turn on. This step is your best friend for preventing serious injuries. Think of it as flipping the switch on safety, making sure the blades stay still during your work.
As an affiliate, we earn on qualifying purchases.
How to Use a Torque Wrench for Perfect Blade Tightening
- Find the manufacturer’s torque specs—usually printed in the manual or on a sticker near the blade assembly.
- Select the right size torque wrench—most common are 30-50 ft-lb for mower blades.
- Attach the socket to the wrench and fit it onto the bolt.
- Apply steady pressure until the wrench clicks or indicates you’ve reached the set torque.
- Double-check each bolt; uneven tightening can cause vibrations or blade damage.
Applying the correct torque isn’t just about following a number — it’s about ensuring the blade is secured firmly without risking damage. Over-tightening can strip threads or warp the mount, compromising the blade’s stability and potentially causing dangerous vibrations during operation. Under-tightening, meanwhile, leaves the blade prone to loosening, which can lead to dangerous incidents or costly repairs. Achieving the right torque balances safety with durability, reducing the risk of accidents and extending the lifespan of your mower components. Precision here is a tradeoff: too tight and you risk damage, too loose and safety is compromised. That’s why a torque wrench isn’t just a tool — it’s a safety device that ensures consistency and confidence in your work.
As an affiliate, we earn on qualifying purchases.
Matching Blade Orientation to Your Mower’s Design
Blade orientation is critical—install it the right way, or you’ll face uneven cuts or dangerous vibrations. Most blades have markings or arrows indicating the correct direction. For instance, a blade with an arrow pointing outward means the cutting edge faces downward when installed.
Check your mower’s manual if markings are unclear. The wrong orientation can make the mower vibrate like a washing machine on spin cycle—wearing out bearings and risking damage.
Ensure the blade is securely fastened and balanced. A balanced blade spins smoothly, preventing uneven wear and noise. If you notice a wobble after installation, recheck the orientation and tightening.
Why does orientation matter so much? Because the blade’s design is optimized for a specific direction of rotation and airflow. Installing it backward can cause the mower to work harder, generate excess heat, and wear out faster. It can also produce uneven cuts, which might look unprofessional and damage your lawn. Proper orientation ensures the airflow and cutting forces are aligned, maximizing efficiency and safety. Balancing the blade is equally important—an unbalanced blade can cause vibrations that loosen bolts, damage the spindle, or even lead to dangerous wobbling. Taking the time to verify and correct orientation and balance directly contributes to the longevity of your mower and the safety of your operation.
As an affiliate, we earn on qualifying purchases.
A Side-by-Side Comparison: Correct Torque vs. Over-Tightening
| Aspect | Proper Torque | Over-Tightening |
|---|---|---|
| Blade Security | Secure, unlikely to loosen | Possible damage to bolt or blade mount |
| Risk of Damage | Minimal | High—stripped threads, warped blades |
| Vibration & Noise | Minimal, smooth operation | Increased vibrations, noise, wobbling |
Using the right torque keeps blades tight without risking damage. Too much torque? You’re inviting trouble. Too little? The blade might loosen mid-cut, risking injury or damage.
Understanding the implications of torque helps prevent costly repairs and safety hazards. Proper torque ensures the blade is held firmly, maintaining the integrity of the mounting and reducing vibrations that can cause the mower to shake or parts to wear prematurely. Over-tightening, on the other hand, can stretch or strip threads, warp the blade or mount, and increase the risk of sudden failure during operation. This can lead to dangerous projectiles or damage to the mower’s spindle. Conversely, under-tightening leaves the blade susceptible to loosening, which can cause dangerous flying blades or damage to the mower deck. Knowing and applying the correct torque is a tradeoff between safety and equipment longevity, and doing so with a torque wrench ensures consistent, safe results every time.
As an affiliate, we earn on qualifying purchases.
Installing Blades in the Correct Orientation — Why It Matters
Installing your blade the right way isn’t just about cutting well. It’s about safety. The cutting edge usually faces downward, away from the engine, to ensure efficient slicing and prevent vibrations. A blade installed backward can cause dangerous wobbling and uneven cuts.
For example, if your blade has a raised edge or markings, follow them diligently. Remember, a misoriented blade can wobble like a top spinning out of control, damaging the mower and risking injury.
Double-check the markings before tightening. Balance is key—an unbalanced blade can shake the mower to bits and shorten blade life.
Why does orientation matter so much? Because the blade’s design is optimized for a specific rotation and airflow. Installing it incorrectly can lead to increased resistance, overheating, and uneven wear, ultimately reducing the lifespan of your blade and motor components. Proper installation ensures the forces exerted during mowing are aligned with the blade’s intended direction—maximizing cutting efficiency and minimizing vibrations. Taking the time to verify markings and balance isn’t just a detail; it’s a safety and performance essential that prevents costly damage and maintains a safe working environment.
Handling Old Blades & Battery Safety: Do It Right
Old blades are sharp—wear heavy-duty gloves to avoid cuts. When removing, keep blades steady and avoid contact with the sharp edges. Dispose of blades according to local regulations—many scrap yards recycle metal.
Battery safety is just as crucial. Always disconnect the battery before working on blades. Lithium-ion batteries can be dangerous if punctured or exposed to extreme heat, so handle with care.
For example, if your battery is swollen or leaking, don’t try to force it out—consult a professional for safe disposal.
Handling old blades with proper safety gear and disposing of them responsibly prevents injuries and environmental harm. Punctured or damaged batteries pose fire and chemical risks; therefore, disconnecting and storing them safely until proper disposal is essential. If a battery shows signs of swelling, leakage, or damage, do not attempt to remove or handle it yourself—contact professionals or follow local hazardous waste protocols. This careful approach ensures your safety and the safety of the environment, avoiding accidents that could have serious consequences.
Frequently Asked Questions
Why is lockout/tagout so important during blade replacement?
Lockout/tagout stops the mower from accidentally turning on. It’s the single most effective way to prevent injuries—think of it as locking the door before working inside.
How do I find the right torque setting for my mower blades?
Check your mower’s manual or look for a sticker near the blade assembly. Most blades need between 30-50 ft-lb. Using a torque wrench ensures you don’t go over or under.
What’s the best way to tell if my blade is installed correctly?
Look for markings or arrows on the blade indicating direction. Install the blade so the cutting edge faces downward or outward, based on your mower’s design. Double-check for balance and tightness.
Can I replace blades myself, or should I hire a pro?
Many homeowners do it safely with the right tools and precautions. But if you’re unsure or if the blade mounting looks complex, it’s best to get a professional’s help.
What safety gear should I wear during blade replacement?
Heavy-duty gloves, eye protection, and sturdy clothing are a must. Sharp blades can cause cuts, and debris can fly during the process.
Conclusion
Replacing mower blades isn’t just about swapping parts. It’s about respecting the machine’s design and your safety. Lockout, torque, and orientation aren’t optional—they’re your best tools for a safe, smooth cut every time.
Next time you change a blade, picture yourself as the guard, the engineer, and the operator—all in one. Keep safety tight, and your yard work will stay safe, clean, and efficient.
Halloween Picks
halloween
As an affiliate, we earn on qualifying purchases.