
TL;DR

Get business pricing on tools and workshop supplies
- Business-only prices and quantity discounts
- Tax-exempt purchasing
- Multiple users, one account, clear invoices
When your battery mower’s self-propelled drive stops, it’s usually due to worn belts, damaged cables, or electronic controller failures. Regular inspection and knowing how to troubleshoot these parts can get your mower back in gear fast.
Nothing kills a weekend faster than a mower that refuses to move when you push the drive lever. You expect your battery mower to make yard work easier, but a sudden loss of self-propulsion can turn it into a frustrating paperweight. Luckily, most drive failures boil down to a few common issues—belt, cable, or controller problems—that you can often fix yourself. Knowing what to check saves you from costly service calls and gets you mowing again faster.
In this guide, you’ll learn how to identify what’s causing your drive system to fail, what parts are most likely to need attention, and how to handle repairs safely. Whether it’s a worn belt, a frayed cable, or a glitch in the electronic control, I’ll give you practical tips based on real-world scenarios to keep your mower running smoothly.
Regularly inspect and replace worn drive belts to prevent sudden failure.
Check cables for damage or disconnection during routine maintenance.
Electronic controllers are increasingly common; understand basic resets and diagnostics.
Proper storage and cleaning significantly extend drive system lifespan.
A systematic approach to troubleshooting saves time and money on repairs.
How to Spot if Your Drive System Is Failing
The first sign of trouble? The mower starts but the wheels stay still. You push the drive lever, hear a faint slipping sound, or notice the mower feels sluggish, especially uphill. These clues point toward a mechanical or electronic hiccup. Sometimes, the drive control feels loose or unresponsive, which can be a sign of a broken cable or a faulty controller.
Imagine you’re pushing your mower and suddenly it feels like the wheels have glued themselves. That’s when it’s time to peek underneath and check for obvious issues like a worn belt hanging loose or a disconnected cable. If everything looks fine visually, move on to more detailed troubleshooting.
battery mower self-propelled drive belt replacement
As an affiliate, we earn on qualifying purchases.
As an affiliate, we earn on qualifying purchases.
The Top 3 Causes of Self-Propelled Drive Failure
| Cause | What Happens | How to Spot It |
|---|---|---|
| Worn or Broken Belt | The belt slips or snaps, disconnecting the motor from the wheels. This can lead to the drive system failing silently or with reduced power, making it seem like the mower is working but not moving. Over time, a worn belt can also cause uneven drive or sudden failures, especially under load. | Look for cracks, fraying, or a loose belt hanging under the mower deck. A belt that’s glazed or has shiny spots indicates slipping. Feel for slack or looseness—if it can be easily pulled away from pulleys, it’s time to replace. |
| Damaged Cable | The cable that controls drive engagement becomes frayed or disconnected, preventing power transfer. This not only stops the drive from engaging but can also cause inconsistent operation, which might seem like electrical issues at first. | Check for frayed ends, loose connections, or cables that feel stiff, cracked, or have visible damage. Tug gently to see if the cable moves freely or if it’s bound up. A damaged cable can cause delays or total failure in drive engagement, especially when the cable is under tension. |
| Controller or Electronic Module Failure | The electronic brain that manages drive signals malfunctions, stopping the wheels from turning. These failures can be caused by moisture, power surges, or component wear, and they often result in the mower not responding at all to control inputs. | Indicators include unresponsive switches, blinking lights, or error codes in newer models. Sometimes, the motor controller may emit a beep or error signal when attempting to engage the drive, signaling a fault that requires diagnosis. |
Understanding these common culprits helps you target your repairs efficiently. Recognizing the signs and understanding why they matter can prevent unnecessary replacements and help you prioritize fixes that restore full functionality. For example, replacing a belt might seem simple, but if underlying misalignment caused the belt to wear prematurely, addressing that will prevent recurring issues. Similarly, diagnosing a controller failure early can save you from replacing electronic parts unnecessarily, saving money and reducing downtime.
As an affiliate, we earn on qualifying purchases.
Step-by-Step Fixes for Mechanical Problems
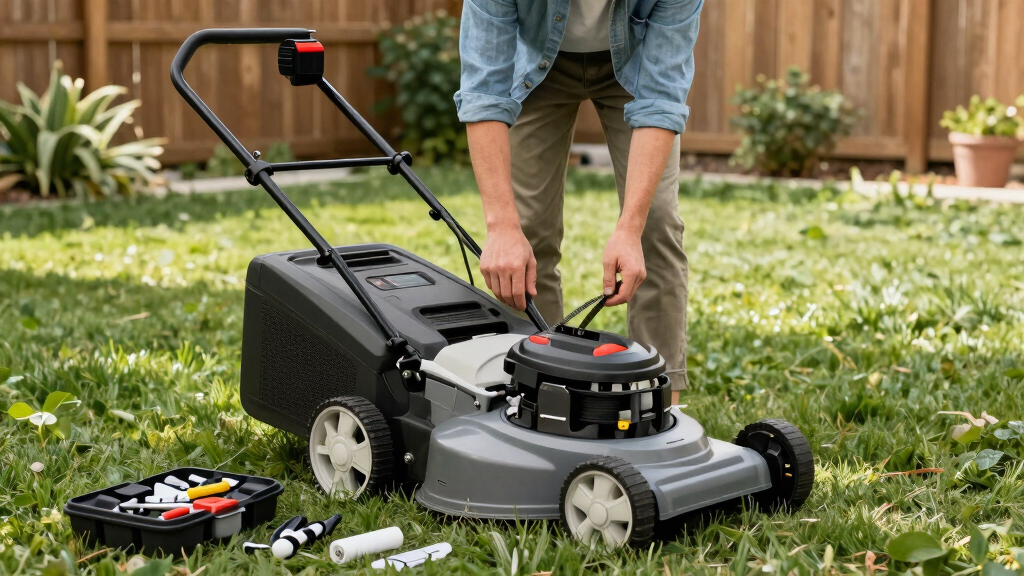
- Unplug the mower and remove the deck cover carefully—wear gloves and eye protection.
- Inspect the drive belt for cracks, fraying, or looseness. If damaged, replace it following your manual’s instructions.
- Check the tension of the belt—if it’s loose or slipping, adjust or replace as needed. Proper tension ensures the belt can transmit power effectively without slipping or excessive wear, which can cause overheating or premature failure.
- Look for any broken or frayed cables connecting the drive control to the transmission. Replace if damaged, and consider replacing cables periodically as part of preventative maintenance to avoid sudden failures.
- Reassemble carefully, then test the mower on a flat, open area, engaging the drive to confirm repair.
Replacing a worn or damaged belt is often the most cost-effective way to restore drive function, but it’s also crucial to understand why it failed. Worn belts can be caused by misalignment, overuse, or debris wearing down the material, leading to potential safety hazards or further damage if ignored. Ensuring proper tension and alignment during replacement not only restores functionality but also prolongs the lifespan of your mower’s drive system. Similarly, checking cables for signs of stress or corrosion helps prevent sudden failures, saving time and money in the long run. Regular inspections and proactive replacement of worn parts can significantly extend the operational life of your mower and prevent costly downtime during peak yard work seasons.
electric mower controller diagnostic tool
As an affiliate, we earn on qualifying purchases.
As an affiliate, we earn on qualifying purchases.
Troubleshooting Electronic Control Failures
Electronic issues can be trickier, but some fixes are simple and can prevent costly replacements. First, perform a reset—turn off the mower, disconnect the battery or power source, wait a minute, then reconnect and turn it back on. This simple step clears minor glitches that can cause unresponsiveness or erratic drive behavior, much like rebooting a computer to fix software hiccups. It’s a quick, non-invasive way to potentially restore function without additional parts.
Pay close attention to blinking lights, error codes, or onboard diagnostic signals. These indicators are designed to communicate specific issues, much like a dashboard warning light. Interpreting these signals can help diagnose whether the problem lies with wiring, sensors, or the controller itself. For example, a blinking light might point to a sensor malfunction, while an error code could suggest a faulty module or software glitch. Understanding these signals allows for targeted repairs, reducing guesswork and preventing unnecessary replacements.
If resetting and basic checks don’t resolve the issue, inspect the wiring harness for corrosion, loose connections, or damaged wires. Corrosion or broken wires can intermittently or permanently cut power or signals, leading to drive failure. Repairing or replacing damaged wiring can restore reliable operation. In more advanced models, onboard diagnostic tools and error codes can guide you directly to faulty sensors or modules, saving significant time and effort. Recognizing when electronic troubleshooting exceeds basic skills is crucial—consulting a professional ensures safety and proper repair, avoiding further damage or safety risks.
self-propelled battery mower repair parts
As an affiliate, we earn on qualifying purchases.
As an affiliate, we earn on qualifying purchases.
Regular Maintenance to Prevent Drive Failures
Prevention beats repair. Regularly inspect belts for wear—replace every 1-3 years depending on usage and conditions. Keep cables clean, dry, and securely connected.
Clean the undercarriage after each use to prevent debris buildup that can wear belts or jam moving parts. Store your mower in a dry, cool space to protect electronic components from moisture and extreme temperature swings.
For example, a landscaper noticed her belt was cracking after a year. A quick replacement and routine checks kept her mower running smoothly through a busy season.
Frequently Asked Questions
How do I tell if my drive belt is broken or just slipping?
If the belt looks cracked, frayed, or loose around the pulleys, it’s likely broken or worn out. A slipping belt often looks fine but feels loose when you try to turn the wheels by hand. Replacing a damaged belt restores power transfer.
Can I repair electronic controller issues myself?
Basic resets and checking wiring are doable if you’re comfortable with electrical parts. However, if error codes persist or the controller shows signs of damage, it’s safer to consult a professional to avoid further issues or safety risks.
How often should I inspect my drive system components?
Perform a quick visual and functional check at the start of each mowing season. Replace belts every 1-3 years depending on use, and check cables monthly for damage or looseness. Regular upkeep prevents unexpected breakdowns.
What’s the best way to store my mower to prevent drive issues?
Store in a dry, temperature-controlled space. Clean the undercarriage after each use to prevent debris buildup. Keep cables and electronic parts covered and disconnect the battery if storing for long periods.
Are newer models more reliable for drive systems?
Yes, advances in electronic diagnostics and more durable belt designs have improved reliability. Still, electronic components can fail, so regular checks remain essential for all models.
Conclusion
When your battery mower’s self-propelled drive stops, don’t panic. Most issues stem from straightforward mechanical or electronic faults that you can fix with a little know-how. Keeping an eye on wear and tackling problems early keeps your yardwork moving—literally.
Remember, safety first: disconnect power before working on electrical parts, and don’t hesitate to call a professional for complex electronic repairs. Your mower’s drive system is simple in theory, but it pays to stay vigilant.
Halloween Picks
halloween
As an affiliate, we earn on qualifying purchases.