Canoe
How To Build A Canoe From A Tree
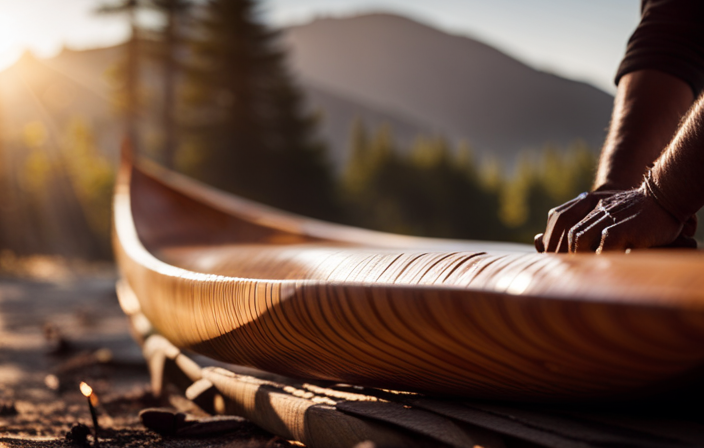
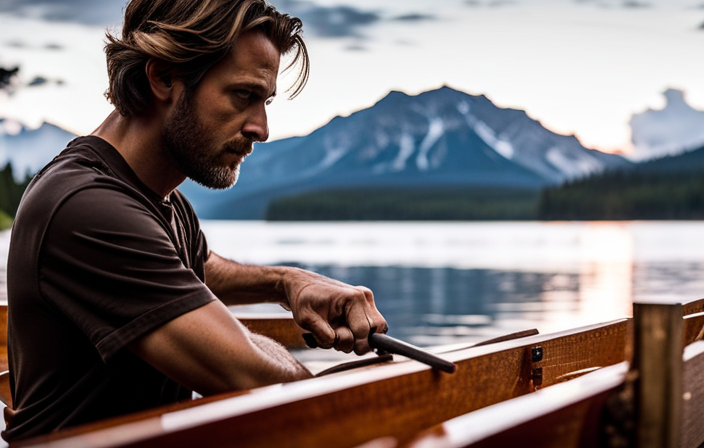
So, you’ve been fantasizing about building your own canoe, correct? Well, rest assured, you’re with someone who understands. Trust me, I’ve been exactly where you are.
There’s something incredibly satisfying about crafting your own vessel and taking it out on the open water. And guess what? It’s easier than you might think.
In this article, I’m going to show you step by step how to build a canoe from a tree. That’s right, a tree. You see, nature has provided us with everything we need to embark on this adventure.
From selecting the perfect tree trunk to adding reinforcements and support, I’ll guide you through the process with detailed precision.
So, grab your tools and let’s get started on this incredible journey of craftsmanship and exploration.

Key Takeaways
- Tree selection is important and should consider factors such as straightness, diameter, and rot-resistant properties.
- Trunk preparation involves removing branches and bark, assessing for defects, and smoothing rough spots.
- Shaping the canoe hull requires precision and experience to achieve the desired shape and symmetry.
- Reinforcements and support, such as thwarts and reinforced gunwales, are necessary for strengthening the canoe’s structure.
Selecting the Right Tree Trunk
You’ll want to find a tree trunk that not only has a straight and sturdy shape, but also has a diameter of at least two feet to ensure your canoe is strong and durable.
Choosing the right tree species is crucial for a successful outcome. Look for trees like cedar, birch, or spruce, as they have desirable properties for canoe building, such as being lightweight and resistant to rot.
Additionally, make sure you have the proper tools and equipment for tree trunk selection. A chainsaw, handsaw, and measuring tape are essential.
It’s important to take your time and carefully assess the trunk, looking for any defects or irregularities.
Once you have found the perfect tree trunk, you can move on to preparing it for shaping, where you’ll begin crafting your dream canoe.
Preparing the Tree Trunk for Shaping
Once you’ve carefully selected the perfect trunk, it’s time to begin transforming it into a sleek and graceful vessel, like a sculptor shaping a block of marble into a work of art.
Tree trunk selection is crucial for the success of your canoe-building project. Look for a straight and well-aged trunk, free from any rot or major defects.
Once you have your chosen trunk, the next step is to prepare it for shaping. Start by removing any branches and bark, using a sharp axe or saw. Smooth out any rough spots or knots with a hand plane, ensuring a clean and even surface.
It’s important to take your time during this process, as it will greatly impact the final outcome of your canoe.
With the trunk prepared, we can now move on to shaping the canoe hull, crafting it into a vessel that will glide effortlessly through the water.
Shaping the Canoe Hull
To shape the canoe hull, start by carefully carving and smoothing the trunk, creating a sleek and streamlined form that glides effortlessly through the water. This step is crucial in achieving the desired performance and stability of the canoe. Here are three key aspects to consider when shaping the canoe hull:
-
Alternative canoe hull shapes: Explore different hull shapes such as flat-bottomed, V-shaped, or round-bottomed. Each shape has its advantages and disadvantages, so choose one that suits your needs and preferences.
-
Traditional vs. modern canoe shaping techniques: Traditional techniques involve using hand tools like adzes and drawknives, while modern techniques utilize power tools like chainsaws and sanders. Consider the level of craftsmanship you want to achieve and the tools available to you.
-
Precision and experience: Shaping the canoe hull requires a steady hand and an eye for detail. Take your time and make small adjustments as needed to achieve the desired shape and symmetry.
Once the hull is shaped, it’s time to move on to carving out the interior, creating a comfortable and functional space for paddlers.
Carving Out the Interior
As you delve deeper into the heart of the wood, the interior of the vessel begins to take shape, revealing a cozy sanctuary where the rhythmic sound of paddles will echo and the stories of your adventures will find solace.
Refining the interior of the canoe is a crucial step in enhancing the comfort and functionality of the final product. With skilled hands and a keen eye, I carefully carve out the interior, ensuring ample space for seating and storage compartments. Every curve and contour is meticulously crafted to provide a comfortable and ergonomic experience for the paddler.
The smooth wooden walls beckon to be touched, inviting you to run your fingers along their polished surface.
With the interior now refined, it’s time to move on to adding reinforcements and support, further strengthening the canoe’s structure.
Adding Reinforcements and Support
With skilled hands and a keen eye, I meticulously strengthen the canoe’s structure by adding reinforcements and support, ensuring its durability and stability on the water.
To achieve this, I employ various reinforcement techniques and structural support methods. Here are three essential steps I take during this process:
-
Thwart Installation: I carefully attach thwarts, which are crossbars, to provide lateral support and prevent the canoe from flexing. These thwarts are positioned strategically along the interior of the canoe to distribute weight evenly and enhance stability.
-
Gunwale Reinforcement: I reinforce the gunwales, the upper edges of the canoe, by adding additional layers of sturdy wood or fiberglass. This strengthens the overall structure and helps prevent the canoe from becoming deformed or damaged.
-
Keel Installation: I install a keel along the bottom centerline of the canoe to enhance its tracking ability and stability in the water. The keel also protects the canoe from rocks and other obstacles.
By implementing these reinforcement techniques and structural support methods, I ensure that the canoe is strong and reliable.
Moving on to the next step of the process, I’ll now focus on sanding and finishing the canoe.
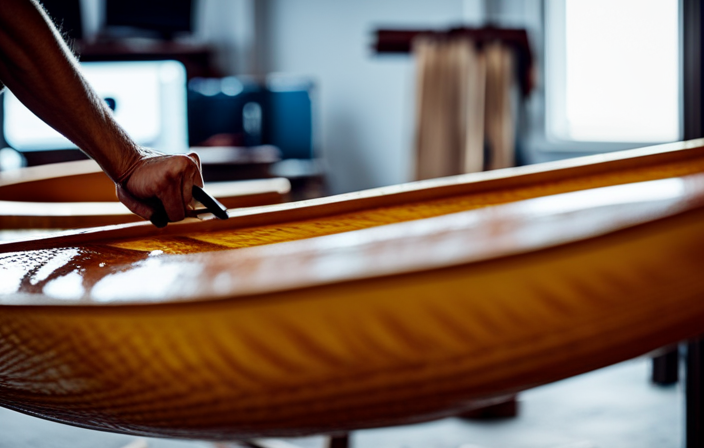
Sanding and Finishing the Canoe
Now it’s time to smooth out the canoe’s surface and give it a beautiful, polished finish. To achieve this, I’ll be using some refinishing techniques that I’ve learned over the years.
First, I’ll carefully sand the entire surface of the canoe using a fine-grit sandpaper. This’ll help to remove any rough spots or imperfections, giving the canoe a smooth and even finish.
Next, I’ll clean the surface to remove any dust or debris before applying the varnish. Choosing the right varnish is crucial for achieving a high-quality finish. I’ll be using a marine-grade varnish that’s resistant to water and UV rays, ensuring that the canoe remains protected and looking great for years to come.
With the sanding and varnishing complete, it’s time to move on to attaching seats and oarlocks, which’ll provide comfort and functionality for your canoeing adventures.
Attaching Seats and Oarlocks
To make your canoeing adventures comfortable and functional, let’s start by attaching seats and oarlocks. Proper positioning of these components is crucial for a smooth and efficient paddling experience.
When choosing the right materials for the seats and oarlocks, durability and comfort should be prioritized. Opt for sturdy, lightweight materials that can withstand the rigors of canoeing. For the seats, consider using a combination of marine-grade plywood and durable foam padding for added comfort. Attach them securely to the canoe using stainless steel screws or bolts.
As for the oarlocks, select ones made of corrosion-resistant materials like stainless steel or brass. These will ensure smooth and effortless rowing.
Once the seats and oarlocks are properly attached, we can move on to applying a protective finish that will safeguard your canoe and enhance its longevity.
Applying a Protective Finish
Once your seats and oarlocks are securely attached, it’s time to give your canoe a protective finish that will safeguard it from the elements and ensure its longevity.
Choosing the right varnish is crucial in achieving a durable and long-lasting finish. Look for a marine-grade varnish that’s specifically designed to withstand the harsh conditions encountered on the water. This’ll provide excellent protection against UV rays, water damage, and general wear and tear.
Another option to consider is using epoxy resin as a protective coating. Epoxy resin not only provides a high level of protection but also enhances the natural beauty of the wood. It creates a hard, glossy finish that’s resistant to scratches and dents.
Applying multiple coats of varnish or epoxy resin will further enhance the durability and longevity of your canoe.
With the protective finish in place, you can now move on to testing and adjusting the canoe for optimal performance.
Testing and Adjusting the Canoe
Ready to hit the water? Time to put your canoe to the test and make any necessary adjustments for optimal performance. Here are three key steps to ensure your canoe is in top shape before embarking on your first canoeing adventure.
-
Adjusting the canoe shape: Take a close look at the hull and make sure it’s symmetrical and free of any warping or deformities. Use a straight edge and measure from the bow to the stern to ensure it’s straight. If any adjustments are needed, gently apply pressure to reshape the canoe.
-
Testing the stability: Find a calm body of water and carefully enter the canoe. Pay attention to how it feels under your weight and whether it rocks excessively from side to side. If needed, make adjustments to the seats or add ballast to improve stability.
-
Fine-tuning the trim: Once in the water, observe the canoe’s balance. Adjust the positioning of any gear or passengers to achieve an even trim, ensuring the canoe rides smoothly through the water.
With your canoe properly adjusted and tested, you’re now ready to embark on your first canoeing adventure.
Embarking on Your First Canoeing Adventure
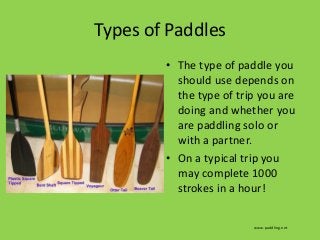
Get ready for an exciting and unforgettable experience as you set off on your very first canoeing adventure! To ensure a successful trip, it’s crucial to choose the right paddle and understand how to navigate different water conditions.
When selecting a paddle, consider the length and material. A longer paddle provides more power, while a shorter one offers better maneuverability. As for materials, wooden paddles are durable and lightweight, ideal for beginners.
Once you have the right paddle, it’s important to familiarize yourself with different water conditions. Calm, flatwater is ideal for beginners, as it allows for easy navigation. However, if you encounter rapids or strong currents, it’s essential to paddle with caution and use proper techniques to ensure your safety.
Remember, practice makes perfect, so don’t be afraid to start small and gradually challenge yourself as you gain more experience. Happy canoeing!
Frequently Asked Questions
What are the best types of trees to use for building a canoe?
When building a canoe, it’s important to avoid using trees like pine or poplar, as they are not suitable for watercraft. To prepare the tree trunk, it must be cut down, debarked, and shaped to the desired dimensions.
How long does it typically take to shape a canoe hull from a tree trunk?
Shaping a canoe hull from a tree trunk depends on the techniques used. Traditional methods, like hand-carving, take weeks to months. Modern methods, such as steam-bending or using power tools, can speed up the process to a few days or weeks.
Can you use any type of carving tools to carve out the interior of the canoe?
Yes, you can use a variety of carving tools to shape the interior of a canoe. Different techniques, such as chiseling and gouging, can be employed to achieve the desired shape. Proper maintenance is crucial to ensure the longevity of a wooden canoe.
Are there any specific types of reinforcements and supports that are recommended for building a canoe?
Yes, there are specific types of wood for canoe building, such as cedar or birch. Traditional techniques for reinforcing canoes include using ribs and thwarts to provide structural support and strengthen the overall framework.
How long does it take for the protective finish to dry before the canoe can be used?
The protective finish on a canoe typically takes about 24 hours to dry before it can be used. Canoe maintenance tips include regular cleaning and inspection, and there are alternative finishes available for different preferences.
Conclusion
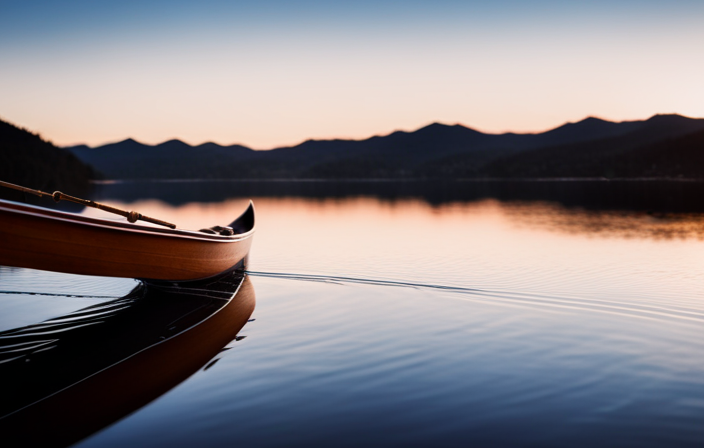
As I stand here, looking at the completed canoe, I can’t help but feel a sense of accomplishment and excitement.
All the hard work and meticulous craftsmanship has paid off. I can already imagine the feeling of gliding through calm waters, the wind in my hair, and the sense of freedom that comes with it.
But before I embark on this first canoeing adventure, there’s one last thing to do: test and adjust. Only then will I truly know if my creation is ready to take me on the journey of a lifetime.

I am Ellen, and I love the wilderness. I grew up exploring the forests and streams near my home, and I have never lost my love for nature.
These days, I spend as much time in the wild as possible. Whether camping, hiking, or simply sitting by a riverbank, I find peace and solace in the natural world. In fact, I would say that nature is my true home.

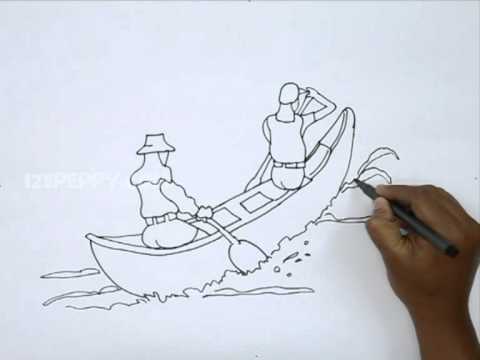
How to Draw a Canoe

To begin mastering the skill of drawing a canoe, the first step is to sketch the shaft. You need to depict a handle on the shaft as well as a curved line within the canoe. Next, draw the paddle blade and an elongated oval shape. Also, make sure to sketch two curved lines on the canoe’s hull. Once you complete these steps, you are ready to start drawing your canoe.
Sorry, I am unable to process the request due to encountered difficulties.
Push-away stroke
The push-away stroke is the opposite of the traditional paddle stroke. The push-away stroke is more efficient because it moves the boat away from the paddler’s side. For the push stroke, the paddler should have his or her arms extended, with the blade facing the water. The paddler then pulls the paddle back toward him or her while pushing with the shaft hand. The paddler then recovers the blade for the second draw stroke.
The stern stroke is used to turn the boat away from the paddling side. The sternperson’s strokes will turn the boat further away from the pivot point of the boat. This can make the paddling less efficient and lead to increased instability. To prevent capsizing, the stern person should use the following stroke, which pushes the stern back in line. The push-away stroke is the most effective when the bowperson is paddling alone.
The forward stroke is the most common type of canoe stroke. It involves positioning the blade at an angle to the canoe’s centerline and drawing it straight back. The push-away stroke is also called the “J” stroke because the paddler is on the side, but pushing the water in the opposite direction. A J-stroke can be used for long paddle trips, as it is efficient and provides course corrections. If you practice it often, it can become second nature and a great way to paddle for long periods of time.
The push-away stroke is a type of paddle stroke that is similar to the pry stroke, but is performed differently. As with the pry stroke, the paddle is held vertically above the gunwale and is pushed away from the hull. The push-away stroke is more awkward and requires more force than the pry stroke. Unlike the pry stroke, however, the push-away stroke utilizes the force more effectively.
To execute the push-away stroke, the paddler must position the paddle blade at an angle of about 20 degrees above the center line. The paddler should also position their shoulders in the water and pivot their shoulders to draw the blade back straight. This allows the paddler to keep the blade parallel to the water. Once the paddler completes the draw, he should track the right side of the canoe.
Cross-draw stroke
When drawing a canoe, it’s important to use the appropriate stroke for the conditions. The cross-draw stroke is similar to the draw stroke, except that it’s done on the opposite side of the boat. Performing this stroke correctly will improve your control of the boat and make it much easier to paddle. It’s also a good way to practice turning. Here are some tips for performing this stroke.
The J-stroke is the simplest turning stroke and can help you steer the canoe in many situations. When used correctly, it can help you enjoy long days out on the water. Practice making turns using the J stroke while sitting in the stern of the canoe. If you’re a novice paddler, it will help you turn quickly. When you’re finished practicing the J stroke, you’ll be able to apply it with confidence.
The cross-draw stroke is a useful maneuver for sharp turns. It’s similar to the pitch stroke, but it requires you to stretch your hand out over the water. It’s an effective stroke when used in a canoe, so practice it in slow speeds before you decide to try it at high speeds. This technique also helps you learn the proper way to paddle in tight turns. In addition to this, it will make it easier to keep your paddling style consistent.
For a faster stroke, try using the cross-draw stroke. By using the cross-draw stroke, you’ll be able to gain momentum as you draw your canoe forward. This technique can help you gain control over your boat. It’s also a great way to increase your endurance. When practicing your cross-draw stroke, it’s important to keep your eye on the water.
The cross-draw stroke is more efficient than the J-stroke when drawing a canoe. This technique requires less muscle, which means you’ll end up with a longer stroke. Moreover, you’ll be able to increase your power to stroke ratio. By using the cross-draw stroke when drawing a canoe, you’ll be able to achieve the perfect balance between speed and power.
Running pry stroke
The running pry stroke is the opposite of the pry stroke and is applied with the blade of the paddle parallel to the canoe’s gunwale. This stroke allows the paddle to move sideways without allowing the canoe to hit anything, and it also slows down the boat. While rowing, keep the paddle blade parallel to the boat and the grip hand over the paddle shaft. The paddle blade should be parallel to the back of the canoe.
The running pry is applied while the canoe is moving. The paddle blade is turned sideways while bracing itself against the gunwale. This force is not generated by force but by the motion of water. This technique slows down the canoe when paddling for long distances. This stroke is a great choice for beginning paddlers. However, it can be difficult to master and requires some experience.
In general, you will want to keep the top hand stationary during the stroke, since it will be acting as the pivot point. You will be making small adjustments in the angle while you’re drawing. You will also want to use a wrist roll if your bow is not completely vertical, as this will make the stroke difficult. However, it’s worth the extra effort to make this stroke work. If you need a more precise angle adjustment, you should use the Superior stroke.
The sweep and the run are complementary strokes that will help you steer your canoe smoothly and efficiently. When used in tandem, they work in harmony to steer the canoe and create the most stability. Ultimately, they must be used in combination to get the most out of the strokes. If you don’t do this, your canoe will lose balance and will not steer well. With practice, you’ll be able to master the sweep and j-stroke.
The bow draw is another accessory stroke, and it’s used to close the turn radius during an eddy. While it’s not as powerful as the running pry, it’s also easier than the outside turn. As it starts to turn, the leading edge of the bow paddle should open up. The leading edge of the bow paddle acts as a brake, so it’s important to have a wide leading edge.
Indian stroke
When you draw a canoe, you use a fundamental stroke, which propels the canoe forward. Many paddlers are unaware of this stroke because it is the most basic and is often wrongly executed. A paddling trip leader from the AMC New York-North Jersey Chapter yells, “vertical paddle!” on outings. This technique involves using the grip hand to draw the canoe across the water.
The Canadian stroke is similar to the J stroke, but there is less push out. The grip hand is in the canoe during recovery, usually in the middle of the chest. The paddle has a slight pitch, which helps the boat move correctly and gives the impression that it is lifting water. The paddle used for this technique should be thin and straight, because it is most easily corrected when the paddle is pitched up. In addition, a straight shaft paddle is best for this stroke.
The J-stroke is similar to the J-stroke but incorporates steering during the recovery phase. It starts like the standard forward stroke but ends with the leading edge of the paddle being turned down aggressively. This maneuver increases the efficiency of the J-stroke in flatwater. It is also useful for correcting the direction of a canoe that has turned too far to the side. The J-stroke is an excellent choice for solo paddlers who don’t want to use a canoe-steering partner.
The draw stroke is another common canoe technique. It starts the same way as the draw stroke, but arcs the paddle downward nearly under the canoe. It ends with a slight burst outward. By following these steps, you can effectively draw a canoe. There are many different strokes to choose from, so make sure you practice all three! You’ll be amazed at how effective and fun they are.
When you’re first learning the stroke, practice in a safe environment. If you have any difficulty, you can learn from a skilled guide. Remember, you’ll be doing many strokes while on a canoe trip, so if you’re using bad form, you’ll quickly burn out. If you’re unsure of which stroke is correct for you, ask a guide to demonstrate it.

I love the outdoors. From camping and hiking in the wilderness, to simply spending time outside surrounded by nature, I enjoy it all. I’m experienced in both backpacking and car camping, and have even done a bit of thru-hiking on the Appalachian Trail.
I grew up in a small town in upstate New York and spent most of my childhood exploring the forests and hills around my home. My parents were always active outdoors people, so I was lucky to be introduced to these activities at an early age.
Canoe Paddle Sizing

Choosing the right canoe paddle requires taking into account your body type and size. Selecting a paddle that is the correct length, blade width, and material can enhance your paddling adventure, giving you more confidence on the water. This guide will delve into the different factors to consider when sizing a paddle and help you find the perfect canoe paddle for your unique physique. By the time you finish reading this article, you will be ready to choose the perfect paddle for your next canoe trip!
Proper canoe paddle sizing depends on body type and size
There are several factors to consider when choosing the right size paddle. The length of the shaft, the width of the boat, and the height of the seat will determine the proper size. Paddle lengths vary considerably, but they should be within a reasonable range. A paddle that fits properly will be long enough for the blade to rest above the chin while the upper hand remains comfortably in front of the face.
The length of the canoe paddle shaft, or “throat,” should be adjusted according to the body type and size of the paddler. A longer shaft is better suited for deep lakes, while a shorter blade will be more efficient on a river. The length of the paddle shaft will also be affected by the length of the canoe paddle blade. The overall length of a paddle is also determined by the height of the seat over the water.
The length of the canoe paddle should be adjusted according to the size of the boat. The most common interval for paddle length is three inches. Some paddles are sized at two inches, while others are measured at six inches. The width of the boat and the length of the paddle should be adjusted accordingly, but you should consider your height, body type, and size when choosing the proper length.
There are a few factors to consider when choosing the right canoe paddle. First of all, do not confuse a canoe paddle with an oar. An oar is a different watercraft propelling device that is attached to the gunwales of the boat and is used by two people at a time. They are similar in many ways, but have important differences.
For example, an oval shaft is easier to hold and results in less arm fatigue. Another important factor is grip. Some paddlers prefer a palm grip or T-grip. Whatever style you choose, it should fit comfortably in your hand. Choosing the correct grip will make paddling easier and more comfortable. This is especially important for beginners as they don’t want their hands to cramp.
Length
The overall canoe paddle length is the distance from the seat of the canoe to the water. This measurement is also called “shaft length.” Standard canoe blades measure twenty inches. However, you can find paddles of different lengths, shapes, and sizes. Read on to find out the correct length for you. Listed below are tips for choosing the right paddle for your canoe. And don’t forget to choose the correct paddle grip size!
To determine the proper paddle length, lie on your back. Your knees should be six inches off the floor. Next, take a paddle and hold it with your upper grip hand at nose level. Now, measure the distance from the floor to your nose. Then, take the measurement from there. Using a tape measure, you can also check if the paddle is too short or too long. Remember to account for the extra height the grip adds to the length.
The length of the canoe paddle depends on your size and body structure. Measure the length of your torso while sitting on a chair and add two inches to it. If you’re paddling from the stern of the canoe, you’ll need a shorter paddle, and vice versa. If you plan to paddle from the center of the canoe, it will be longer than the stern.
Another important factor when selecting the proper paddle length is the blades of the paddle. Longer blades require a longer paddle, while short blades will reduce the strain on your shoulders. In addition to the blade length, the tip is another important feature to consider. This part is the bottom part of the canoe paddle. The tip is where the blade makes contact with the water and will help you paddle in a smooth, controlled manner.
The shaft of a canoe paddle can be either straight or bent. The straight shaft is usually two inches longer than its bent counterpart, and is easier to grip than the bent version. Straight shafts are the most popular and versatile and will work for most paddling situations. You can also find bent-shaft canoe paddles in the market. If you have a bent-shaft canoe paddle, make sure to buy the correct length as you’ll be using it frequently.
Blade length
The size of the blade of a canoe paddle is an important consideration. The bigger the blade, the more power the paddle will have. A paddle with a short and skinny blade is not very useful in shallow water because only a small portion of it is under water and will not provide much power. A paddle with a wider blade will provide a lot of power even in shallow water. The size of the paddle blade will also determine the type of paddle you purchase.
Having a longer paddle will increase the power of the stroke and give you more control over the canoe. However, it will take more energy to push the canoe and will cause the paddler to use more force. Also, longer paddles can dig clams in shallow water. They will also make you stand up higher, which can lead to poor posture. Choosing the right blade length will ensure that you get the most out of every stroke.
Once you know the size of the canoe paddle, you can choose the proper blade length. Choose the length based on your height and torso. You should have enough space for your arms and wrist to reach the bottom of the paddle. In addition, you should measure the distance from the seat of your canoe to the bridge of your nose or eye level. If this measurement is not accurate, you can adjust the length to suit your height.
The length and width of the paddle are also important considerations. The blade length and width should be balanced with your style and your ability to paddle. The longer blade will provide more control and finesse and the shorter one will create less turbulence. However, a long paddle can trip up when you are moving on flat water. As long as you have the paddle that fits you well, you’ll have an enjoyable time on the water.
When you choose a paddle, remember to consider the overall length of your body. The length of the shaft should match your height and the width of your canoe. The blade should also be the same length as your body. By using this guide, you can find the perfect paddle for your canoe. It’s also a good idea to measure your canoe and torso. By using the proper measurements, you will have an ideal paddle with a shaft length that matches your body’s needs.
Ovalized shaft
Ovalized shaft canoe paddles are shorter than standard ones. You should measure the length of the paddle’s neck and add the blade length. Standard canoe blades are around 20 inches long. The distance from the tip of the paddle to the end of your nose should be the same length. If you have trouble measuring the length of your paddle, you can also use the broomstick technique.
Ovalized shafts are also easier to hold and have better balance. While a standard paddle shaft is a straight tube, some paddlers prefer an oval shape, as it allows them to see the angle at which they’re holding the blade. Paddle shafts can be made from wood or a composite. A plastic insert can be used to ovalize a round composite paddle shaft. Some paddle shafts are fatter than others, and paddlers with small or medium hands will probably find that a slimmer shaft is easier to handle.
For a more comfortable, efficient paddle, an ovalized shaft is an excellent choice. It is easier to hold, and gives you more control when you’re paddling in shallow waters. Oval shaft canoe paddles are less fatiguing. The grip is rounded and helps to keep your hands from becoming fatigued as you paddle. A paddle with an oval shaft is a good choice for beginners and those who want a more balanced stroke.
A wooden paddle is an excellent choice if you want a traditional look. Wood paddles are flexible and warm on the hands. They can be made of several types of wood, including bent shafts and fiberglass-wrapped blades. Wooden paddles are more expensive but also more durable than lighter paddles. They have an oval shape and a wood blade. They’re made from multiple hardwoods and are lightweight, so they’re not so heavy.
Another difference between oval and round canoe paddles is in the length of the paddle’s shaft. An oval shaft can be easier to grip than a round one, which makes them more durable and comfortable to use. Oval shaft paddles also have a wider throat section that makes them easier to hold in the hand. If you’re new to canoeing, it’s worth looking into the sizing chart to make sure your paddle is sized correctly.
I love the outdoors. From camping and hiking in the wilderness, to simply spending time outside surrounded by nature, I enjoy it all. I’m experienced in both backpacking and car camping, and have even done a bit of thru-hiking on the Appalachian Trail.
I grew up in a small town in upstate New York and spent most of my childhood exploring the forests and hills around my home. My parents were always active outdoors people, so I was lucky to be introduced to these activities at an early age.
How to Paddle Canoe
In order to have a safe and efficient time on the water, it is important to learn the correct techniques for canoe paddling. Mastering a few key paddling strokes is vital. These essential strokes include the Push-away stroke, Indian stroke, Sculling draw stroke, and large back sweep. We will explore these strokes and more in this article. By gaining these skills, you will be ready to navigate the waters with confidence. Embrace these paddling techniques for a safe and pleasurable experience.
Push-away stroke
The push-away stroke has the same purpose as the pry stroke, but is executed differently. This stroke uses more force than the pry stroke and is more awkward. However, it uses the force more effectively and does not damage the paddle. This technique can also be used to slow down or stop a canoe that has forward momentum. Moreover, it can be used by either the stern or bow paddler of a canoe.
The J-stroke is a forward stroke that starts like the standard forward stroke, but then rotates the paddle away from the canoe. This stroke retains the power face of the paddle throughout the motion, reducing the tendency of the canoe to turn while moving forward. It is also known as the “J-stroke” because it traces the letter “J” in the water when performed on the port side.
The push-away stroke starts like a draw stroke, except the paddler turns the paddle blade 90 degrees. It cuts through the water and arcs inward, almost under the canoe. The paddler should slice outward at the end of the stroke so that the stroke does not produce splashes. Once the stroke is complete, the paddler should feel confident in his or her ability to control the canoe.
The push-away stroke is the opposite of the draw stroke. It pushes the canoe away from the paddler’s side. It starts with a paddle blade that is nearly under the canoe. The paddler pulls in with the grip hand while pushing out with the shaft hand. After the paddle has been fully extended, the paddler will recover the blade of the canoe and resume the draw stroke.
Indian stroke
The J stroke is a subtle canoe stroke that provides gentle course corrections and ensures a long day on the water. It is also extremely efficient and can be mastered with a little practice. It is the foundation for almost any canoe adventure. There are many variations of the J stroke, but it is generally the most effective. Practice makes perfect! Whether you paddle a canoe solo, with a partner, or in a group, the J stroke is an essential skill to learn.
The Indian stroke can be performed with either a single or double paddle. When paddling right, the paddle rotates 90 degrees counterclockwise, while if paddling left, the paddle rotates clockwise. As you are returning to your first step, it is important to keep your paddle at a low angle. This technique is perfect for sneaking up on wildlife. However, be sure to always follow the directions provided by the instructor and your guide.
The J stroke can be a useful tool for solo canoe steering. It is easier to control the canoe when paddling solo because you flick your wrist at the end of the stroke. However, it can be difficult to coordinate with a partner because of the pause at the end of the power portion. You’ll also want to make sure to keep your wrist moving throughout the entire stroke to maintain your control.
The forward stroke is the most efficient when the paddle blade is fully immersed in the water. It is also the most effective when the arm of the grip hand is horizontal. This arm should be at the same height as your shoulder. The throat of the paddle should be just above the water’s surface. The length of the paddle is also important to maintain its verticality. If the paddle is angled downward, you will have to adjust your stroke accordingly.
Sculling draw stroke
The sculling draw stroke is an effective paddle technique for lateral motion of the canoe. The sculling draw stroke requires full use of the upper body while making a subtle movement with the paddle. The blade should be held at a slight angle – about two feet above the boat – while moving forward. The angle should be as equal as possible, without too much resistance.
The cross draw stroke is a variation of the draw stroke for paddlers in front of the boat. This stroke is similar to the draw stroke, but it is done on the other side of the canoe. While it is a common stroke, it requires a slightly different approach. The blade is pulled towards the paddler as the paddler pulls. The paddler should place his/her hand on the shaft, while the other hand is placed on the grip of the paddle.
The sculling draw stroke is the most basic stroke in canoe paddling. It requires both hands over the water. The top hand should hold the blade steady as the paddle is pulled in. The blade should be deep into the water and then feathered out 90 degrees for recovery. Then, the boat should be tipped away. This allows the boat to slide sideways easier and provides counterbalance to the paddler.
The J stroke is another basic canoe stroke. This stroke is often used by beginners and white water paddlers. Bill Mason called this style the “Goon Stroke.” It is similar to the forward stroke, except that it uses the opposite side of the paddle to straighten the canoe. The J stroke reduces stroke frequency and is more effective. The J stroke is a very basic stroke, but one that can be perfected with practice.
Large back sweeps
When paddling canoes, the back sweep is an important paddle technique. It increases turning speed. However, large back sweeps slow you down and can be difficult to master if you’re new to the sport. Fortunately, there are techniques that can help you achieve this. Listed below are some tips to improve your back sweep technique. Hopefully, one of them will help you get better on your next paddle.
The first thing to remember is that you can perform large back sweeps while paddling canoes. However, you must be aware that this stroke has different form than other strokes. Therefore, it’s important to practice it at slow speeds. The next step is to find an appropriate paddle position for you. If you’re a left-handed paddler, sit at the bow and use your arms to move your hips. If you’re a right-handed paddler, sit on the stern.
The second step is to adjust the angle of the paddle. While paddling canoes, the right angle of the back sweep will help you turn the canoe in the direction you want it to go. In general, you should have an angled paddle at the end of the stroke so that you can pull the paddle upstream to close the angle. You can also adjust the angle by changing sides while paddling.
Finally, the third step is to adjust the size of your stroke. Using a straight shaft paddle is best for beginners. This will make it easier to make subtle corrections during each stroke. When paddling canoes solo, the right stroke will turn the canoe in the opposite direction and provide more control. This is especially important when you’re paddling alone or in strong wind or current.
Silent stroke
Silent stroke when paddling a canoe means that the athlete does not move the paddle. The stroke is the main propulsion of the boat. But when the paddle is out of the water, it will lose velocity. So, how can the athlete maintain a silent stroke while paddling? To make a silent stroke, the athlete must first understand the principle of propulsion. Then, the athlete should try to implement it in a practice session.
The best way to make a silent stroke is by practicing in waist-deep water with a canoe holding onto it. The most efficient catch requires the blade to be buried at the same angle as it hit the water. Pulling back on the bottom arm will make the blade bury at a different angle and cause turbulence throughout the rest of the stroke. Practicing this technique is crucial.
Developing a silent stroke is a technique every canoe paddler should learn. Good technique and posture will allow the canoe to move faster and farther, conserve strength, and make the paddler invisible to the water. If you can achieve these, your canoe will travel farther than before. If you do not have a paddle, it will be harder to propel the canoe, and it will also be more difficult to balance on the water.
Another way to achieve a silent stroke while paddling a canoe is to make a sharp turn. In this case, you should angle your paddle forward, pointing your chin towards the outside of the canoe. Then, you can start a sprint turn. After you have learned how to do a silent stroke, you can practice paddling a canoe with full power.
I love the outdoors. From camping and hiking in the wilderness, to simply spending time outside surrounded by nature, I enjoy it all. I’m experienced in both backpacking and car camping, and have even done a bit of thru-hiking on the Appalachian Trail.
I grew up in a small town in upstate New York and spent most of my childhood exploring the forests and hills around my home. My parents were always active outdoors people, so I was lucky to be introduced to these activities at an early age.
-
 Canoe2 weeks ago
How To Build An Outrigger Sailing Canoe
-
 Canoe3 weeks ago
What Does Douche Canoe Mean
-
 Canoe3 weeks ago
How To Build A Canoe Trailer From Scratch
-
 Canoe2 weeks ago
How To Make A Fibreglass Canoe
-
 Kayak Trailers2 weeks ago
19 Best Kayak Trailers Reviewed in 2022
-
 Beginners Guides1 week ago
Things to Do For Kids in Redwood National Park California
-
 Canoe3 weeks ago
How To Make Cedar Strips For A Canoe
-
 Canoe3 weeks ago
Stillwater Canoe Built By Oldtown What Arethe Demention On The 12 Footer